

Introduction to Service Desk V2 Module
ITarian Service Desk V2 is support ticketing management system
used by enterprises and service providers to keep track of tickets raised by
users, attend to them, reassign them to appropriate department or
organizations, and generate reports and more.
- After creating an account, you can raise support
queries by creating tickets in the help desk portal.
- This guide explains how you can register for a service desk account, submit support tickets, view the knowledge-base and more.
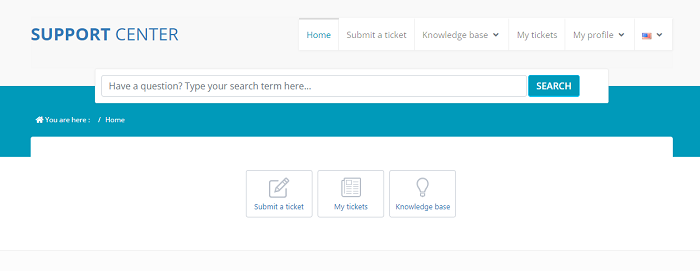
Open a New Ticket
in Service Desk
- Users can create a ticket from the support
portal and submit tickets. This option to create a support ticket can either be
made available for all the users who access the portal or only for logged
users.
- You need to sign-up for a Service Desk account
in order to submit tickets.
Sign-up for an
account
- Visit the web-portal URL provided by your
administrator
- Click 'Sign-in' at the top right
The login page will be displayed:
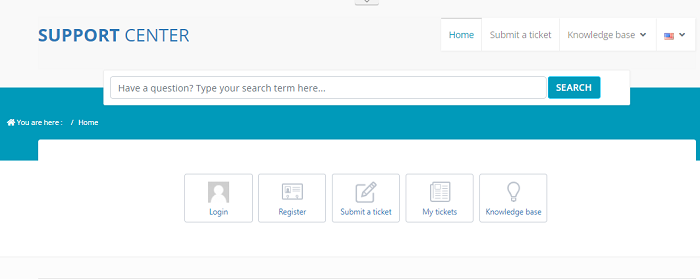
- Click 'register' button
The 'Account Registration' form appears.
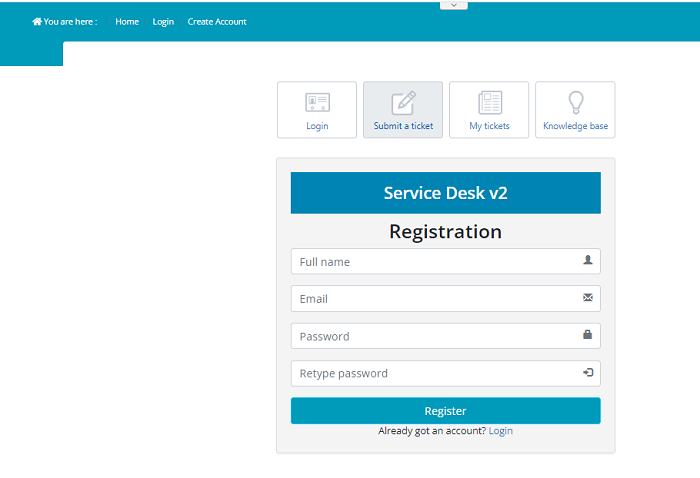
- Enter the full name, email id and password to
create a new account
- Click ‘Register’
Your account will be registered and an email containing
account activation link will be sent to your email address.
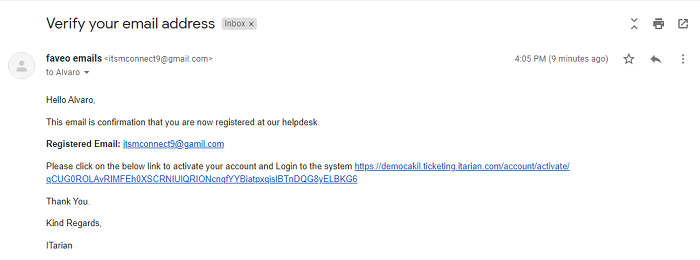
- Click the given link to activate your account. You can now raise a new ticket, reply to agent queries and more.
- Click ‘Login’ if you have already had an account
Open a New Ticket in Service Desk
Users can create a ticket through any of channels/sources
supported by the help desk.
There are multiple ways to create a ticket:
- Use the web portal
- Send a mail to support
- Over the phone to a staff member
Open a ticket via the
web portal
You can create tickets in the web portal
- Login to your support portal as
an Admin/Authenticated agent.
- In Agent Panel > click ‘Tickets’ >click
‘Create Ticket’ Option.
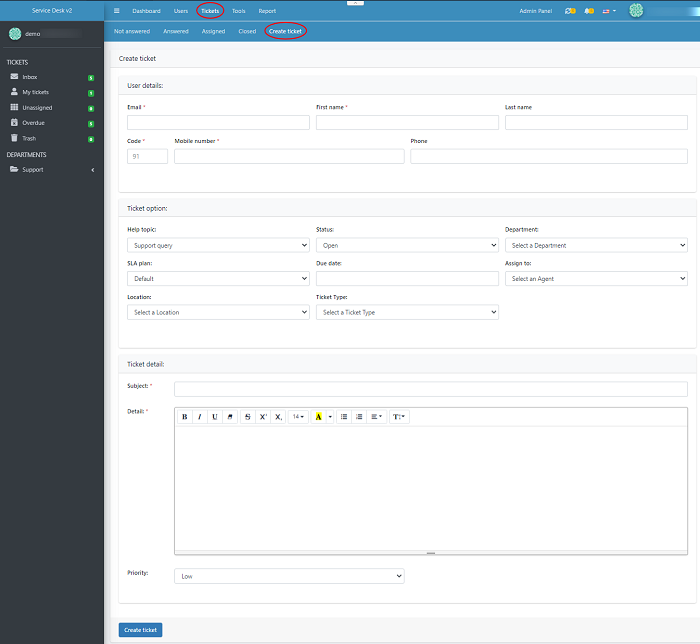
- Select or Enter the user information and
fill the ticket option, ticket details and Status etc...to raise a
ticket on behalf of the user
- If the user is already part of your support
portal select their email id from the requester’s list.
- If you are creating a ticket on behalf of a new
requester, first register their details in the support portal > Agent Panel
> Users > Users Directory and create a ticket.
- Once the details are filled click on the ‘Create ticket’ button to submit the ticket to the support portal
Create a ticket in support portal
- If you are already a user of the support portal login as a user
Or
- You can register your details by clicking on
the ‘Register’ option.
- Use the support URL provided by your administrator
- Click on the ‘Submit a ticket’ option to create a new ticket.
It will show you on the page of submitting a new ticket.
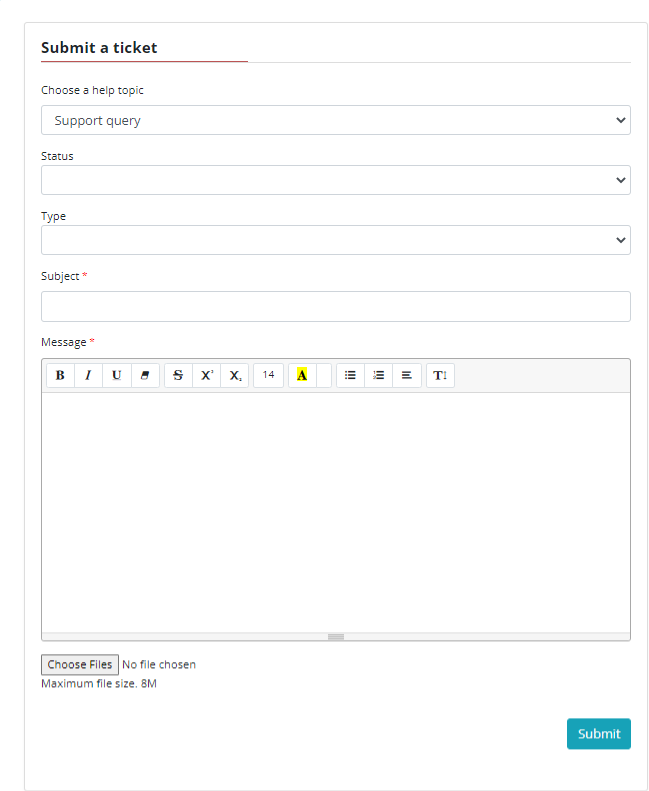
Note: The
form you see may differ to the one shown above. The layout is configured by
your admin. The above shows the default fields and labels.
Choose a help topic– Select a help topic from the drop-down list for web tickets. help topics are
the keywords that help to manage the tickets, by organizing the tickets
categorically and easy to categorize.
Status – Select
the ticket status from the list. This
helps you to manage the ticket life cycle, from the time when the ticket gets
recorded in the Helpdesk system and till the endpoint when the ticket gets
closed.
By default, the helpdesk system has different ticket statuses
given in the system:
- Open- This is the default status of a ticket when it is created in your system.
When the ticket is in Open status then, that immediately needs
support team's attention.
- Resolved–This status mention where the ticket requester's problem has been solved,
according to the agent
- Merged -
This ticket status is applied to an open ticket when two or more tickets are
merged and it sets the purpose of status is Merged.
- Closed -
A ticket gets closed when a requester acknowledges that his issue has indeed
been resolved that the ticket has been marked as Closed
- Deleted- When the ticket has existing duplicated or unwanted tickets, they can mark it as Deleted. Once they do, the ticket can remain with the same status as Deleted.
Subject – Add a short
issue heading in the text box that you want to display in your ticket
Message – Enter a
detailed description of your issue
Choose Files – Select
a file from your system that related to your issue, this file will attach in
ticket. The maximum file size is 8mb
- Fill all the necessary details and click ‘submit’
Note:
- Once the ticket is created in the support portal one of our Support Agents would get in contact with you to assist further and get your issue resolved on time.
Your customers can create a ticket from email, the staff member may create a ticket on your behalf. You will receive an automated reply (if enabled by the administrator) with the ticket details. You can then check the ticket status from the web portal.
- Login to your help desk web portal
- Click 'My Tickets' from the top
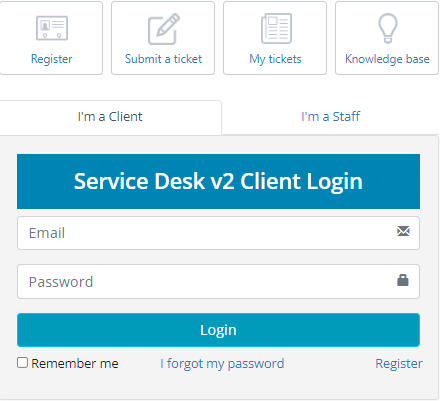
- Log in as ‘I am client’ for users, Enter the email and password.
- Click ‘Login’
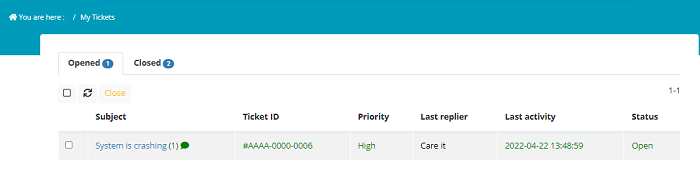
- The total number of tickets you have open and
closed is shown at top-right.
- Click the ticket or the subject to view the
ticket thread.
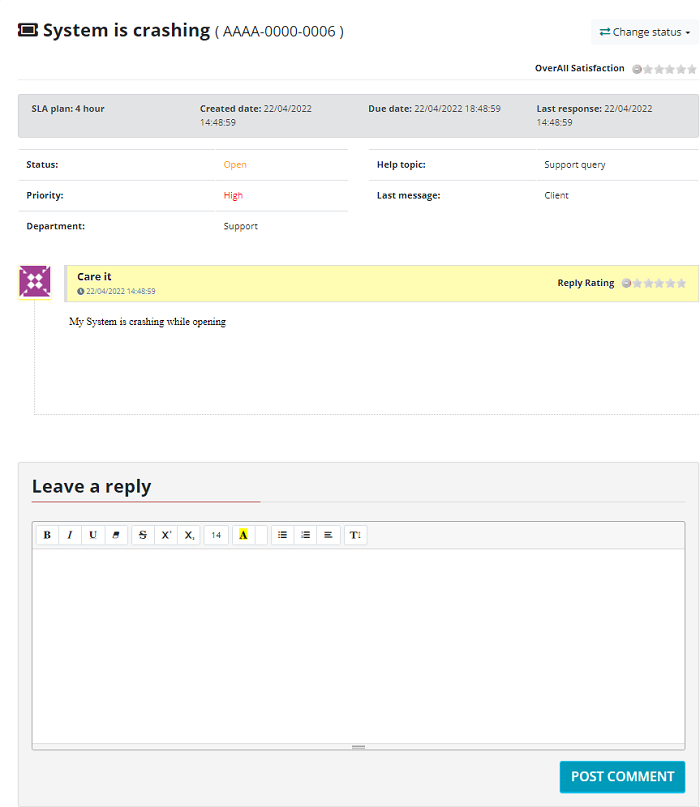
- This contains your initial request and all staff
responses.
- The ticket provides the detailed view of your
ticket created date, due date and last response
- Users can change the status by clicking ‘Change
Status’ in the top. You can set status as close, open and resolved.
- Use the rating bar to add the rating for the
ticket in the side bottom
- To post a reply, type your response and click
the 'Post Comment' button.
- You can close or open a ticket by selecting the desired ticket > click ‘close/open’ on the top
Service Desk support system comes loaded with Knowledge base
to define FAQ’s, An easy way for users to help themselves.
- Click ‘knowledge base’
To create a new knowledge base category go to Agent Panel > Tools > Knowledge Base Categories > Add New Category.
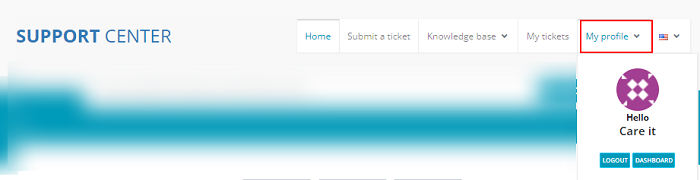
- Click ‘My Profile’ .Click ‘Logout’ to exit or Select the ‘Dashboard’ to go to your staff panel
We support multiple languages from the Support system which
can also be managed in different languages. You can set your system primary
language and add new language packages to the system as per your requirement.
- Go to Admin Panel > Settings >
Language > Enable the preferred language that your system should
reflect as a default one, from the list of languages available and accessible.
- However, if your preferred language in not
available in the language list you can add your preferred language in the
system.
- When you want to change system language to access support system You can go to the support portal at the upper right > click on the flag icon.
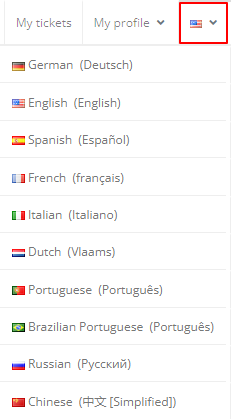
- Click on your preferred language. Now the system is accessible in your language.