


Manage Tickets
The 'Tickets'
tab allows staff (agents) to respond to tickets created by users.
Tickets can be submitted to Service Desk using the following interfaces:
- Web portal - Registered users can login to the web portal at the helpdesk URL and create a ticket. Guest users can also raise tickets at the portal if allowed by an administrator.
- Email - Users can create tickets by sending a mail to the default 'System Email' for your help desk.
- Staff Panel - Staff and admins can create tickets on behalf of end-users. This may be useful, for example, for requests that were made over the phone or by another out-of-band communication method. You can also create back-dated tickets for issues resolved in the past, but for which no ticket was created. Back-dated tickets are added with a 'Closed' status.
- ITarian modules - Endpoint Manager can auto-submit tickets when certain conditions are met on a managed system. For example, create a ticket if the remaining disk space on an endpoint falls below a certain level.
- Endpoint users can also submit tickets by right-clicking the EM icon in the system tray.
- Such users are automatically added as guests in Service Desk if they are not already registered.
- Custom applications - Customers can integrate their systems with Service Desk by using the service desk API. Those integrated systems can then submit tickets to Service Desk.
To open the 'Tickets' interface:
- Open the staff panel
- Click 'Tickets' on the left then click 'Open' (to see all open tickets)
- Alternatively, select one of the other ticket categories:
- My Tickets
- Unassigned
- Answered
- Overdue
- Closed
- Scheduled
- Paused
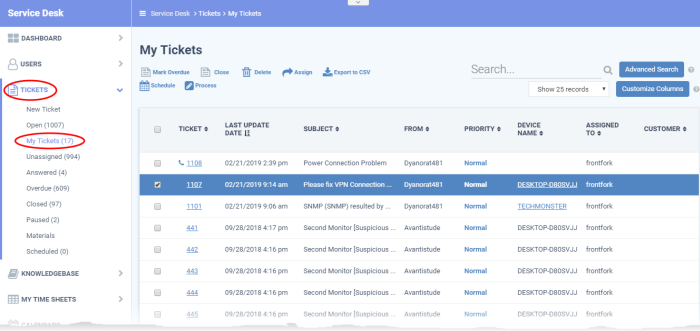
The 'Tickets' menu on the left contains the following filters and links:
- New Ticket: Allows the currently logged-in staff member or admin to create a ticket on behalf of a user. See Create a new ticket on behalf of a user for more information.
- Open: Tickets that are not yet resolved. Click the ticket number/subject to answer, transfer, reassign or schedule an open ticket.
- 'Assigned' and 'Answered' tickets are excluded from this view if configured in 'Admin Panel' > 'Settings' > 'Tickets' interface. See 'Ticket Settings and Options' in the Service Desk admin guide for more details.
- My Tickets: Tickets that are assigned to the person that is currently logged-in. Click the ticket number/subject to answer, transfer, reassign, schedule or register time-spent on a ticket.
- Unassigned: Tickets that have not yet been assigned to a staff member. Admins can assign tickets to staff by clicking the ticket number/subject then the 'Assign' link at the top. See Assign tickets to a specific staff member for guidance on this.
- Answered: Tickets for which there has been at least one reply. Answered tickets can be reviewed, reassigned, transferred and more by clicking the ticket number or subject.
- Overdue: Tickets that are not closed within the stipulated period per the SLA plan.
- Overdue tickets will be closed automatically if set in the 'Admin Panel' > 'Settings' > 'Tickets' interface. See 'Ticket Settings and Options' in the Service Desk admin guide for more details.
- Closed: Tickets that are resolved and completed. Closed tickets can be reviewed, reopened, reassigned and more by clicking the ticket number or subject.
-
Scheduled: Tickets that have a fixed timetable. The schedule will be displayed in the staff member's calendar. Scheduled tickets can be answered, re-assigned, transferred, re-scheduled, and more by clicking the ticket number/subject.
- Paused: Tickets that are not being worked on at the current time. Paused tickets can be resumed by the same staff member or an admin. A paused ticket can be resumed by clicking the ticket number then clicking the 'Resume' button.
- Materials: View details of material costs and other expense items added to tickets by staff, with their approval status. See View Details of Materials/Expense Items added to Tickets for more details.
|
Tickets - Table of Column Descriptions |
|
|---|---|
|
Column Header |
Description |
|
Ticket |
The number assigned to the ticket. Clicking the ticket number will open the 'Ticket Details' screen.
|
|
Last Update Date |
The date and time at which ticket was created, reopened, last updated or closed. |
|
Subject |
A brief description of the issue.
|
|
From |
The name of the user that raised the ticket. |
|
Priority |
The criticality of the ticket.
|
|
Device Name |
The label of the endpoint for which the ticket was generated.
|
|
Assigned To |
The name of the column header depends on the ticket status that you have selected. For example, for 'Unassigned' tickets the column header will be 'Department'.
|
|
Source |
The channel through which the ticket was created. Possible channels are:
|
|
Sub Category |
Sub-categories
are specific topics grouped under a main support topic. For example,
'My toaster keeps burning the toast' might be a sub-category of
'Toaster Help'. It is optional for you to create sub-categories of a support category. Sub-categories are selected by users when they submit their ticket. |
|
Department |
The department of your company to which the ticket is assigned. |
|
Due Date |
The date and time by which the ticket should be closed. |
|
Closed By |
Staff member who closed the ticket. |
|
Status |
Ticket progress. Possible values are:
|
|
Ticket Category |
Displays the help topic on which the user requested support. See ticket categories in the admin guide for more details. |
|
Overdue |
Indicates whether the ticket was not closed on or before the due date. |
|
Answered |
Indicates whether a response has been given to the user for the reported issue. |
|
Asset |
Indicates the asset type for which the issue was reported. |
|
Category (Ticket Type) |
The support category of the ticket. The possible values are:
|
|
Sub-Category |
Specific issue type as chosen by the person who created the ticket. For example, 'Overheating' may be a sub-category of 'Problem'. |
|
Scheduled Time |
Date and time at which the ticket will be attended to. |
|
First Reply |
Date and time of the first response to the user. |
 - Tickets that were raised via the web portal.
 - Tickets that were raised via email.
 - Tickets that were raised by staff members on behalf of users.
 icon
in the subject column indicates that one or more collaborators have
been added to the ticket CC list.
icon
in the subject column indicates that one or more collaborators have
been added to the ticket CC list.
Add or Remove Columns
The columns displayed by default depend on the ticket filter chosen on the left. You can add more columns if you want to view additional details and hide columns that you do not want to be displayed.
- To add or remove columns, click the 'Customize Columns' button:

- Use the check-boxes to enable or disable columns as required
- Certain columns are mandatory for certain views
- Click 'Save' to add/remove the selected columns to the list
The following
sections explain more about managing tickets and creating a new
ticket:
View a Short Summary of a Ticket
- Place your mouse cursor over a ticket to view brief details:

The links at the bottom allow staff members to manage the ticket. See 'Ticket
Details' for more details.
- The 'Process' feature allows you to quickly update ticket details. You can reassign ticket to a different staff/administrator, update items such as user information, ticket category, department, collaborators and more.
- Alternatively, you can also edit individual tickets by opening the ticket and clicking the 'Edit' button.
- This feature is available for all ticket categories except closed tickets.
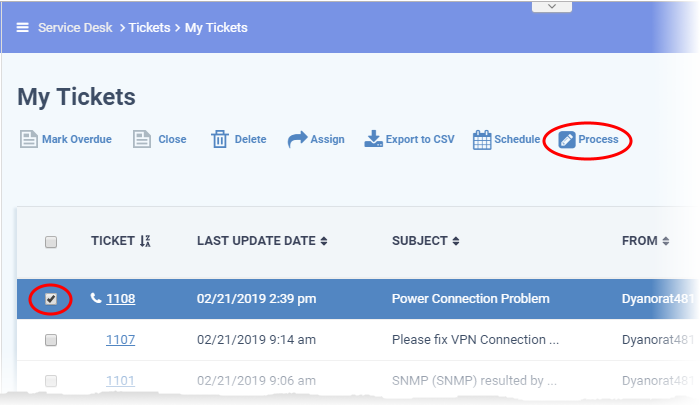
Use the process option
- Click 'Tickets' then a ticket type ('Open', 'Unassigned', 'Overdue', etc)
- Select a ticket and click 'Process' at the top:
The 'Process Ticket' screen opens:
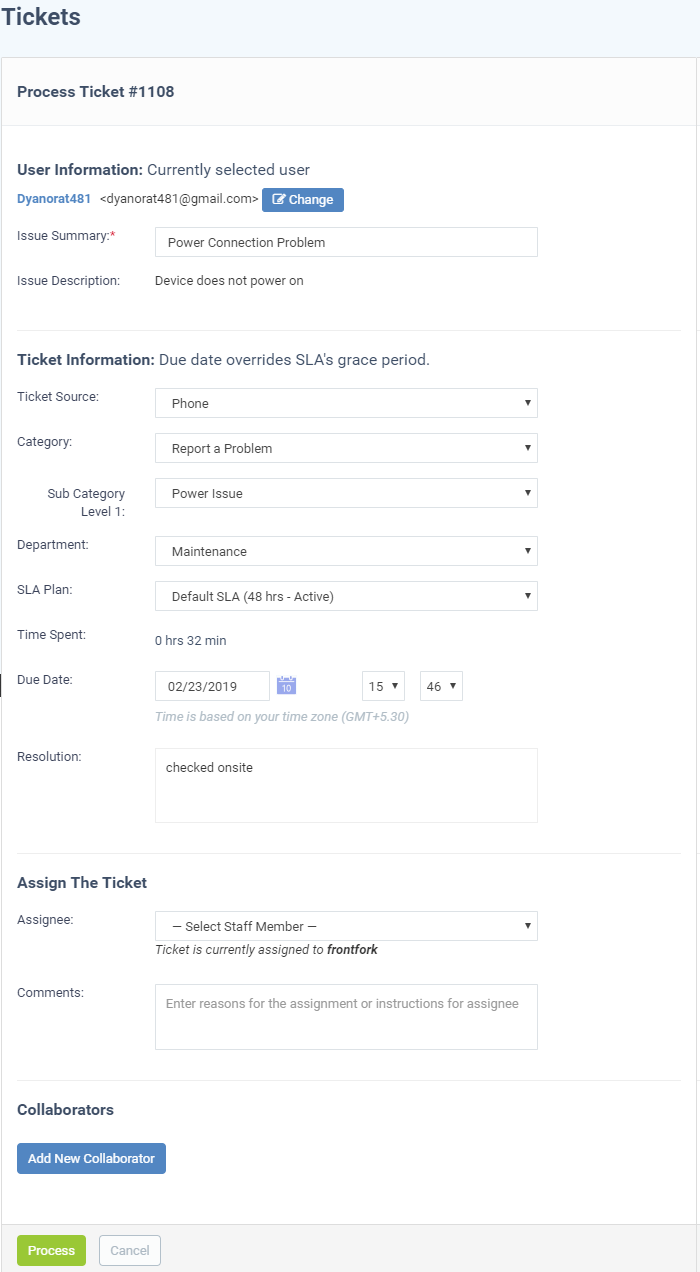
User Information
- User name: The person who submitted the ticket or for whom the ticket was created. This is is pre-populated. Click 'Change' to select a different user.
- Issue Summary: Brief description of the issue. Update if required.
- Issue Description: Ticket description provided by the creator of the ticket. This is not editable.
Ticket Information
- Ticket Source: The channel through which the ticket was created. The options available are 'Phone', 'Email', 'Web', 'API' and 'Other'. This is pre-populated and can be updated if required
- Category: The help topic under which this ticket falls. This is pre-populated and can be updated if required.
- Sub Category: Specific issue type as chosen by the person who created the ticket. For example, 'Overheating' may be a sub-category of 'Problem'.
- Department: The department to which to the ticket is currently assigned. This is pre-populated and can be updated if required.
- SLA Plan: The service level plan associated with the ticket. Use the drop-down menu to change the plan if required. The option chosen here will prevail even if the SLA plan for the 'Ticket Category' and 'Department' is different.
- Time Spent: Cumulative time spent on the ticket by all contributing staff members. This total includes time recorded automatically during a session and time manually added by administrator/staff.
- Due Date: The date and time by which the ticket should be closed. Change the date and time if required. This will override the date generated by default.
- Resolution: A description of the fix/solution. This could also be a description of the steps taken so far, and those that remain, in order to bring about a fix. This is set by the staff member attending to the ticket. Change the resolution if required.
Assign the Ticket
- Assignee: Person who is currently responsible for the ticket. You can change the assigned staff member if required.
- Comments: Enter instructions for the assignee or reasons for the assignment.
Collaborators
Add people who also worked on the ticket as additional recipients for ticket updates.
- Click 'Add New Collaborator' to associate new or existing users with the ticket.
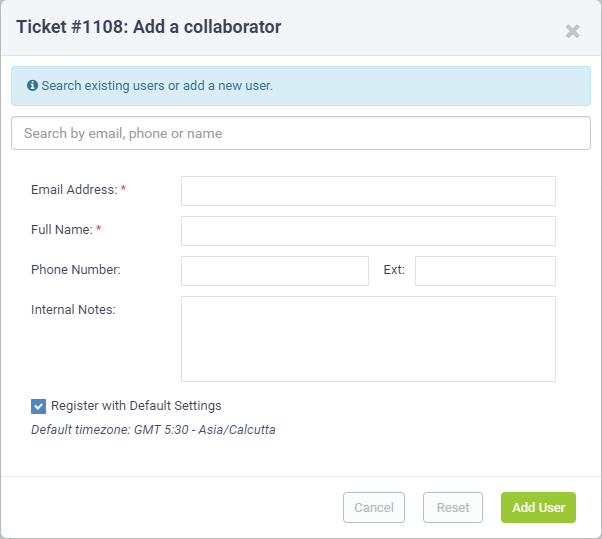
- To add an existing user, type the first few letters of their username/email address in the 'Search' box at the top. Select the correct user from the suggested options
- To add a new user, enter their email address, full name and other contact details
- Click 'Add User'
- Repeat the process to add more collaborators
- Click the 'Process' button after you have made your changes. The ticket will be updated per the new details.
A scheduled ticket is useful for tasks that will be started at a set time in the future, like a site visit for example.
- The schedule will be added to the calendar of the currently logged-in admin/staff.
- The ticket will be assigned to the person who creates the schedule, even it it is currently assigned to someone else.
To create a schedule for a ticket
- Open the 'Staff' panel (see last link on the left)
- Click 'Tickets' then a ticket type ('Open', 'Unassigned', 'Overdue', etc)
- Select a ticket and click 'Schedule' at the top:
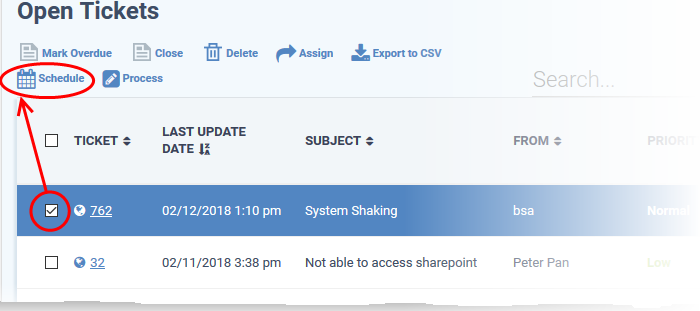
The calendar for the currently logged-in admin/staff will open. The ticket details will be displayed on the title bar:
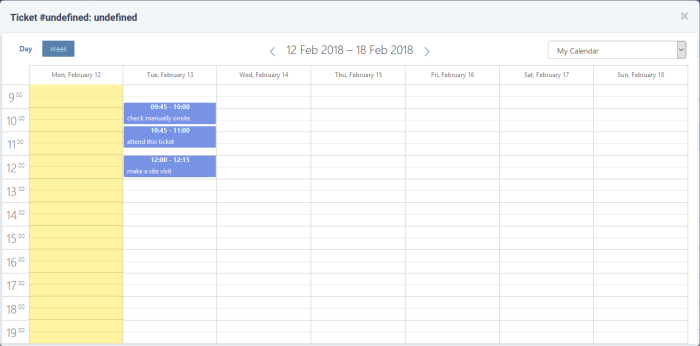
- By default, the current week will be displayed. You can view the current week or day by clicking the respective button above the calendar
- To move to next week/day, use the '>' buttons on the top
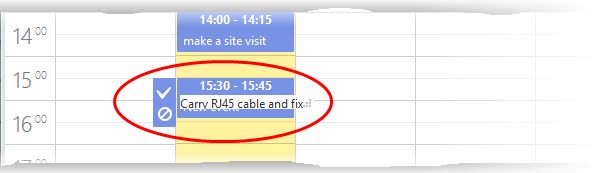
- Double click on the cell that represents the time slot on which you wish to fix appointment for the ticket
- Enter a short description for the task to be executed.

- Click
the tick mark
 to save the schedule
The appointment will be added to the calendar. You can view your calendar from the 'My Calendar' interface. See Manage Calendars for more details.
The ticket will be moved to the list to the 'Scheduled' category on the left.
View Materials/Expense Items added to a Ticket
The 'Tickets' section lets staff and admins view any costs added to a ticket. Admins must approve expense items in order for them to be billed to the customer company.
View the materials/expense items
- Click 'Tickets' on the left then select 'Materials':
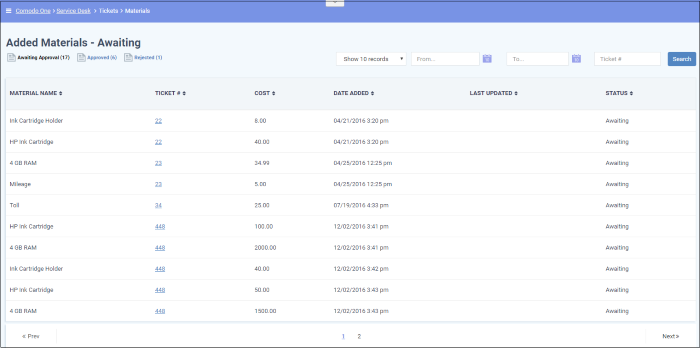
Column Headers
- Material Name - The name of the material or the expense item
- Ticket # - The number of the ticket to which the material or expense item was added. Click the ticket number to view or update the ticket. See Ticket Details for more details
- Cost - Cost of the material/expense item as entered by the staff member
- Date
Added - Date and time when the item was added to the ticket
- Last Updated - Date and time when materials on the ticket were last modified
- Status - Indicates whether the material/expense was approved by the administrator. The possible states are:
Sorting and Filtering Options
- Awaiting - The expense item has been added to a ticket but has not yet been approved by an administrator.
- Approved - The expense item has been added to a ticket and approved for billing by an administrator.
- Rejected - The expense item has been rejected by an administrator.
- Click a column header to sort items in ascending/descending order
You can search for items based on the date range within which the items were added and the tickets to which they were added.
- To filter items based on their addition date range, enter the Start and End dates of the period by clicking the calendar icons beside the From and To fields
- To filter the items based on the ticket to which they were added, enter the ticket identification number in the Ticket # field
You can use more than one filter option at a time.
- Click 'Search'
- To view the full list again, clear the search criteria or, simply click the respective 'Approval' link at the top.
You can save the list of tickets as a comma separated value (CSV) file for archiving and analysis purposes.
To save the list of tickets
- Click 'Tickets' then a ticket type ('Open', 'Unassigned', 'Overdue', etc)
- Click the 'Export to CSV' link at the top
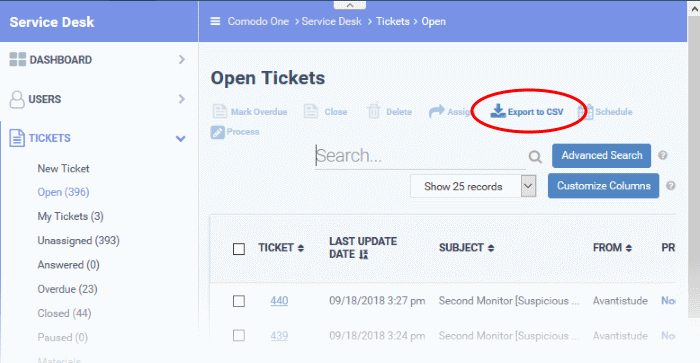
The list will be downloaded as a .csv file. The file can be opened with spreadsheet applications like Microsoft Excel and OpenOffice Calc.
Assign Tickets to a Staff
Member
- Admins can assign/reassign individual or multiple tickets to a staff from the 'Tickets' interface.
- The ticket will appear in the 'My Tickets' area of the person to whom it is assigned.
Assign a ticket
- Click 'Tickets' then a ticket type ('Open', 'Unassigned', 'Overdue', etc)
- Select one or more tickets and click 'Assign' at the top
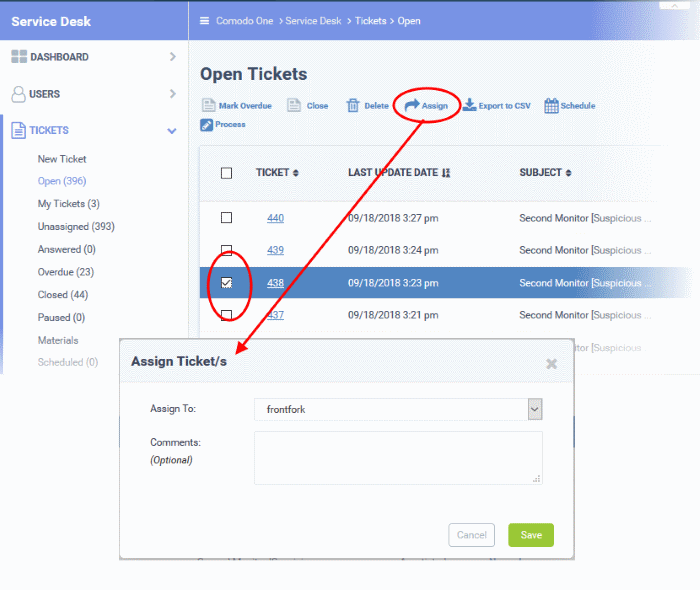
- Assign to - Select the admin/staff member to whom you want to assign the ticket
- Comments (Optional) - Enter a reason for assigning the ticket or other notes about the task. The comment will be added as an internal note to the ticket.
- Click 'Save'.
Create a new ticket on behalf of a user
- Staff and admins can create tickets on behalf of users from the 'Tickets' interface.
- Staff can also create tickets for issues that they resolved, but which had no ticket. This is useful to record time spent/materials used and bill accordingly.
- Select 'Work done in the past' to enable this option.
- Tickets created for already completed tasks will have a status of 'Closed'.
- For more details, refer to Ticket Details.
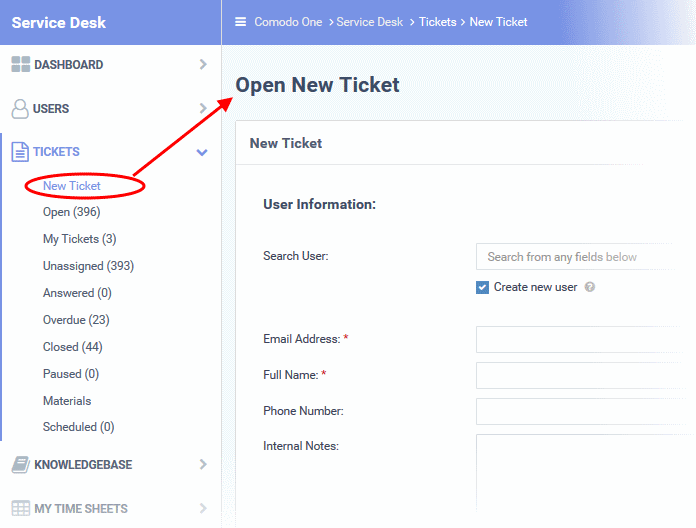
- Click 'Tickets' then select 'New Ticket'
The 'Open New Ticket' page will open:
It contains the following sections:
- User information - Details of the user on behalf of whom the ticket is created
- Ticket information and options - Ticket parameters like category, SLA plan, due date, staff to whom the ticket is to be assigned and more.
- Backdated ticket - Specify whether the work was done in the past and the period
- Ticket details - Details like issue description, priority, asset type, ticket category and more
- Response - Initial response to be sent to the user
- Internal note – Notes regarding the issue for internal references
The following
sections describe each ticket section in detail:
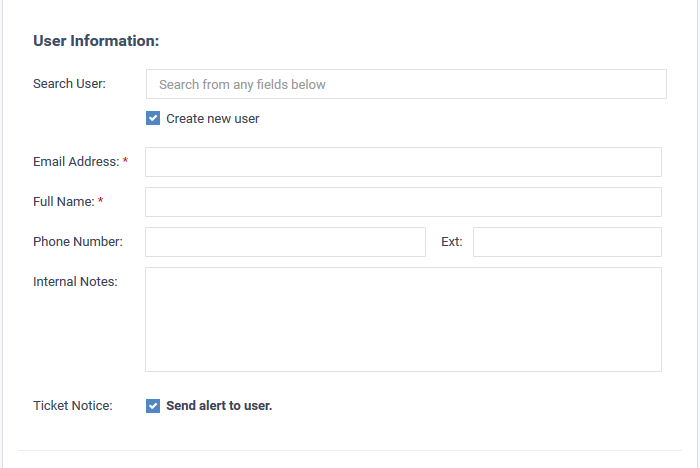
- To create a ticket for an existing user:
- Start typing the user name or email ID in the search field and choose the user from the suggestions.
- The details like email address, username, phone number will be auto-populated.
- To create a ticket for a new user
- Enter the email address, full name and phone number of the user and notes about the user in the respective fields. The internal notes will be visible only to admins/staff.
|
Tip: New users will be added as a guests. You can associate new users with a customer in the 'User Directory' interface. See 'Add a user to an organization' in Manage Users for more details. |
- Ticket Notice - Enable to notify the user that the ticket has been created.

- Ticket Source: Select the source through which you received the request for the ticket. The options are 'Phone', 'Email' and 'Other'.
- Category:
Select the help topic under which the ticket falls. Depending on
the ticket category selected, more forms may be included in the
ticket.
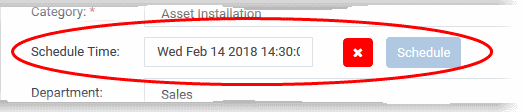
- Schedule Time: Choose a specific time and date in the future to work on the ticket, if required.
- It is optional to create a schedule. The schedule will be added to your calendar.
To set a schedule
- Click the 'Schedule' button to open the calendar:

- The current week is shown by default. You can view the current week or day by clicking the respective button above the calendar.
- To move to next week/day, use the '>' buttons on the top
- Double-click on the time slot you wish to reserve for the ticket
- Enter a short description for the task.
- Click the tick mark
- The schedule will be added and displayed:
The appointment will be added to the calendar after saving the ticket. You can view your calendar from the 'My Calendar' interface. See Manage Calendars for more details.
- Department: Select the department to which the new ticket should be assigned. The option chosen here will prevail even if the 'Department' for the selected 'Ticket Category' is different. If required, staff can change the department while the ticket is in progress. See Ticket Details for more details.
- SLA Plan: The service level plan associated with the ticket. Use the drop-down menu to change the plan if required. The option chosen here will prevail even if the SLA plan for the 'Ticket Category' and 'Department' is different. If required, staff can change the SLA while the ticket is in progress. See Ticket Details for more details.
- Due Date: The date and time by which the ticket should be closed. A default due date will be auto-generated based on the Ticket Category, Department, SLA Plan and other parameters. You can change the date and time as required. This will override the date generated by default.
- Assign To: Select the staff member to whom the ticket should be assigned. The option chosen here will prevail even if the 'Agent' for the selected 'Ticket Category' is different.
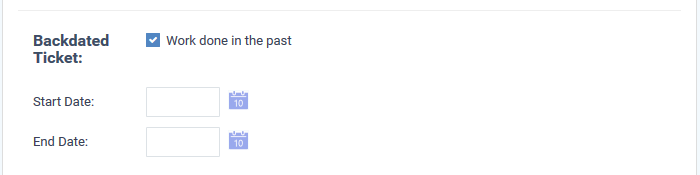
- Work
done in the past - Select only if you are creating a
ticket for a resolved issue that did not have a ticket originally.
The ticket will be created with a status of 'Closed'.
- After selecting this option, enter the start and end dates of the task using the the calendar icons. Make sure that the end date is before the due date entered in the 'Due Date' field.
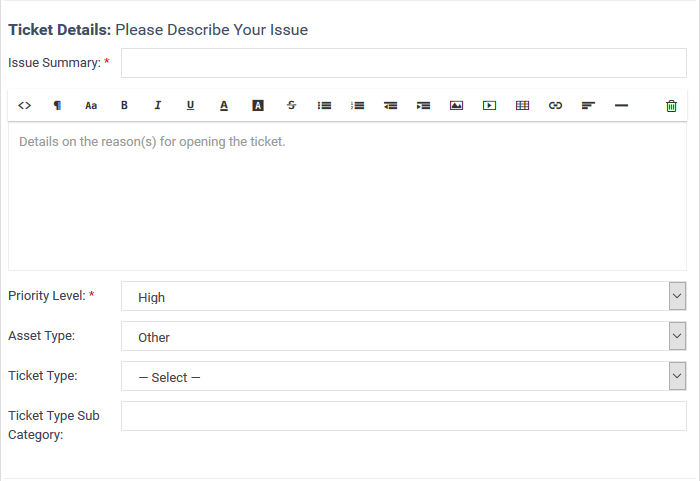
- Issue Summary: Enter a brief description of the issue.
- Issue Details: Enter a more detailed description of the issue in the text editor. Click the trash can icon above the editor to clear the field.
- Priority Level: Ticket criticality.
- The option chosen here will prevail even if the 'Priority' for the selected 'Ticket Category' is different.
- Staff can change the priority while the ticket is in-progress. See Ticket Details for more details.
- Asset Type: The type of item that the ticket concerns. For example, 'Workstation', 'Server', 'Printer', 'Mobile'.
- Ticket Type: Select the type of category for the ticket. The options available are 'Alert', 'Order' and 'Problem'.
- Ticket Sub Category: Type a specific sub-set if you wish to refine the 'Category' further. Sub-categories can be used to more details about the category. For example, 'Overheating' may be a sub-category of 'Problem'.
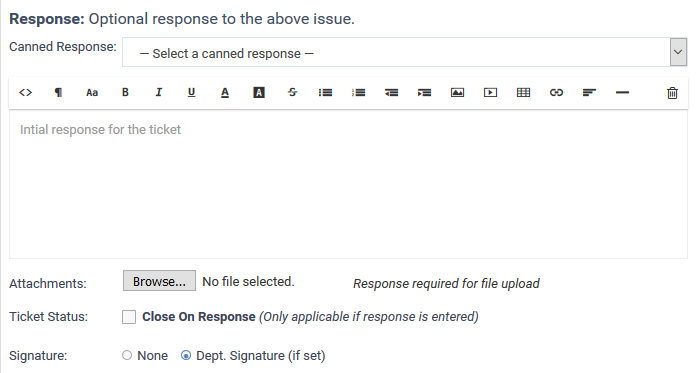
- It is optional to create a response. Type any response you wish to send to the user in the text field provided. Responses will be automatically sent to the user after you click 'Open'.
- Canned Response: Select if you wish to want to send a pre-defined response to the ticket.
- Any canned responses you select will be added to the 'Response' text field. You are free to edit and/or add text to complement the canned response.
- You can add multiple canned responses to build a more complete answer. For example, you might add the following 3 canned responses to a single response - 'Acknowledgment', 'Ticket has been queued', 'Contact details'. Please enter a carriage return between each canned response for formatting reasons.
- See Canned Responses for more details about creating canned responses.
- Attachments: Click the 'Browse' button to add relevant attachments to the ticket. To remove the attachment, clear the checkbox next to the file and select 'OK' in the confirmation screen.
- Ticket Status: If enabled, the ticket will be closed after creation if a response has been sent to the user. See the descriptions above for more about responses.
- Resolution: Enabled - The answer/response that staff enter will be treated as the resolution statement.
- OR click 'Add Resolution', if you want to specify a different resolution statement.
- Signature: Options are 'None' or 'Dept. Signature'.
- None - Means you can either send with no signature OR type a custom signature in the editor.
- 'Dept. Signature' can be created in the Admin Panel ('Admin Panel' > 'Staff' > 'Departments'). See 'Department' in the Service Desk admin guide for more details about adding signatures.
- Enter comments, reminders, notes to staff who might work on the ticket and more. The internal note will be visible only to the admins/staff who open the ticket and not to the user.
- Click 'Open' to create the ticket on behalf of a user.
- The ticket will be added to the 'Tickets' interface. You or the staff member to whom the ticket is assigned can view/update the ticket by clicking the subject or ticket number.
The 'Ticket Details' section covers additional actions you can complete on a ticket. For example, how to create a knowledgebase article out of a ticket.
Sorting and Filtering Options in the 'Tickets' Interface
Sorting items
- Click a column header to sort items in ascending/descending order
The 'Show records' drop-down on the right allows you to select the number of entries to be displayed per page. The options range from 10 records per page up to 100. The default value can be set in the 'My Profile' interface. You can navigate to different pages by clicking 'Next' and 'Prev'.
Search Options
You can run a simple search or an advanced search on tickets.
Simple Search
- The 'Search' field lets you filter tickets by the following criteria:
- Ticket ID
- User name
- Customer
- Device Name
- Start typing your search term and tickets matching your criteria will be automatically displayed.
- To display all tickets, clear the search field (or simply click the ticket category link on the left).
Advanced Search
- 'Advanced Search' lets you filter tickets based on preset criteria
- Click the 'Advanced Search' button
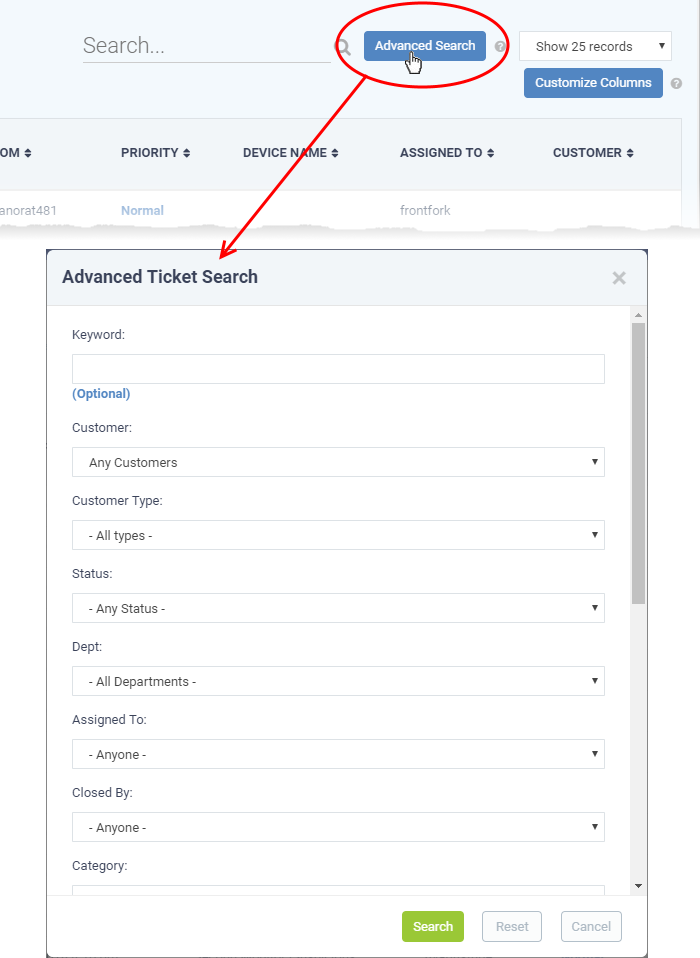
- Enter/select the parameters that you want to use as search criteria.
- Click the 'Reset' button to clear the fields.
- Click the 'Search' button after filling the required search parameters.
The number of tickets that matches the search parameters will be displayed at the top of the screen.
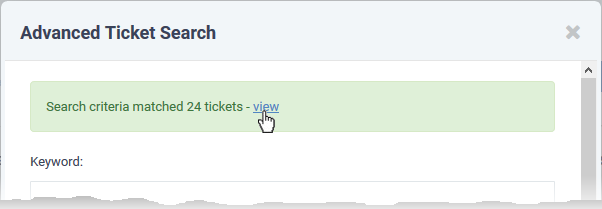
- Click the 'view' link to see the list of tickets which match the search criteria
- To view all tickets again, click the respective ticket category under 'Tickets' on the left.