Step 6 - Create New Organizations and Assign Users to Organizations
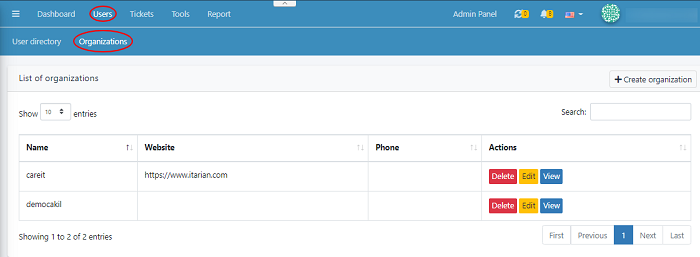
- Go To Agent Panel > Click 'Users' > 'Organizations'
- You can see the List of Organizations your users
belong to.

This tab displays a list of organizations, where they can be viewed, edited or deleted.
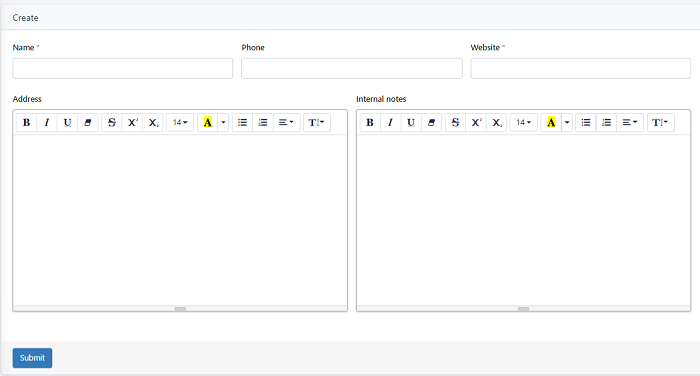
To Create an Organization
Go to Users > Organizations > Create Organization

- Enter the name, phone number and website.
- Add the address for further communication.
- You can add the ‘Internal notes’ in the
mentioned filed. Here the notes written can be shared with the agents/admins.
Delete an Organization
- Click Users > Organizations
> Click Delete

The selected organizations will be deleted successfully. Once the organization deleted the associated users of that organization will also remove
Edit Organization
- Go to Users > Organizations
> Click Edit

- In case if you want to edit the organizations,
you can change the desired filed added here.
- Click ‘Submit’ to save your changes.
View an Organization
- Go to Users > Organizations
> Click View’ button

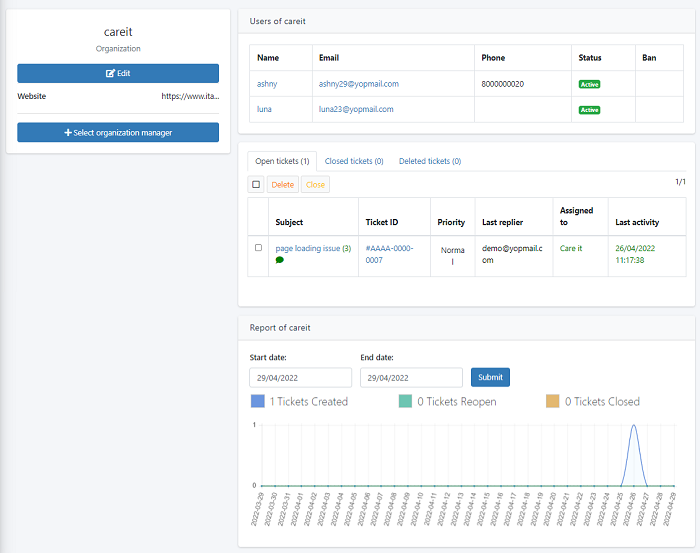
An Organization's profile looks like this

- This tab displays a list of users who belong to
the organization.
- Clicking ‘Edit’ will take you take the create
organization page where you can edit the details.
- You can check the ticket details that belong to
a particular user, also change the status of the ticket. Tickets of a
particular user can be merged together.
- You can view the number of ‘Open ticket’,
‘Closed tickets’ and ‘Deleted tickets’ of a user. This area describes about the
ticket subject, id, priority, last replier, assigned to and last activity of a
user
- To delete a ticket > Select a ticket you want
to remove >click ‘Delete’
- To close a ticket > Select a ticket you want to close
>click ‘Close’
To assign users to organizations
- Go to Agent Panel > Users > Users Directory
- Select a User you would like to add to a
department >Click ‘Edit’ tab
- Select Organisation from the dropdown list. Once
the Organisation is selected the user will assign to the selected organization.
- Click ‘Update’ to save your changes

