

Step 5 - Enroll Users
- Click Agent Panel> 'Users' > 'User Directory'
- Click the Create User' link at the top
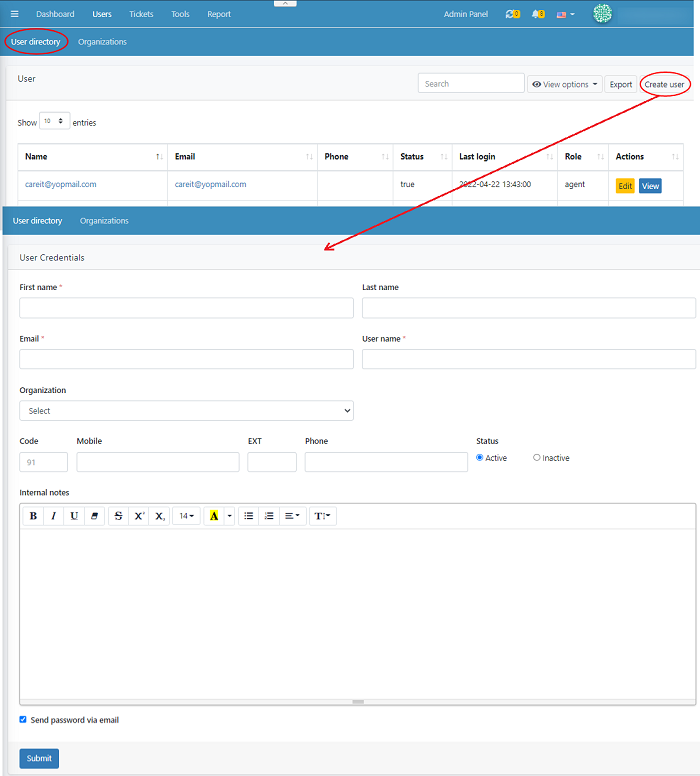
- Enter the First name, Last name and User name in
the specified boxes.
- Choose the organization name from the list,
which the user belongs to.
- The Email and Mobile Phone details that are
specified are accessed for user verification and sending email alerts and
notifications.
- Select the Status as ‘Active’ if you want to
enable your user profile or select ‘Inactive’ to disable the profile
- You can add the ‘Internal notes’ in the
mentioned filed. Here the notes written can be shared with the agents/admins.
- Once the user details are filled click on the ‘Submit’
button to save the details.
- When the user mail id is registered in the
system, A registration confirmation email and an email verification mail with
password is sent to the user. Once the users access the link their details are
verified then the user is activated. Now they’ll be able to log in and access
the system.
Edit a user
- Click 'Users' > 'User Directory'
- Click ‘Edit’ button of a user which you want to edit details.
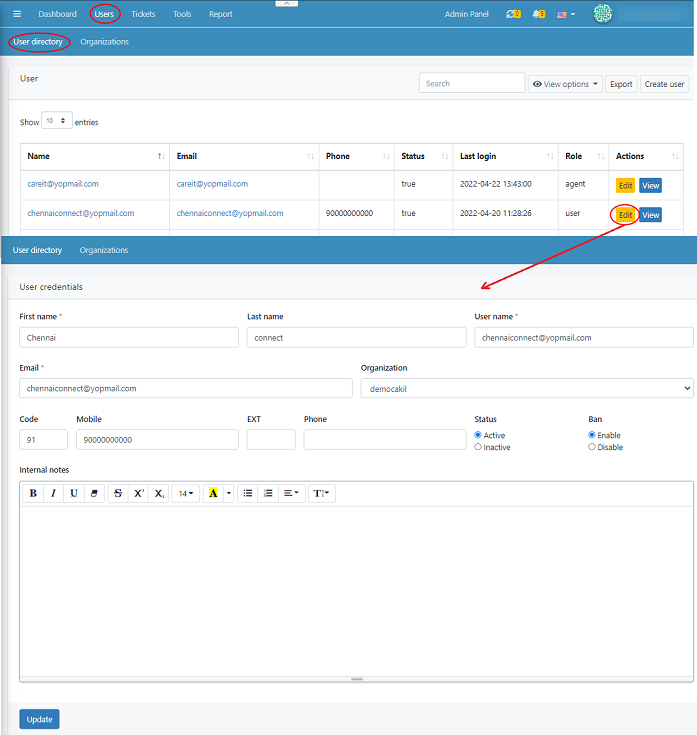
- In case if you want to edit the user role, you
can change the desired filed added here.
- If the user is not active you can deactivate the
user profile in ‘Status’ > ‘Active’/’Inactive’ When the deactivated user
tries to create a ticket, it will move automatically to the Spam folder.
- Click ‘Update’ to save your changes.
View and manage user
profile
To view and manage user's profile:
- Users > User directory >
Select the user whose profile you wish to view > click ‘view’
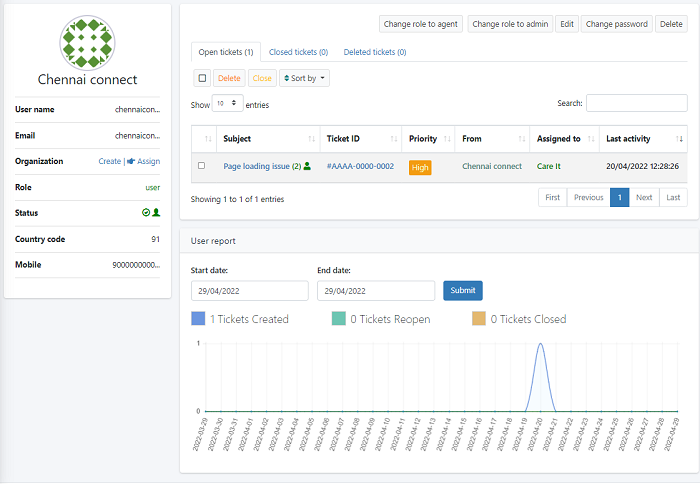
- This gives an overall view of the user, which includes the number of tickets opened, closed and deleted.
- You can change the role of the user to either
Admin or Agent by selecting ‘Change role to agent’/ ’Change role to admin’ and
merge them accordingly. Also, the password can be changed in the user profile.
- You can manually verify a user’s email id and
phone number. The green tick symbol pointed out by the arrow mark can be used
to activate/inactive the user.
- We also have an option to delete the user from
the system. Deleted users will not be allowed to login to the system or create
tickets.
- Clicking on edit will take you take the create
user page where you can edit the details.
View Ticket Details
- You can view the number of ‘Open ticket’,
‘Closed tickets’ and ‘Deleted tickets’ of a user. This area describes about the
ticket subject, id, priority, from, assigned to and last activity of a user
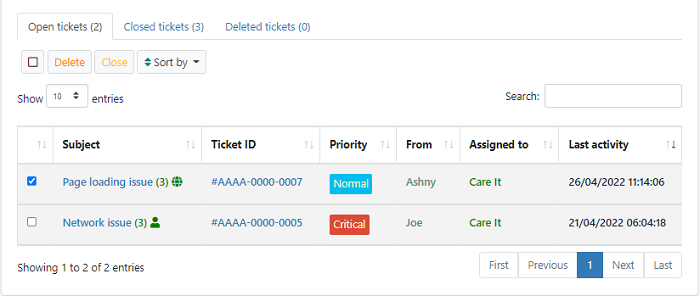
- To delete a ticket > Select a ticket you want
to remove >click ‘Delete’
- To close a ticket > Select a ticket you want
to close >click ‘Close’
- You can sort the ticket by ‘created at’ date of ticket created and ‘Last activity’