

Step 7 - Manage Tickets
- Go To Agent Panel > Tickets
- The 'Tickets' tab allows agents to respond to tickets created by users.
The 'Tickets' interface will have:
- Not
answered - Tickets for which has not replied yet.
- Answered- Tickets for which there has been at least one reply. Answered tickets can be
reviewed, reassigned, transferred and more by clicking the ticket number or
subject.
- Assigned -
The received tickets is assigned to a particular agent member
- Closed -
Tickets that are resolved and completed. Closed tickets can be reviewed,
reopened, reassigned and more by clicking the ticket number or subject.
- Create ticket - Ticket creation behalf of customer
Not answered
- Click Tickets > Not answered
- Tickets for which has not replied by an agent.
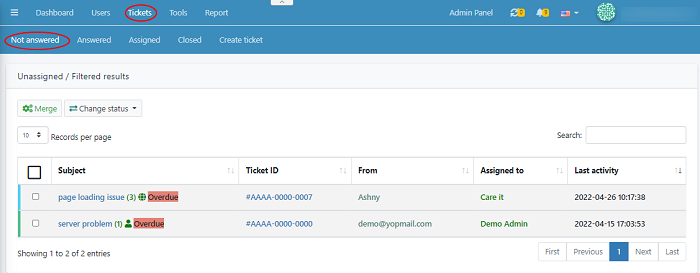
- Here you can view the not answered ticket.
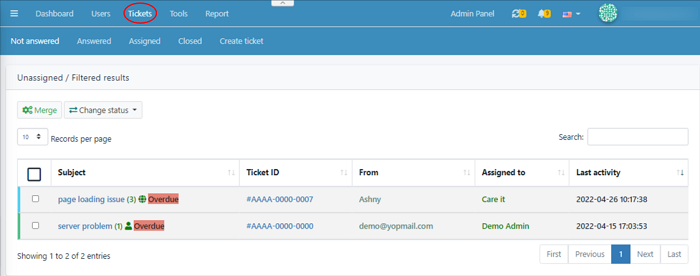
- To merge a ticket select the tickets you want to
merge > click ‘merge’ .You can merge two or more tickets which it has
multiple tickets for the same issue.
- To change ticket status, select the ticket >
click ‘change status’ > select the ticket status from the drop - down list
- Click a ticket to view the detailed summary
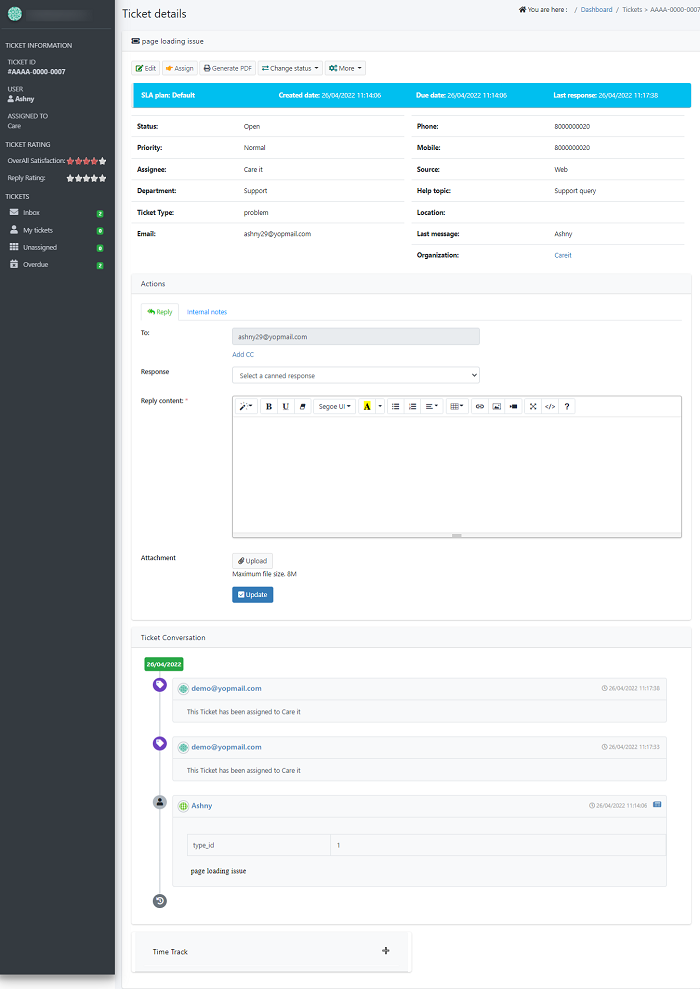
This tab provides the summary of a ticket details
- Click Edit tab to edit the existing tickets. You can assign the tickets by clicking ‘Assign’ on top
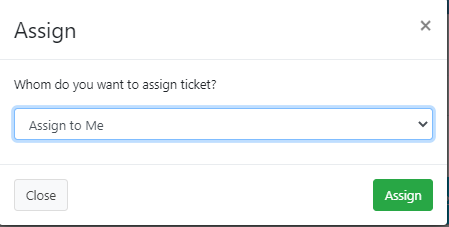
- Select the assignee from the drop -down list
> click ‘Assign’
- You can export the ticket details as in pdf
format click ‘Generate PDF’ to export
- The Ticket conversation shows all the
conversation between the user and the agent. Agent can also add a time track
for their work taken to complete that ticket
- When you reply to the ticket
the To field is picked automatically from the ticket requester. You
can fill up the CC Fields with multiple members mail ids in the
specified place. When the reply is given to a ticket, CC Members also
will be notified via email.
- In case of the same reply need to be given to a
ticket of multiple clients create a predefined template (canned response) and
select it from the list.
(Or) - In the Reply Content option, post your reply and format it. You can also attach media and files in the reply. Once done click on the Update button.When the reply is given to a ticket, it is added in the Ticket Timeline view.
Answered Tickets
- Click Users > ‘Answered
- This tab shows the tickets for which there has
been at least one reply.
- Answered
tickets can be reviewed, reassigned, transferred and more by clicking the
ticket number or subject.
- To answer a ticket Select a ticket > Add a
comment of a ticket which you want to answer. Now the ticket is moved to
answered tab.
Assigned Ticket
- Click Users > Assigned
- This tab shows all the assigned tickets. Select
a ticket to view the ticket details
- To assign a ticket, select the ticket > click on ‘Assign’

- You can select the agent name from the
list to whom the ticket needs to be assigned. (Or) You can also assign a ticket
to a team (Or) You can assign it to yourself.
- Once the tickets are assigned to the concerned
staff member, it is moved to their Tickets > My Ticket.
- As an agent, you can also assign tickets (Which
is currently assigned to you) to any other agents.
- When you assign a ticket to a team and any of the team members reply on the ticket it will be assigned to them.
Closed Ticket
- click ‘Tickets’ >click ‘Closed’ Option.
- Closed tickets display the resolved and
completed tickets. Closed tickets can be reviewed, reopened, reassigned and
more by clicking the ticket number or subject.
- To reopen a ticket ,select a ticket > Click change status > select open . The ticket will be reopened and marked as not answered .
Create a ticket
- click ‘Tickets’ >click ‘Create Ticket’ Option.

- Select or Enter the user information and
fill the ticket option, ticket details and Status etc...to raise a
ticket on behalf of the user
- If the user is already part of your support
portal select their email id from the requester’s list.
- If you are creating a ticket on behalf of a new
requester, first register their details in the support portal > Agent Panel
> Users > Users Directory and create a ticket.
- Once the details are filled click on the ‘Create ticket’ button to submit the ticket to the support portal