


Reports
- Click 'Reports' on the menu bar
- The 'Reports' interface lets you generate and view reports on:
- Service desk tickets
- Managed devices
- Malware identified on managed devices
- Files discovered on managed devices
- Files submitted to Valkyrie for analysis and their verdicts
- You can generate a report on demand, or schedule automatic reports at set intervals
Open the reports interface
- Click
'Reports' on the menu bar
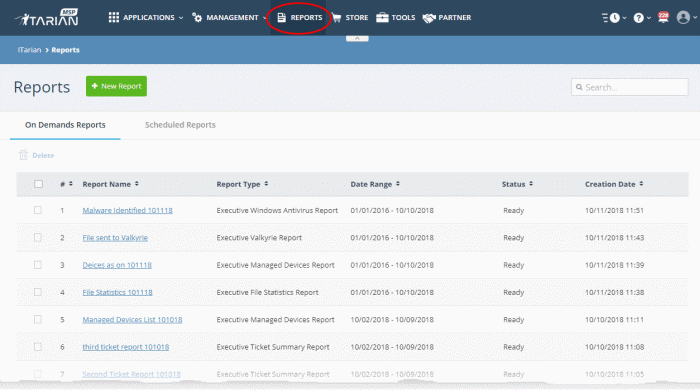
The interface has two tabs:
- On Demand Reports - Manually generated reports
- Scheduled
Reports - These reports are automatically
generated at set intervals you choose.
|
Reports - Column Descriptions |
|
|---|---|
|
Column Header |
Description |
|
Report Name |
Label of the report. You specify the report name when you create the report. |
|
Report Type |
Module which the report concerns. For example, 'Executive Ticket Summary Report', 'Executive Managed Devices Report' and 'Executive File Statistics Report'. |
|
Date Range/Period |
Time period covered by the report. |
|
Schedule |
Report frequency. Applies to scheduled reports only. |
|
Status |
The current stage of the report.
On-demand reports may have the following statuses:
You can activate or deactivate a schedule using the options at the top. See View and manage report schedules for more details. |
|
Creation Date |
Date and time at which the report was generated. |
- You can navigate to different pages by clicking 'Next', 'Prev' or the page number at the bottom
- Click any column header to sort reports based on the column label
- To search for a specific report, enter the name of the report in the search field and click the magnifying glass icon.
The following sections explain how to:
You can instantly generate reports for a specific period, or create a schedule to generate reports periodically. The reports that can be generated are:
- Executive Managed Devices Report
- Executive Windows Antivirus Report
- Executive Ticket Summary Report
- Executive File Statistics Report
- Executive Valkyrie Report
Generate a report or report schedule
- Click 'Reports' on the menu bar
- Click 'New Report' on the top
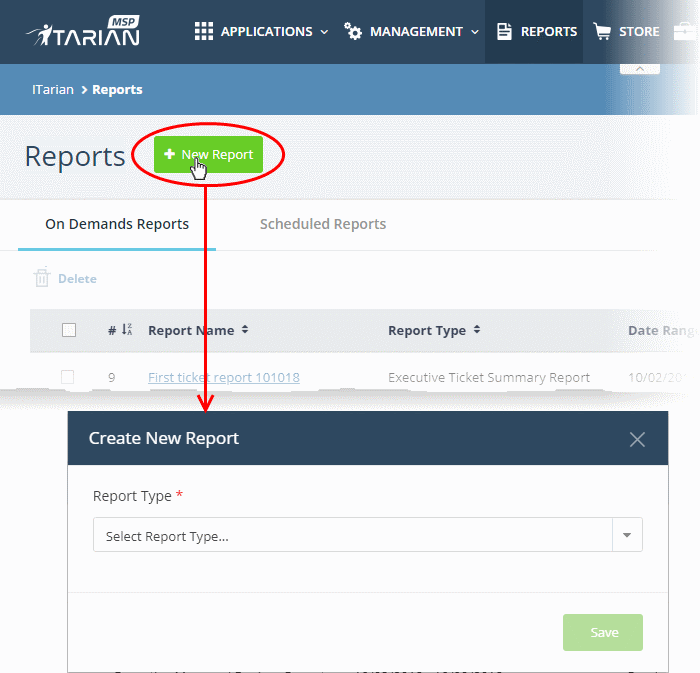
- Choose the report type from the options.
The 'Create New Report' dialog appears for the selected report type:
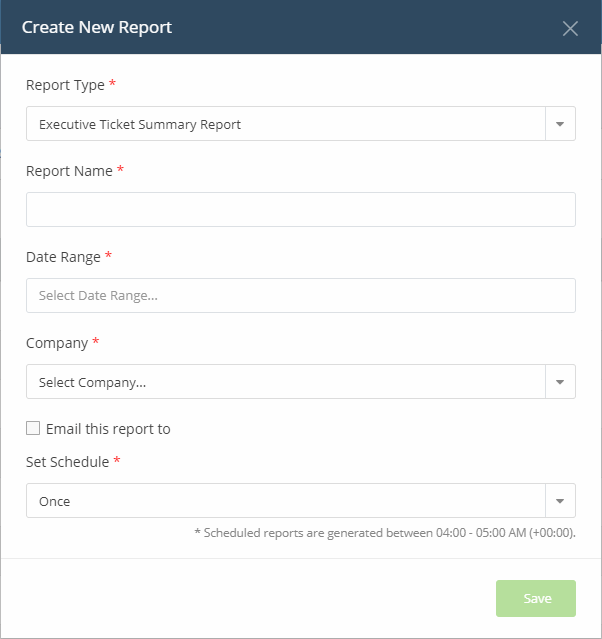
- Report Name - Enter a descriptive label for the report.
- Date Range - Click inside the field to choose the time period covered by the report:

- Click 'Custom Range' to choose specific start and end dates:
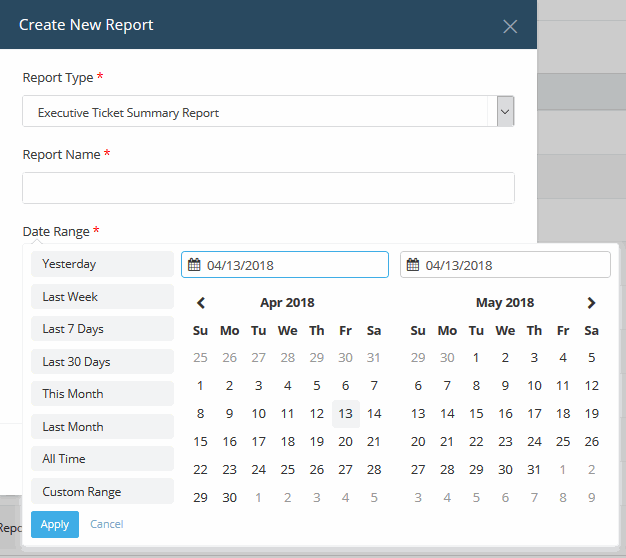
- Click 'Apply' to enter your date range
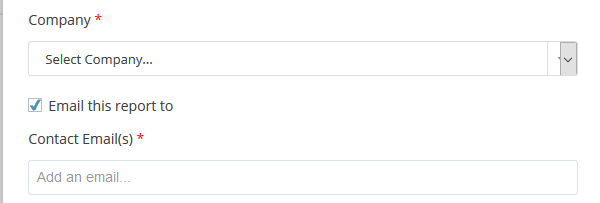
- Company - Organization whose devices/ files/ tickets are covered by the report
- MSP customers - Select the target company from the drop-down
- Enterprise customers - Cannot change the target company
- Email
this report to - Enter the addresses of any admins to whom the report is to be sent. You can add multiple email addresses in the field. Press 'Enter' button after each address.
- Set Schedule - Select the frequency at which the report should be generated. Please note, the 'Set Schedule' feature is not available for custom date range.
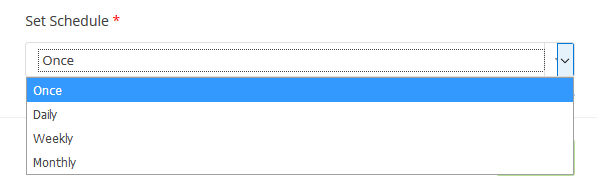
The available options are:
- Once - A one-off report. There will be a slight delay while the report is generated. The report will appear in the list when it is ready.
- Daily - The report will be generated every day.
- Weekly - The report will be generated every week on the day the report was created.
- Monthly - The report will be generated once per month on the day of the month that the report was created.
- Click 'Save'.
|
Note: Daily, weekly and monthly reports are generated between 04:00-05:00 AM (UTC). |
- Click 'Reports' on the menu bar
- Click 'On-Demand Reports' to view manually generated reports or 'Scheduled Reports' to view auto-generated reports
- Click
on the name of a report to view it.
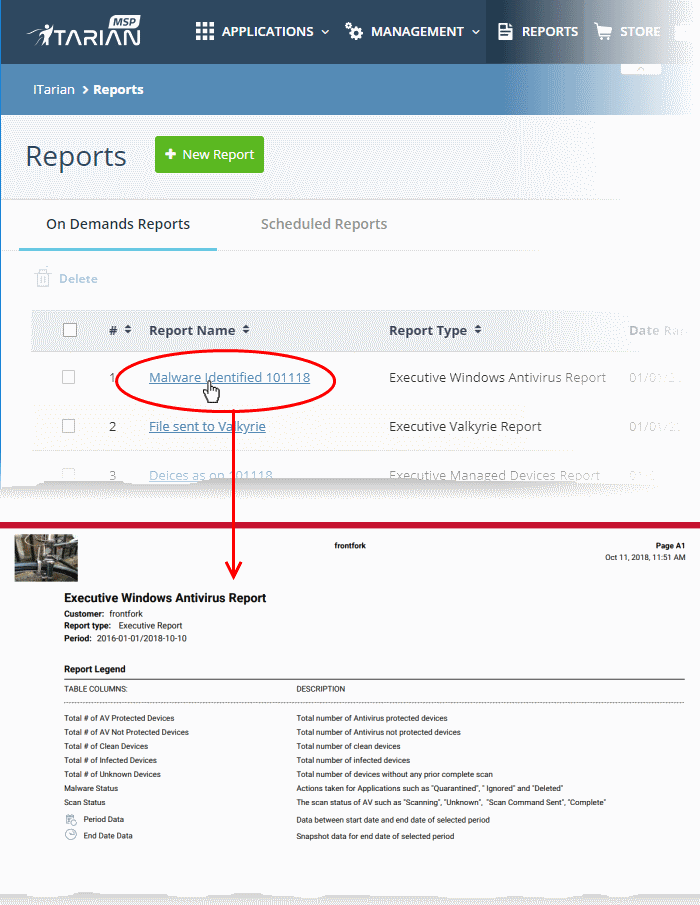
- The
report will open in pdf format. Click the download button to save a
copy.
View and Manage Report
Schedules
- Click 'Reports' on the menu bar
- Click the 'Scheduled Reports' tab
- Click a report name to view it as a pdf
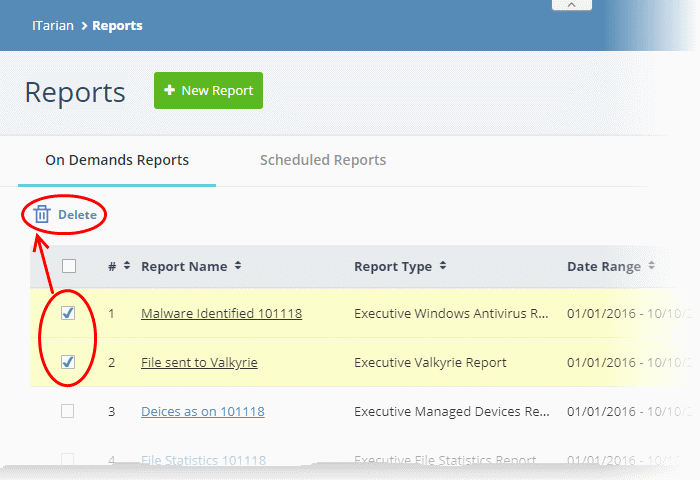
- Select reports using the check-boxes on the left to perform the following actions:
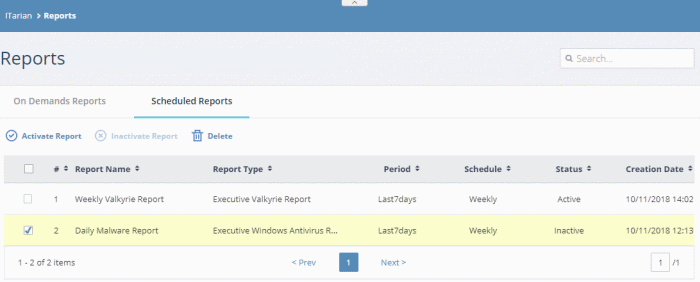
- Inactivate Report - Stops the report from being generated at the scheduled times
- Activate Report - Resume automatic report generation at the scheduled times
- Delete - Removes the schedule from the list.