Add Comodo Data Loss Prevention
Comodo Data Loss Prevention is a powerful solution that lets you monitor and control the movement of confidential information in your network.
- Data Loss Prevention is available only for ITarian Enterprise customers.
- Data Loss Prevention and Secure Email Gateway are premium add-ons for 'Comodo Secure Web Gateway'. These add-ons can only be added to your account if you have Secure Web Gateway.
- The basic version of Comodo Data Loss Prevention is free for thirty days and can be added to your account at any time.
- You can upgrade to the full product by purchasing a new license from the ITarian console.
- If you already have Data Loss Prevention on another Comodo Accounts Manager (CAM) or ITarian account, you can add it to your ITarian by linking the other account to your ITarian account.
The following sections explain how to purchase and activate a license:
- Click 'Store' on the menu bar
- Locate the 'Comodo Data Loss Prevention' tile

- Click 'Buy' or '30 Day Free Trial' depending on the version you want to add to ITarian.
You will be taken to the product order page. The example shown below is for the paid version.
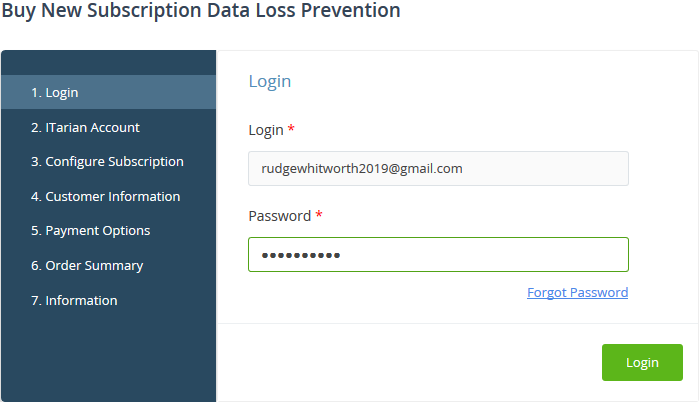
- Your username is pre-populated and cannot be changed
- Enter your ITarian account password then click 'Login'
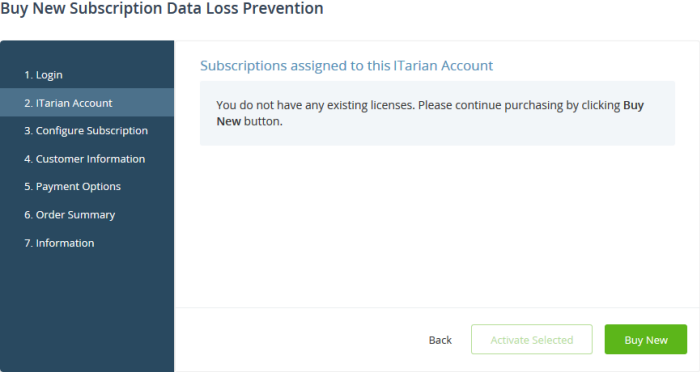
- If you selected a paid version, click the 'Buy New' button to configure your subscription package
- If you chose the basic version then, after logging-in, the process jumps straight to the customer information screen.
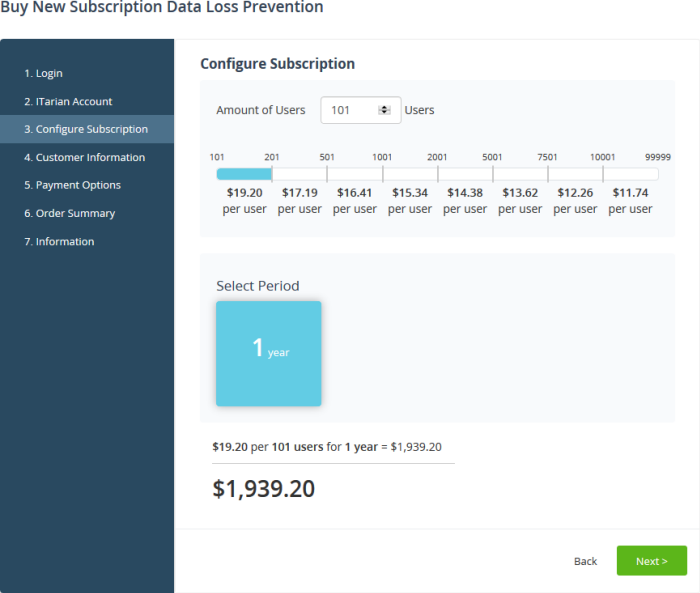
- Select the number of users you require. The per-user rate depends on the number of users. The minimum number of users is 101.
- Select the subscription duration. The minimum license period is one year
- Click 'Next' to continue to the customer information form:
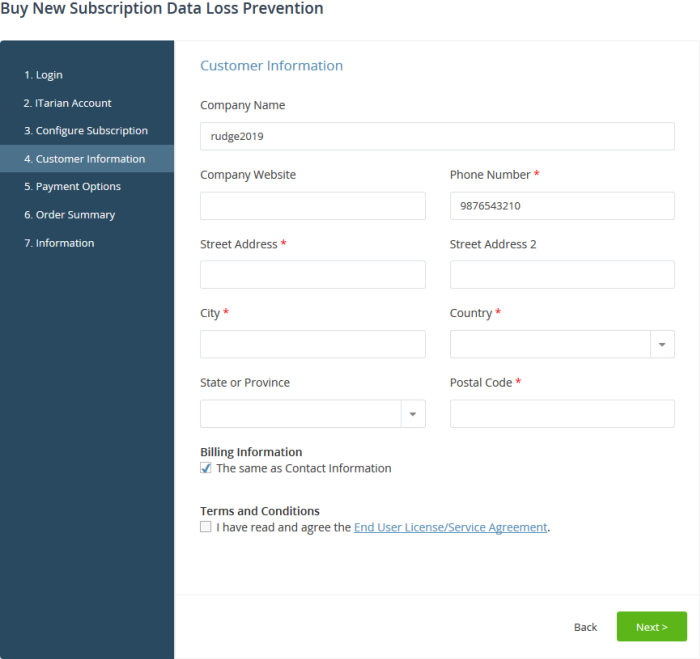
- Customer Information - Enter your company name, website and address details
- Agree to the terms and conditions then click 'Next'
- Paying customers will next confirm their order and enter payment details. Basic customers will jump straight to the order summary
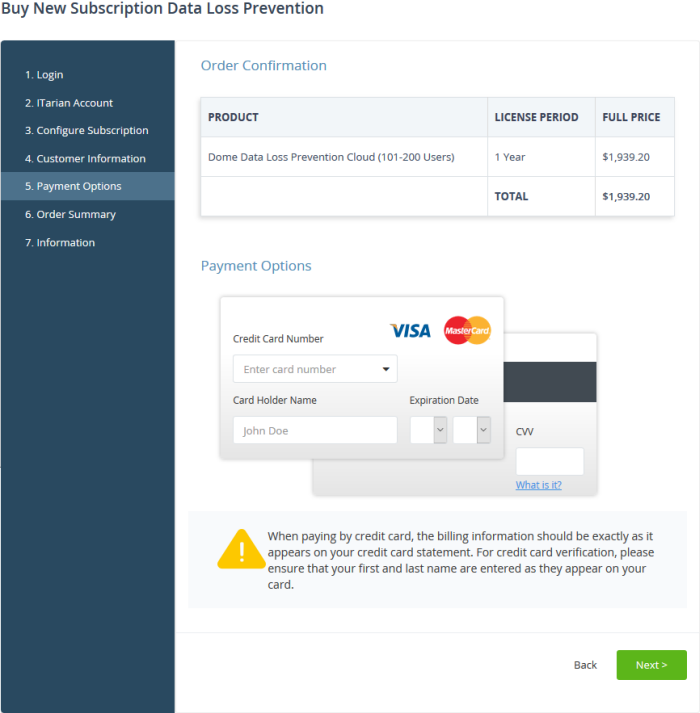
- Review your order and enter your payment details
- Click 'Next'
- Your order will be submitted and subscription details displayed. You will receive a confirmation mail with the order details and license key.
- The order summary page is shown after your order has been processed:
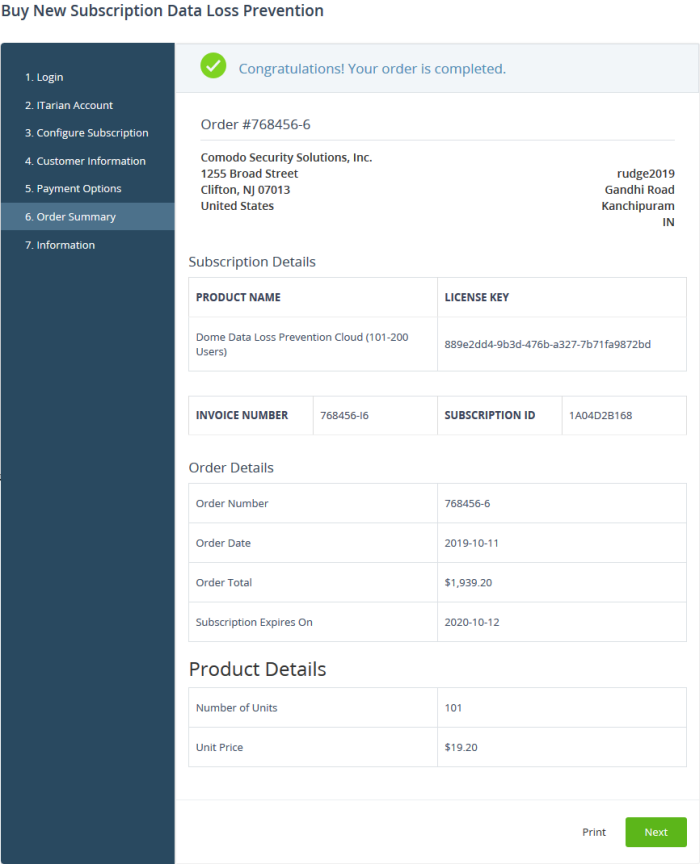
- Click 'Print' to make a hard-copy of the order summary
- Click 'Next' to view support details and instructions
- The information page explains how to setup Comodo Data Loss Prevention
- Click 'Finish' to complete the purchase process
- Our technical team will now setup your personal instance of Data Loss Prevention. We will send you an email with the URL of this instance once complete. We will send the mail within two working days
- You can access DLP from the ITarian ‘Applications’ menu. You will need to enter your service URL the first time you access the service
You can activate DLP licenses in ‘Management’ > ‘Applications’. The process is slightly different if you want to activate a license in a different account.
All newly purchased licenses are activated immediately. Follow these steps only if your license is not active for some reason.
- Click ‘Management' > ‘Applications’ on the ITarian menu bar
- Click the 'Data Loss Prevention' tile
- Click the ‘Subscriptions’ tab if not open already
- Select the license you want to activate
- Click ‘Activate’
Activate a license in a linked account
You can activate licenses in linked accounts by logging in to the other account at the product order form.
Note - You must first have linked an account and set it as default. See ITarian License Account Details for help with this.
- Click 'Store' on the ITarian menu bar
- Locate the 'Data Loss Prevention' tile
- Click 'Buy' or '30 Days Free Trial' depending on the type of license you want to link
- You will be taken to the order form
- The username for the default account is pre-populated
- Enter the password for the default account then click 'Login':

- The next page shows DLP licenses on your default account:
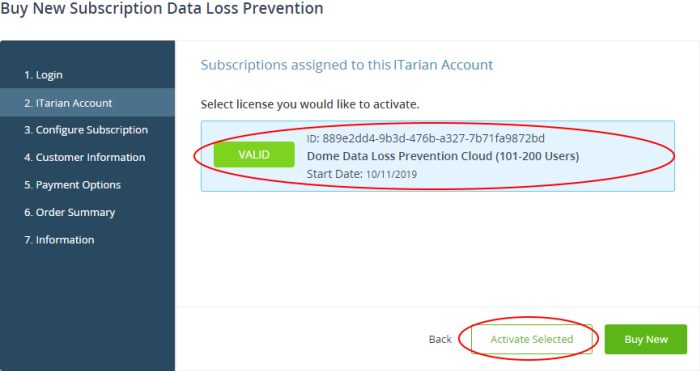
- Choose the license you want to use for this account then click 'Activate Selected'
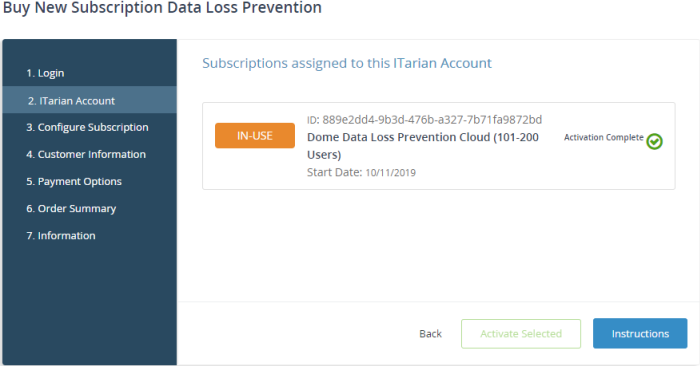
The license will be activated.
- Click 'Instructions' to learn how to set up Comodo Data Loss Prevention
- Click 'Finish' to complete the activation process
- Our technical team will now setup your personal instance of Data Loss Prevention. We will send you an email with the URL of this instance within two working days
- You can access DLP from the ITarian ‘Applications’ menu. You will need to enter your service URL the first time you access the service
Open the Data Loss Prevention interface
- Dome Service URL - Once you add DLP to your ITarian account by activating your first license, our technicians will setup your DLP server instance. You will receive an email containing the URL of the server instance within two days of your license activation. You should enter this service URL during your first login to DLP
- Click 'Applications' on the menu bar then choose 'Data Loss Prevention' from the list
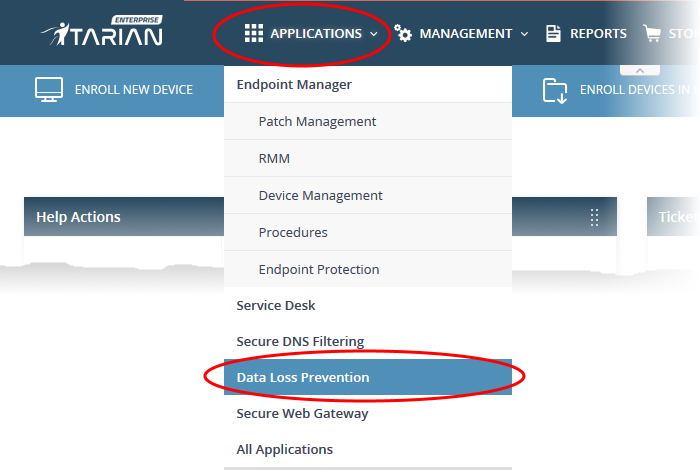
OR
- Click 'Applications' on the menu bar then click 'All Applications' from the list.

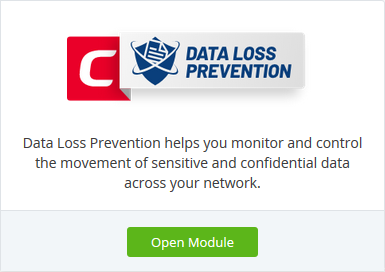
- Click 'Open Module' on the 'Data Loss Prevention' tile
The Data Loss Prevention interface will open. If you have not configured the service then the 'Application Settings' dialog will appear:

- Enter the service URL that was sent to your
email then click 'Save'
- You can also enter the service URL by clicking 'Manage' > 'Applications' > 'Data Loss Prevention' > 'Settings'. See Configure App Settings and Dome Service URL for help with this.
For more help to use Data Loss Prevention, see https://help.comodo.com/topic-283-1-596-7050-Introduction-to-Comodo-Dome-Data-Protection.html


