


Integrate your Office 365 Account with SOCaaP
You can integrate your Office 365 account with SOCaaP so any threats
and behavioral anomalies are detected. Once integrated, our SOC team
analyzes data logs from your Office 365 account for malware activity and
other anomalies.
You have to first configure your Azure AD application and SOCaaP so as to collect data.
Configuration Steps
Step 1 - Create an API Integration Application within Registry
- Log into your Azure account (https://portal.azure.com).
- Navigate to App registrations and create a new app by clicking ‘+ New registration’
- Fill application details as shown below:
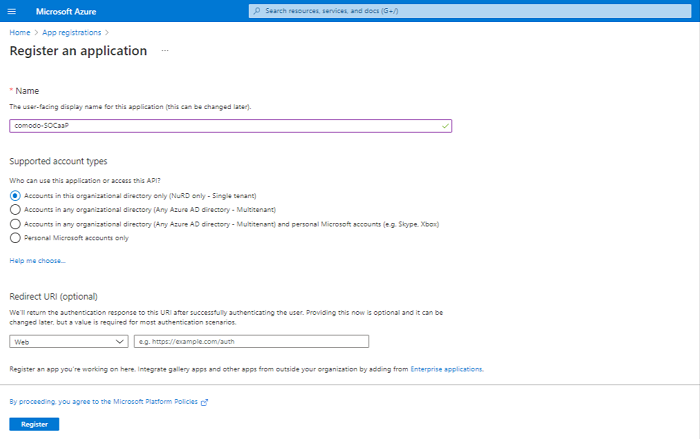
- Name: ITarian-SOCaaP (or any other suitable label)
- Supported account types: Choose "Accounts int this organizational directory only"
- Click "Register"
Note down the Application (client) ID and Directory (tenant) ID.
Step 2 - Create Security Credentials for Registered Application
- Click ‘Certificates & Secrets’ on the left
.png)
- Click ‘+New client secret’
- Add a description for your client secret.
-
Select an expiration for the secret or specify a custom lifetime
- Client secret lifetime is limited to two years (24 months) or less. You can't specify a custom lifetime longer than 24 months.
- Click 'Add'
- Copy the secret's value. This secret value is never displayed again after you leave this page.
Step 3 - Add Permissions for the Registered Application
- Click ‘API Permissions’ on the left then ‘Add a Permission’
- Click ‘Microsoft Graph’ and select ‘Application Permissions’
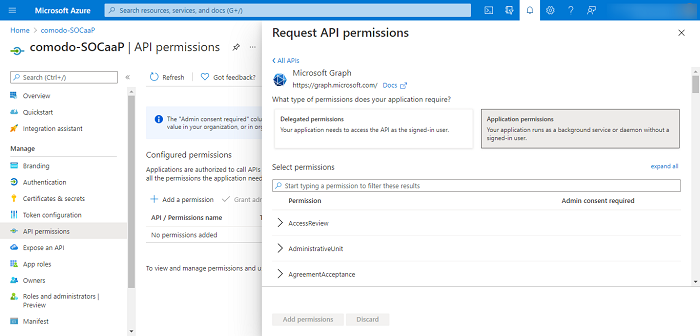
- Add permissions as shown below:

- Click ‘Add a permission’ again and select ‘Office 365 Management API’ and toggle ‘Application Permissions’

- Add permissions as shown below:

- Click ‘Add a permission’ and close the tab
Step 4 - Configure SOCaaP with Azure Application Registration Attributes (Tenant Id, Client Id, Secret Key)
- Log into SOCaaP Customer Portal.
- Click "Settings" at the top left of the screen and scroll down to ‘Cloud Security Settings’

- Enter your client ID, tenant ID (generated in step 1) and secret key (generated in step 2) into the respective fields.
- Click "Register Your Account"
That’s it, your Office 365 cloud account is integrated with SOCaaP.
Contact your ITarian account manager for support if you have any trouble
integrating your cloud account with SOCaaP.