ITarian Help

Find the desired product help

SOCaaP

SOCaaP

Version 2.2

English

Print Help
SOCaaP Web Protection > Website Data And Settings > Content Delivery Network > Activate CDN For A Website
  • Introduction
    • Logging-in To The SOCaaP Console
  • Dashboard Overview
    • Summary
    • Alerts, Incidents And Website Vulnerabilities
    • Customer Health
  • SOCaaP Alerts/Escalations
    • Log-in To The Admin Console
    • The Home Screen
    • Service Summary
    • Incidents Overview
      • Incidents
      • Threat Summary
    • Log Collection Summary
    • Threat Communication Graph
    • Tickets
    • Reports
    • Notification Settings
    • Integrate Your Office 365 Account With SOCaaP
  • SOCaaP SIEM
    • Log-in To The Admin Console
    • The Main Interface
    • The Dashboard
    • Customer Asset Management
      • Add Customers
      • Add Assets For Monitoring
        • Hard Assets
        • Soft Assets
      • Configure Nxlog And Rsyslog To Send Logs To SOCaaP Server
      • Edit Customers
    • Query Management
      • Configure Event Queries
      • Long Term Analysis
      • Configure Custom Dashboards
      • Event Field Selection Settings
    • Manage Rules
      • Manage Correlation Rules
      • Manage Tagged Rules
      • Manage Aggregation Rules
    • Incidents
      • Manage Incidents
      • Incident Category Management
      • Category Action Management
    • Lists
      • Manage Live Lists
      • Manage Live List Content
      • Manage Range List Content
      • Manage IP Range List Content
      • Manage Multiple Column List Content
    • Manage Reports
    • Administration
      • Event Collection
      • Phantom Settings
      • Manage Users
    • Appendix 1 – Field Groups And Event Items Description
    • Appendix 2 – SOCaaP Supported Logs
  • SOCaaP Web Protection
    • Add Websites
    • The Main Interface
    • The Dashboard
    • Website Data And Settings
      • Website Overview
      • Security Scans
        • Website Scans
        • Website Files Security Scans
          • Malware Scan Settings
            • Automatic Configuration
            • Manual Configuration
          • Run A Scan And View Results
          • Notifications, Malware Removal And Scheduled Scans
        • Vulnerability Scans
          • CMS Vulnerability Scans
          • OWASP Top 10 Vulnerability Scans
      • Content Delivery Network
        • Activate CDN For A Website
        • CDN Settings
        • View CDN Metrics
      • Firewall
        • WAF Statistics
        • WAF Events
        • Configure WAF Policies
        • Manage Custom Firewall Rules
      • SSL Configuration
      • DNS Configuration
      • Add Trust Seal To Your Websites
      • Back Up Your Website
        • Backup Settings
        • On-Demand Backup
        • View Backup Records And File Statistics
        • Restore And Download Website Files
        • Delete Backups
    • Manage Your Profile
  • Sensor Installation
    • Requirements
    • (Option 1) Create Installation Media
    • (Option 2) Deploy Virtual Machine Environment
      • Create A New Virtual Machine
      • Configure Memory Size
      • Configure Hard Disk
      • View VM Summary
      • Configure Network Settings
      • Select VM Startup Disk
    • Sensor Installation Steps
    • Sensor Configuration Steps
      • Login To The Web Portal
      • User Settings
      • Configure Network
      • Configure Timezone
      • Key Activation
      • (Optional) Valkyrie Key Verdict
      • (Optional) Forward Log
  • Frequently Asked Questions
  • About ITarian Security Solutions

Activate CDN for a Website


  • Select the target website from the drop-down at top-left
  • Click 'CDN' > 'Settings' > 'Activation'

You need to change your site's authoritative DNS server to ITarian  DNS in order to activate the CDN. Alternatively, you can add a CNAME entry to your DNS records.


See the following links for more help:


  • Register your site with ITarian DNS
Activate the CDN:

  • Option A - Change your authoritative DNS to ITarian DNS
  • Option B - Add a CNAME to your DNS

Register your site with ITarian DNS


  • Select the target website from the menu at top-left
  • Click the 'CDN' tab
  • Click 'Settings'
  • Click the 'Activation' tab

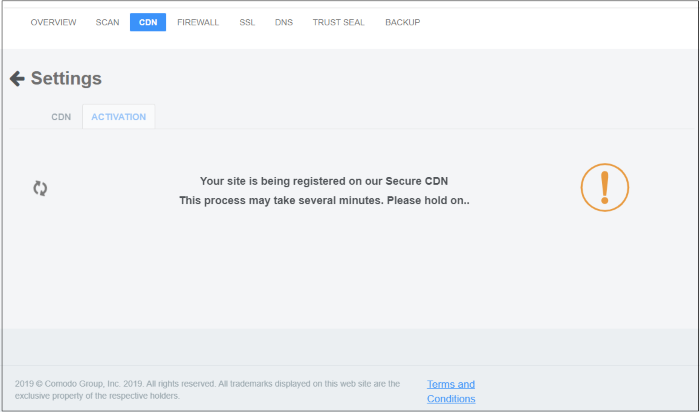
SOCaaP Web Protection automatically registers your site with the CDN service:


Next, use one of these two methods to configure your site to use our DNS:


  • Change your authoritative DNS to ITarian DNS
  • Add a CNAME to your DNS


Note - You should also configure SSL settings in SOCaaP Web Protection to avoid interruptions to HTTPS traffic. See SSL Configuration for more on this.


Option A - Change your authoritative DNS to ITarian DNS


  • Click CDN > Settings > Activation
  • ITarian name servers are shown in the ‘value’ column:


  • Go to your site's DNS management page and enter the new name servers
  • See https://support.google.com/domains/answer/3290309?hl=en if you need more help with name server changes
  • It may take up to 24 hours for the update to propagate. The status column will say ‘Name servers are set’ once the change is live:


  • After changing to ITarian DNS, you need to use SOCaaP Web Protection to manage your DNS settings going forward
  • For example, changes to your MX records must be done in SOCaaP Web Protection, not in your web host's DNS management page
  • You can access the management page as follows:
  • Select a website from the drop-down at top-left
  • Click the ‘DNS’ tab to manage the site’s DNS records
  • See 'Manage DNS Records' if you want further help with this


Option B - Add a CNAME to your DNS


  • Click 'CDN' > 'Settings' > 'Activation'
  • The CNAME and A records for your site are shown in section B:


  • Go to your website's DNS management page and enter the 'CNAME' and 'A' records
  • See https://support.google.com/a/topic/1615038?hl=en if you need more help to add records
  • DNS propagation may take around 30 minutes depending on your hosting provider
  • The status column will say ‘Configured’ once the change is live:

Comodo Help
  • IT Platform:
  • Help
  • Scripts
  • Wiki
  • Forum
  • Developer
  • RMM
  • Patch Management
  • Service Desk
  • ITSM
  • Managed Service Provider
  • Managed Detection and Response
  • Ticketing System
  • Helpdesk
  • ITIL

Copyright 2025 Itarian