

Create a Ticket workflow
- Click 'Admin Panel' > 'Manage' > 'Workflow'
Workflows are the rules created to
perform some automated actions on the tickets once the ticket created by the
users. We need to determine the conditions and actions for the workflows.
To create a workflow
- Navigate to Admin panel > Manage > Workflow

- Click 'Create'
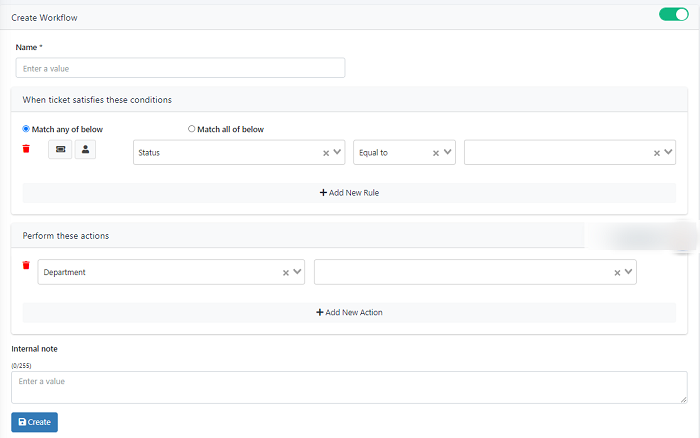
- Name - Add a name of the workflow in the given box. This name is used for identification while applying for a ticket.
- Click the toggle button to enable/disable a workflow.If the workflow status is active, it will be apply on all tickets created by agents/users. The workflow will not apply if the status is inactive.
Match any of the below - If any one of the conditions satisfied on the ticket, the actions will be performed automatically
Match all of the below - All the given conditions must be satisfied on the ticket to perform the action

Click 'Add New Rule' to create a new workflow
- Ticket Field - This option enables the ticket form fields. For the enabled ticket form fields, you can set criteria.for ex: Source, Department, Select, Text field, etc.
- User Field - This option enables the user form to apply the conditions. for ex: User name, First name, Last name, Organisation, Organisation department, etc.
-
You can set up the rule based on the ticket form or the user form attributes. So that whenever tickets created in the system it checks for the tickets satisfying the rule to apply some actions. Also, you can set up multiple conditions in the workflow by clicking on the “Add New Rule” option.
- Click 'Add New Action to create a new
- Choose the action that has to be performed on the ticket from the drop-down menu. When the conditions on the ticket are satisfied, the stated actions will performed.

Once the workflow is created, you can add internal notes for the created workflow
- Click 'Create' to save your details
Edit a Workflow
- Go to Admin Panel > Manage > Workflow.
- Click on the Edit button to edit the workflow details.
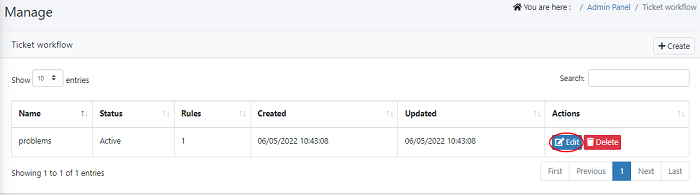
- Once the changes are made click on the update button.
Delete a workflow
- Navigate to Admin Panel > Manage > Workflow.
- Click on the Delete button to delete the workflow details.
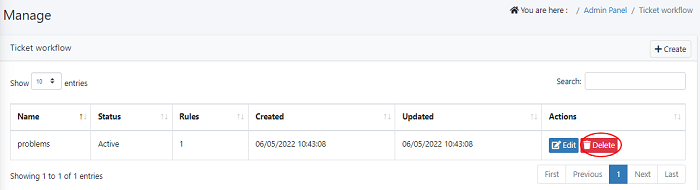
- A Delete pop-up confirmation is displayed. Click on the delete button to delete details.