Manage Leads
- The lead list lets you view and update lead contact information, industry, assigned staff member and more.
- You can also schedule activities for the lead from this interface. Activities will be added to the calendars of team members assigned to the lead.
- You can associate emails, products, campaigns and services records to a lead from here. You can also send automated emails to the lead, and transfer lead ownership.
To view lead details:
- Click 'All' > 'Leads' to open the lead list
- Click on a lead to view the lead summary
- Click 'Lead Details' if you want to see even more.
- Click 'All' > 'Leads' to open the lead list
- Click on a lead's first name and then the 'Edit' button at the top right of the 'Lead Summary' interface
OR
- Click 'All' > 'Lead' to open the 'Lead List' interface
- Place your mouse cursor over the name of a lead to reveal the action buttons on the right of the row
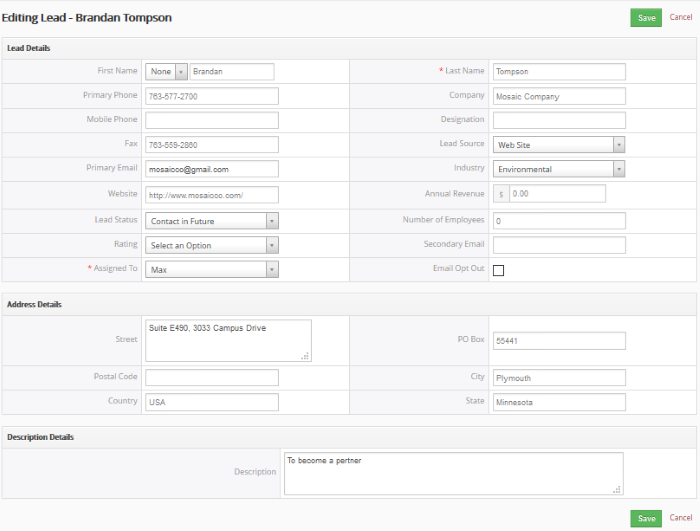
- Click the 'pencil' icon to open the lead edit interface:

- See this table for descriptions of the fields in the 'Lead Details' interface
- Administrators can edit a lead to update it with the latest campaign progress
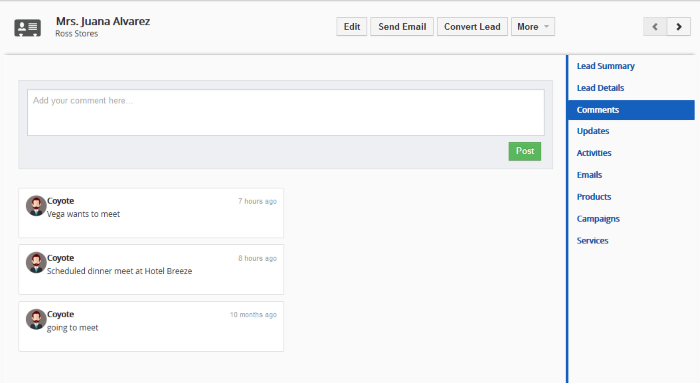
The comments part of the lead record allows staff to post internal memos about the lead.
To view a comment in a record:
- Click 'All' > 'Leads' (under 'Marketing and Sales') to open the 'Leads List' interface
- Choose a lead record and enter your comments and click 'Save'
OR
- Click 'Comments' in the 'Leads Summary' interface
- Enter your comments and click 'Save'

Activities
Activities
consist of 'Events' (meetings, calls, webinars etc) and 'To Dos'
(product delivery, purchase etc). Administrators can
add 'Activities' to a lead and these will be added to the CRM calendar. Activities
can be viewed by administrators and staff members to whom the
lead is assigned. Assigned staff and administrators can
add an 'Event' or 'To Do' as an activity of a lead record.
To create an Event/To Do:
- Click 'All' > 'Leads' (under 'Marketing and Sales') to open the 'Leads List' interface
- Choose a lead then click 'Activities' from the menu on the right
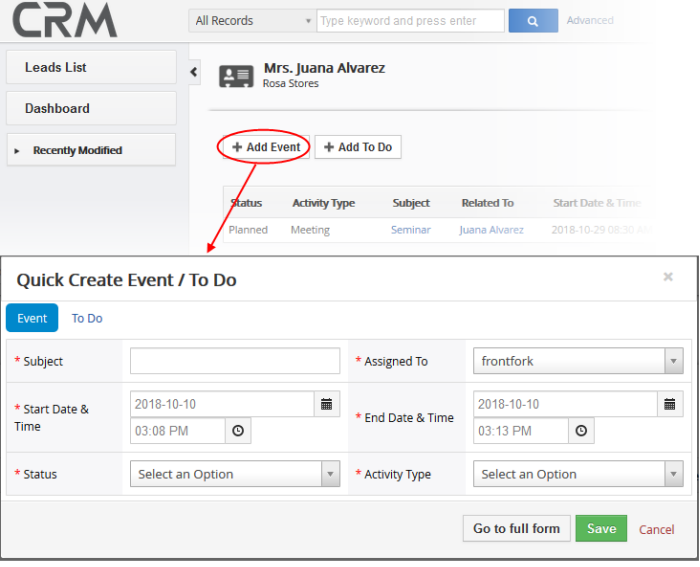
- Click 'Add Event' or 'To Do' in the activities interface.
OR
- Click 'More' on the top right of any of the lead interfaces from the right pane.
- Choose 'Add Event' or 'To Do' in the drop down menu.

The event / to-do dialog will open:
- Complete your event details and click 'Save'.
Please note that the 'Activity Type' option is only available for quick events.
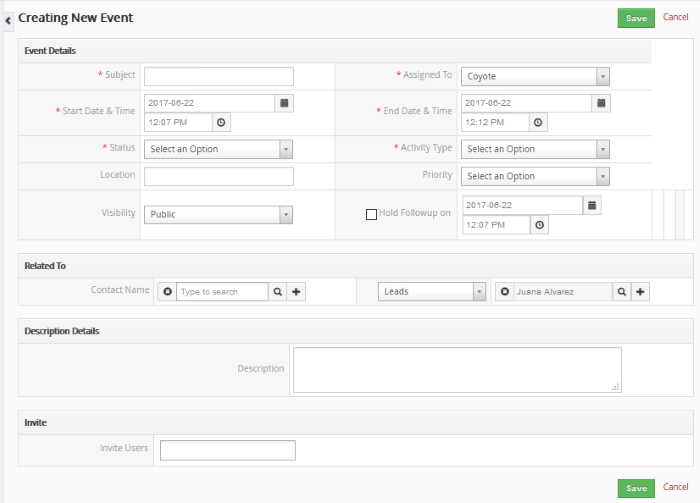
The information in the quick event dialog is basic in nature and will be used to populate the calendar entry. Use the 'full form' if you want to create a detailed event with more information (priority, visibility etc).
- To create a detailed event, click the 'Go to full form' button in the quick event dialog:

- Enter the required details and click 'Save'.
See Manage Shared Calendar for more details on the 'Event/To Do' full form.


