Block / Allow Specific Websites to Specific Users
Comodo Client Security allows you to block or allow access to specific websites, or groups of websites, to different users. This involves two steps:
2. Click 'Website Filtering' on the left
3. Select 'Categories' tab from the 'Website Filtering' interface

4. Click 'Add' from the options at the top and choose 'Add Category' from the drop-down. The 'Edit Property' dialog will open:

5. Enter a name for the category and click 'OK'. The new category will be created and added under the 'Categories' tab.
6. Select the new category > click 'Add' from the options at the top > choose 'Add Website' from the drop-down. The 'Add Website' dialog will open:
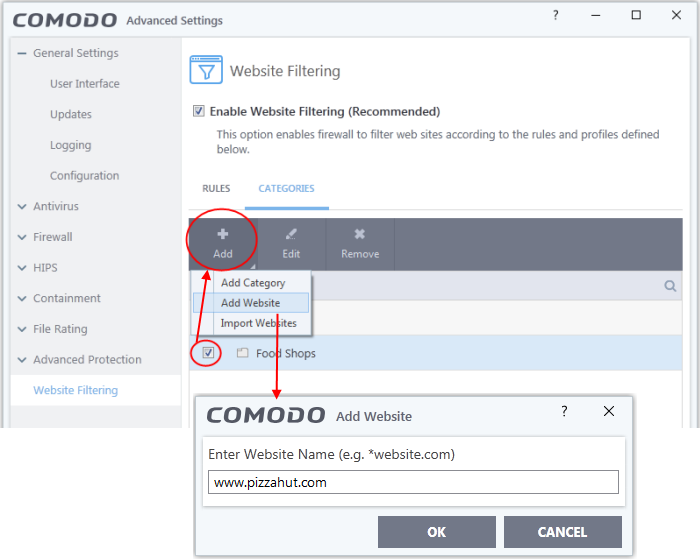
7. Type the website or text string you wish to add to the category. See the following notes for advice on this:
- To add a specific website/webpage, enter the full URL of the website/webpage
- To include all sub-domains of website, add a wildcard character and a period in front of the URL. For example, *.friskywenches.com will cover friskywenches.com, login.friskywenches.com, pictures.friskywenches.com, videos.friskywenches.com and so on.
- To include all websites with URLs that start with a specific string, add a wildcard character after the string. For example, “pizza*” will cover 'pizzahut.com', pizzacorner.com, and so on.
- To include all websites with URLs that contain a specific string, add the wildcard character before and after the string. For example, “*pizza*” will cover hotpizzanow.com, spicypizzadishes.net and so on.
The website(s) will be added to the category.
8. Repeat the process to add more websites to the category.
9. Repeat the process to add more website categories.
10. Click 'OK' in the 'Advanced Settings' interface to save your settings.
Create rules to block or allow websites to specific users
2. Click 'Website Filtering' on the left
3. Checkbox 'Enable Website Filtering'
4. Click 'Rules' tab > 'Add' at the top. The 'Website Filtering Rule' dialog will open:
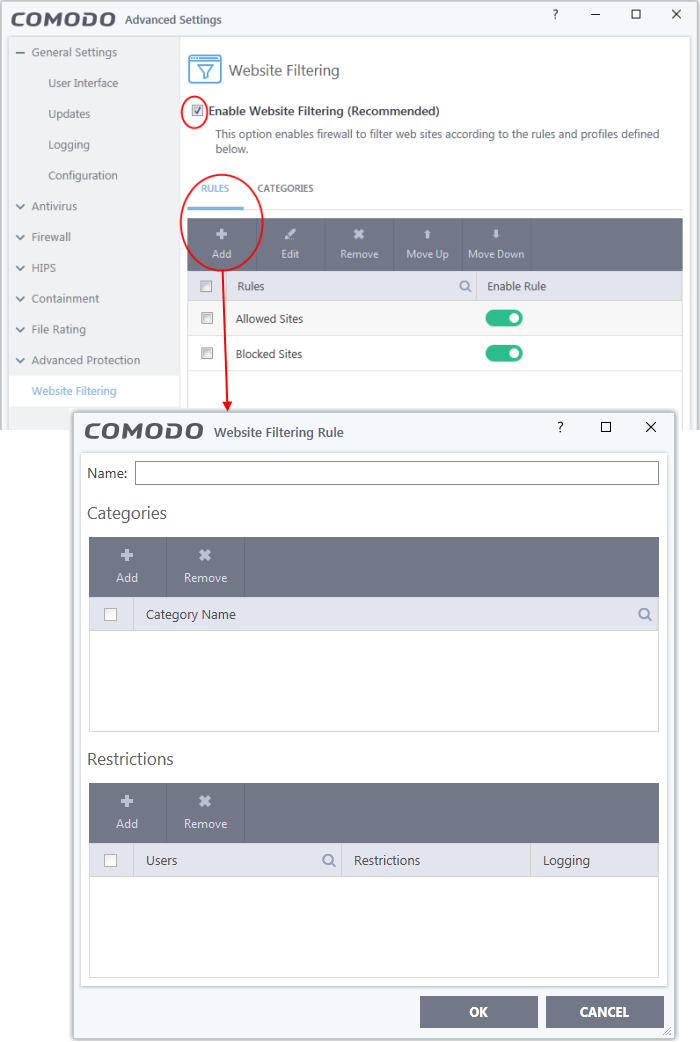
5. Enter a name for your new filter in the 'Website Filtering Rule' dialog.
6. Select the categories to add to the filter:
- Click 'Category' pane and choose 'Add'.
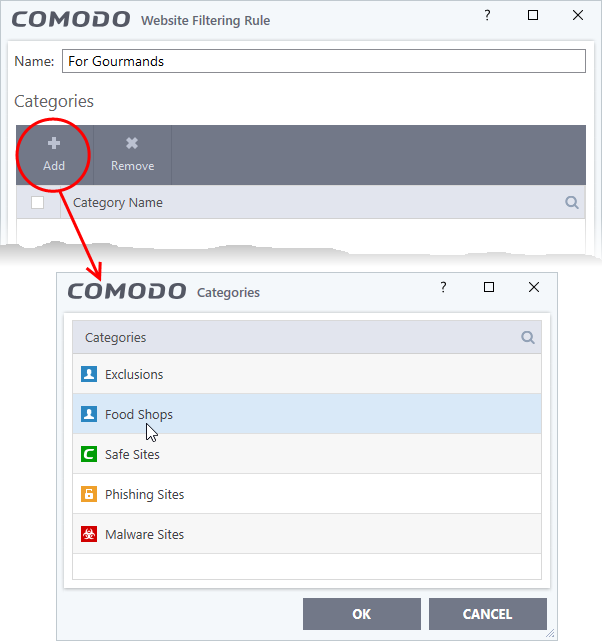
The 'Categories' dialog contains a list pre-defined Comodo categories and any user created categories. Comodo categories cannot be modified.
- Comodo Safe Sites - Websites that are considered safe according to the global whitelist
- Comodo Phishing Sites - Websites that lead to phishing websites, as per dynamically updated Comodo Blacklist
- Comodo Malware Sites - Websites that may inject malware into your system, as per dynamically updated Comodo Blacklist
- Select a category and click 'OK' to add it to your rule. Repeat the process to add more categories.
For more details on creating and modifying categories, see Website Categories.
7. Add Users or User Groups to whom the rule should be applied:
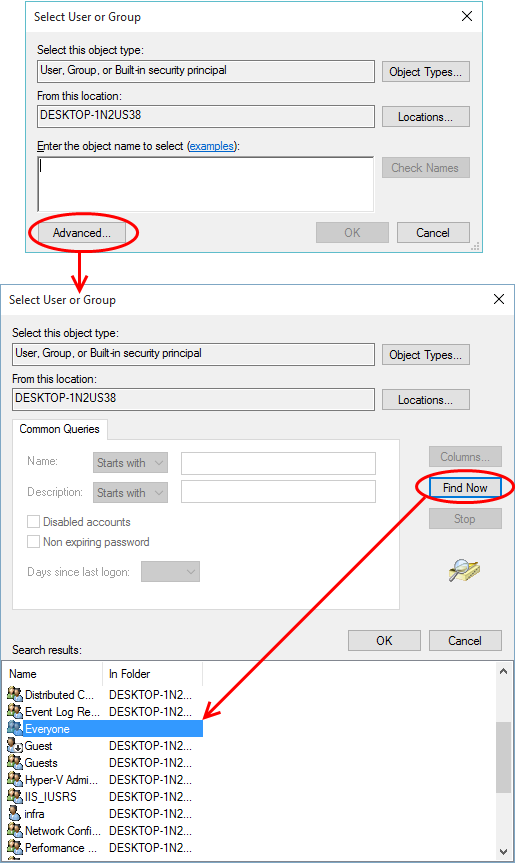
- Click 'Add' at the top beneath the 'Restrictions' pane. The 'Select User or Group' dialog will appear:
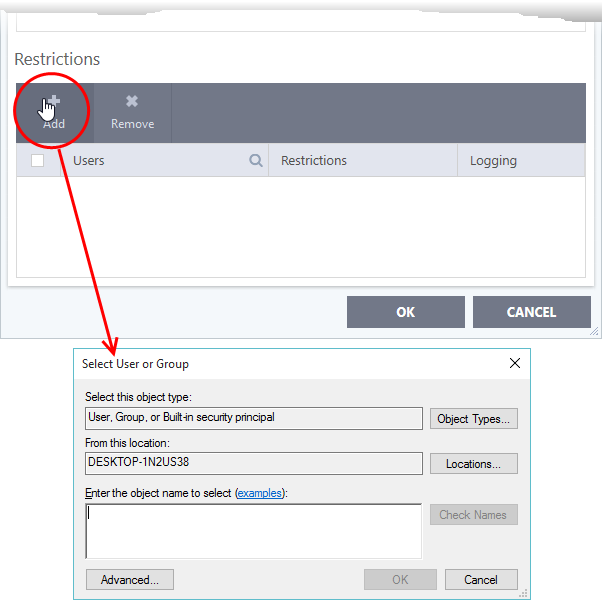
- Enter the names of users to whom the filter should apply in the 'Enter the object name to select' box. Use the format [domain name]/[user/group name] or [user/group name]@[domain name]. Alternatively, click 'Advanced' then 'Find Now' to locate specific users
- Click 'OK' to confirm the addition of the users
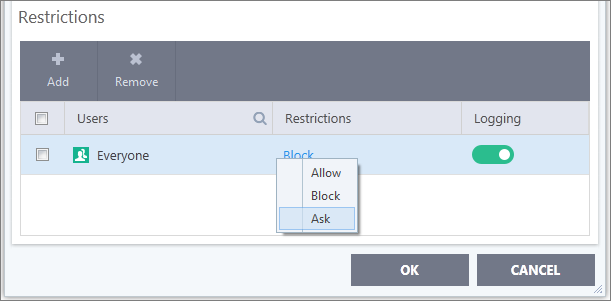
- After adding users or groups, you need to specify what restriction will apply to them. You can allow or block them from viewing the websites in the category or ask them if they want to continue. This is done by modifying the link in the 'Restrictions' column:
8. Click 'OK' to save your new rule. The rule will become effective immediately.
- Allow - The websites in the categories can be accessed by the user
- Block - The websites in the categories cannot be accessed by the user
- Ask - An alert will be displayed in the browser if the user tries to access any of the websites in the category. The user can decide whether or not to continue.
- Use the 'Logging' switch to choose whether or not attempts to access a categorized website are logged.
9. You can disable or enable rules at any time using the switch under the 'Enable Rule' column.


