


Manage Default Profiles
- 'Default'
profiles are automatically assigned to new devices which match their
operating system IF no user / user-group profile exists for the OS.
- Default
profiles are only applied if no user or user-group profile exists
for the operating system.
- If
you remove all user profiles from a device then they will be
replaced by the appropriate default profiles.
- You can mark any profile you want as a 'default' profile. You can also apply multiple default profiles to the same devices.
- Endpoint
Manager ships with the following default profiles:
- Windows
- Security Level 1 Profile
- Mac
OS - Security Level 1 Profile
- Android
- Security Level 1 Profile
- iOS
- Security Level 1 Profile
- Linux - Security Level 1 Profile
Each of the profiles above provides good, baseline security for managed devices. These profiles cannot be modified or deleted, but may be replaced on devices by another profile.
- Endpoint
Manager also ships with three, non-default, profiles for Windows:
- Windows
- Security Level 1 Profile [Former Standard Profile]
- Windows
- Security Level 2 Profile
- Windows - Security Level 3 Profile
- You can remove 'default' status from any profile, including the 'built-in' profiles mentioned above. However, it is mandatory to have at least one default profile per operating system.
- You can turn any profile you want into a default profile. You can also clone a default profile to use as a template for a new profile.
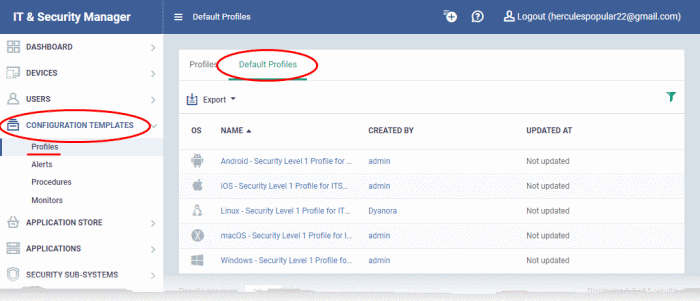
View and
manage default profiles
- Click
'Configuration Templates' > 'Profiles'
- Select the 'Default Profiles' tab at the top.
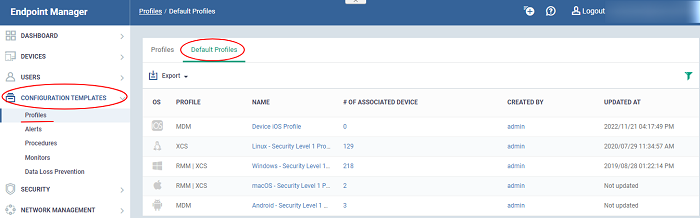
The image above shows the default profiles shipped with Endpoint Manager.
Click the
following links for more help:
You can turn any profile into a 'default' profile. You can do this when you create a new profile, or by editing an existing profile.
- Click 'Configuration Templates' > 'Profiles'
- Click the 'Profiles' tab
- Click 'Create' and choose the OS of the profile:

- Enter a name as 'Device Windows Profile' and description for the profile
- Click the 'Create' button
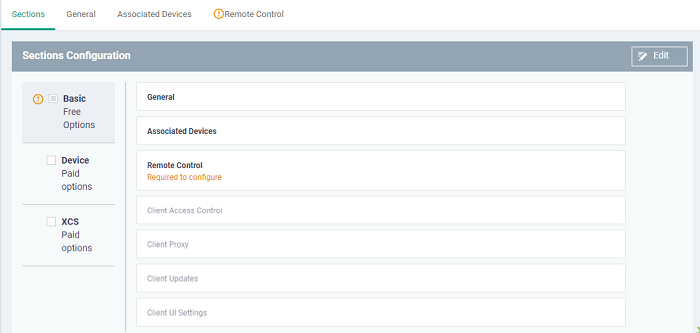
The profile
will open at the 'Section' screen.
- Click
'Edit' at the top right
- Click 'ITarian Basic' > Select 'Remote Control' from the list > Click 'Save'
- After saving the profile the system will dispaly the new profile sections.You need to configure the settings that highligted in the 'Yellow warning text' and 'Plug icon' on the section title.
- Click 'Remote Control' > Click 'Edit'
- Remote Control' settings let you choose the protocol and ports used for remote connections.There are two tabs, ‘Device Takeover’ and ‘File Transfer’. These two are independent of each other.
- Click the 'Device Takeover' tab and configure the options below:
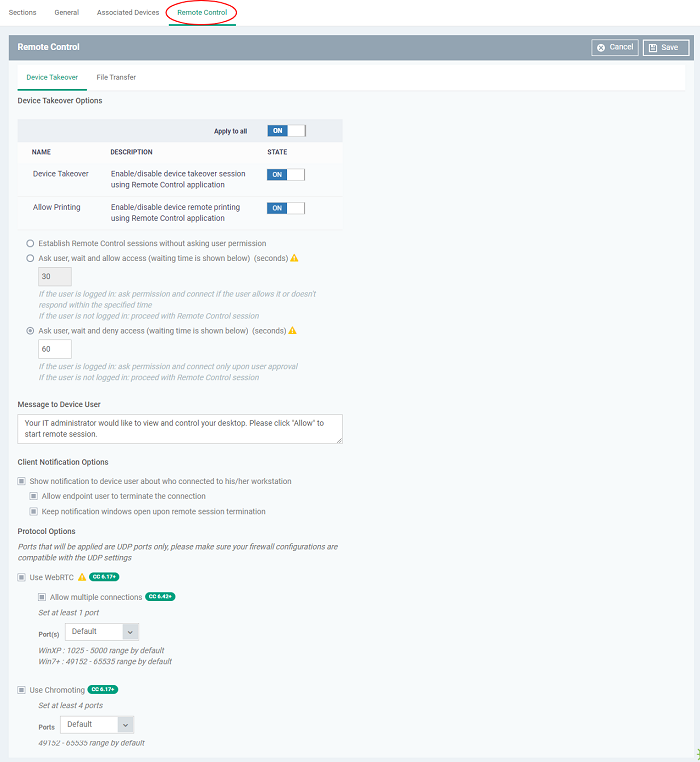
- Enable Device Takeover gives you full control of the remote device'. Use the On/Off button to enable the device to take over the session
- Select 'Ask user, wait and deny access' - Show a message to the user which requests them to accept the connection (as shown above). The connection attempt will be abandoned if the user does not respond within the timeout period.
- Enter the timeout period (in seconds)
- Click 'Save' to apply your changes to the profile.
- Go to 'File Transfer' tab
- The file transfer feature lets you perform file operations on the remote computer. For example, it allows you to copy files to and from the remote computer, and create/delete/rename items.
- Enable 'File Transfer' it allows admins to view files/folders on remote devices. You can enable this setting in isolation if you only want admins to have read-access to the remote device.
- Click 'Save' to apply your changes to the profile.
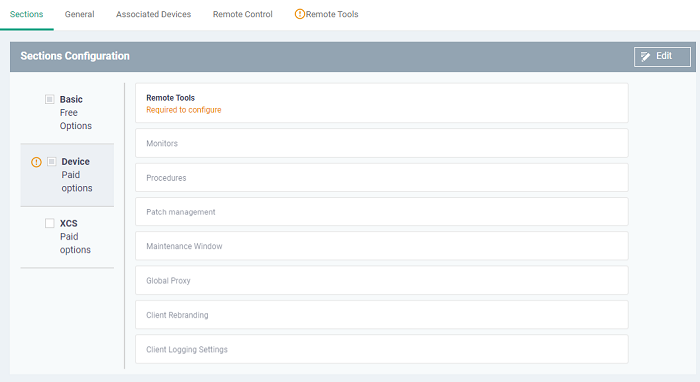
- Click 'Remote Tools' > 'Edit'
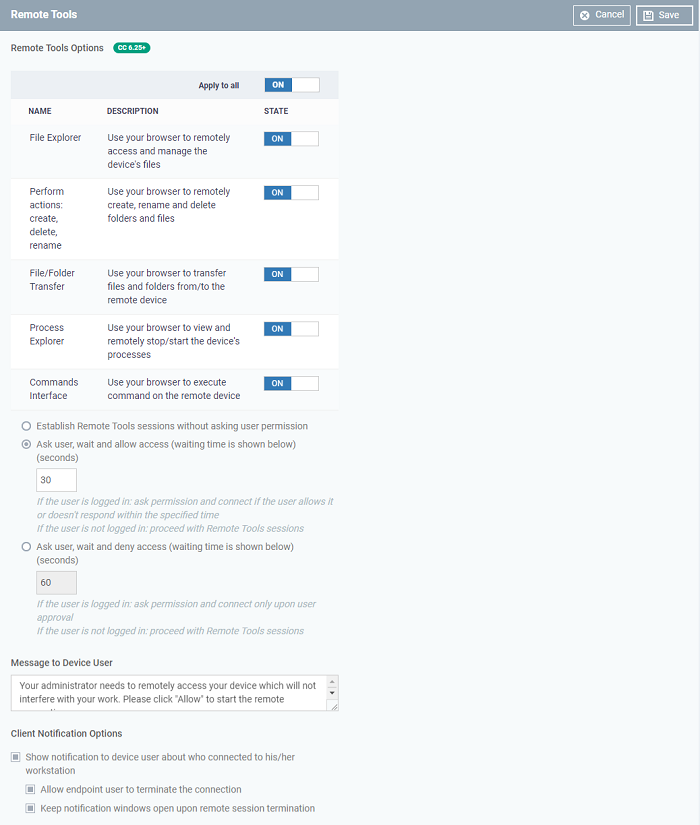
- Use the 'Apply to all' switch at the top to enable or disable all remote tool configuration at-once
- Select 'Ask user, wait and allow access' - A message is shown to the user which requests them to accept the connection. The connection is established if the user does not respond within the timeout period.
- Enter the timeout period (in seconds) in the text box
- User not logged in: Endpoint manager will auto-connect to the device without showing a notification.
- Type a custom message that is shown in the connection request dialogue. The default message is shown if you make no changes here.
- Note - You can only enter a message if you choose one of the 'Ask...' settings.
- Enable 'Client Notifications Options' This area lets you configure the notification box which is shown on the endpoint when a remote session is active
- Click 'Save' to apply your changes
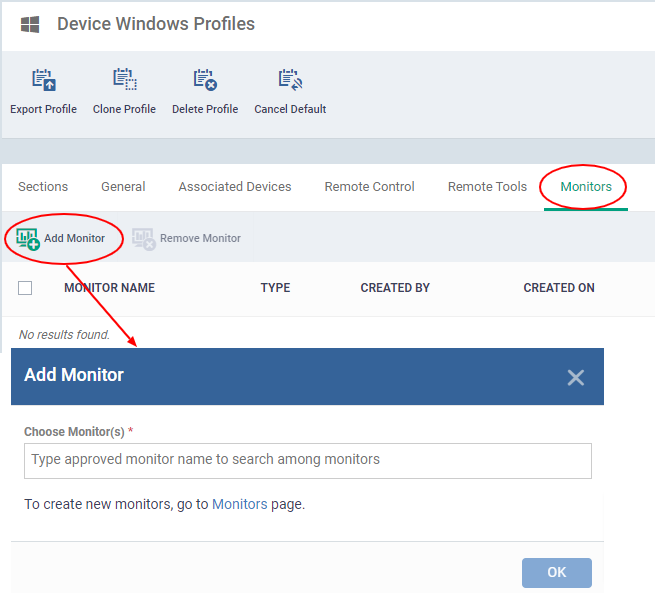
- Click 'Section' > 'Device' > 'Select 'Monitors'.You need to configure the monitor settings that are highligted in the 'Yellow warning text'.
The new profile will be listed in the 'Default Profiles' area:

You can edit the profile and add profile components (sections) as required. See Edit Configuration Profiles for more details.
Turn an existing profile as default profile
- Click 'Configuration Templates' > 'Profiles'
- Click the 'Profiles' tab
- Click
the name of the profile that you want to set as a default:
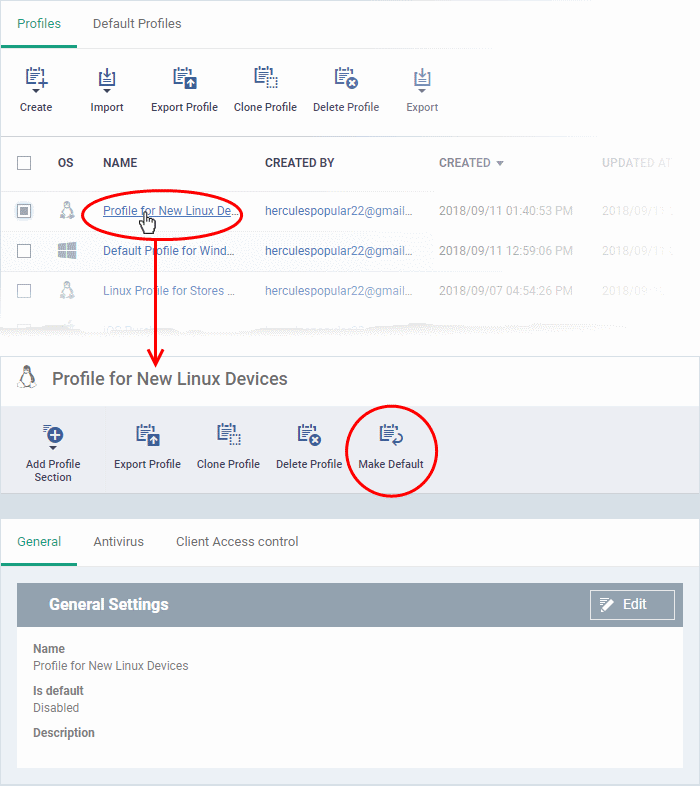
- Click the 'Make Default' button in the profile details screen.
Or
- Click the 'Edit' button then enable 'Is Default'
- Click 'Save'.
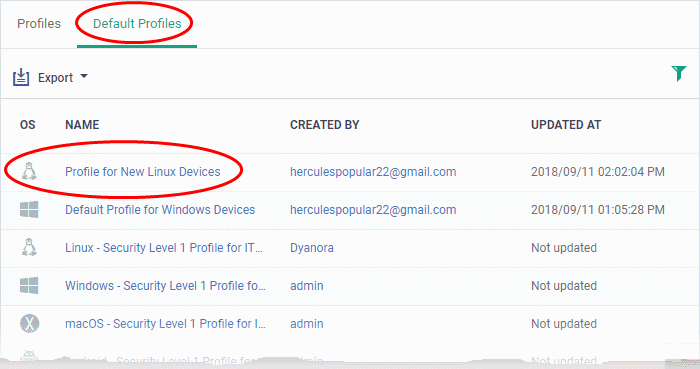
The
'Default Profiles' interface
|
Default Profiles - Column Descriptions |
|
|---|---|
|
Column |
Description |
|
OS |
The operating system of the devices to which the profile is applied. |
| Name |
The label of the profile.
|
|
Created by |
The admin who created the profile.
|
| Updated at |
Date and time the profile was most recently edited. |
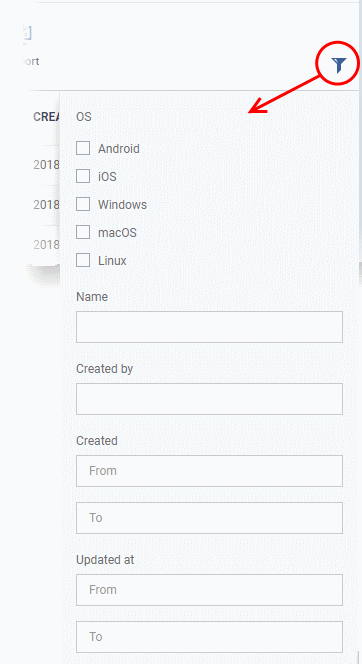
- Click any column header to sort items in ascending/descending order of the entries in that column.
- Click the funnel icon to filter by OS, profile name, author or date:
Assign default profiles
to devices
- New devices are automatically given the default profiles for their operating system IF there are no user/user group profiles for the device owner.
- Conversely,
if you remove all user/user-group profiles from a device, then the
default profiles are automatically deployed to take their place.
- You can cancel the default status of built-in profiles so they are not applied to new devices on enrollment. They will also be removed from any existing devices.
- For devices with no profiles applied, you can carry out on-demand functions such as run antivirus scans, run a procedure and so on. For Windows devices with CCS installed, when there are no profiles applied, the default CCS settings will apply.
- To open the default profiles screen, click 'Configuration Templates' > 'Profiles' on the left then choose the 'Default Profiles' tab.
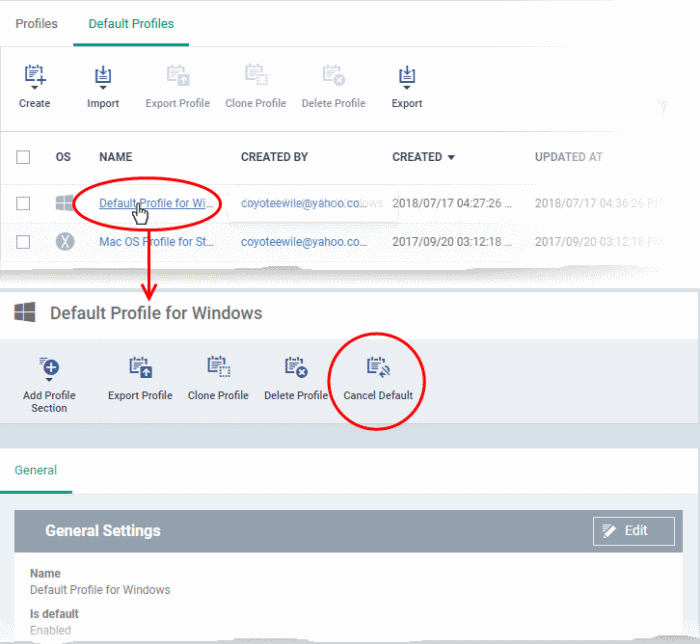
- Click the name of the default profile from the list
- Click 'Cancel Default' button at the top
Or
- Click
'Edit' on the right, deselect 'Is Default' check box and click
'Save'
The 'Edit' button is not available for built-in default profiles. You can remove default status only by clicking the 'Cancel Default' button at the top.
|
Note:
|
Export the list of Default Profiles to a CSV file
You can export the list of default profiles to a comma-separated values (CSV) file as follows:
- Click the 'Export' button above the table then choose 'Export to CSV':
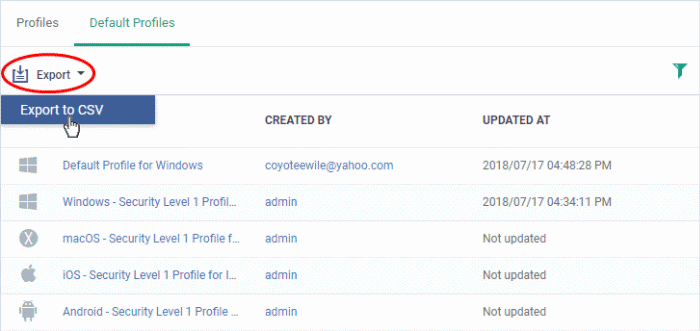
-
The CSV file will be available in 'Dashboard' > 'Reports'
- See Reports in The Dashboard for more details.