Import Windows Profiles
In addition to creating a new Windows profile from the Endpoint Manager interface, you can create new profiles for rolling out to endpoints or endpoint group(s) in the following ways:
- Import the security configuration of CCS from a managed endpoint and save it as a new profile
- Export a profile from EM in .cfg format then import it as a new profile
- Clone an existing profile and edit it to create a new profile
This section explains more
about import
CCS configuration from a selected endpoint.
- For more details on importing configuration from an exported profile, see Export and Import Configuration Profiles.
- For more details on creating a new profile by using an existing profile as base, see Clone a Profile.
Import CCS Configuration from a Managed Device
By importing the configuration of Comodo Client Security from an existing endpoint, you can create a Windows profile which can be deployed to similar machines on your network.
Step
1 - Export the current configuration from the selected device as an
.xml file
The current security configuration of the CCS installation on the endpoints depends on:
- The configuration profiles applied to the endpoint
- Manual configuration of the parameters at the endpoint.
|
Note: If you are manually configuring the security parameters, ensure that the option 'Enable local user to override profile configuration' is selected in the 'Client Access Control' section in the profile(s) in action on the endpoint. Otherwise your manual settings will be reverted and the security parameters will be automatically set as per the configuration profile(s) effective on the endpoint during the next polling cycle of the communication client. See Client Access Control for more details. |
You can export the CCS configuration from a managed Windows device in two ways:
Export
Configuration from EM interface
- Open the 'Device List' interface from the EM console by clicking 'Devices' > 'Device List' on the left
- Click the name of the device whose configuration you wish to export to open its 'Device Details'
- Click the 'Export Security Configuration' button:
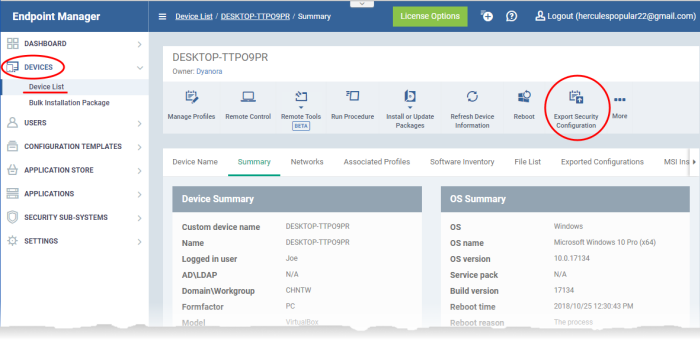
- The CCS configuration will be exported as a .xml file and saved in EM.
- You can view all configuration files exported from this device under the 'Exported Configurations' tab in 'Device Details':
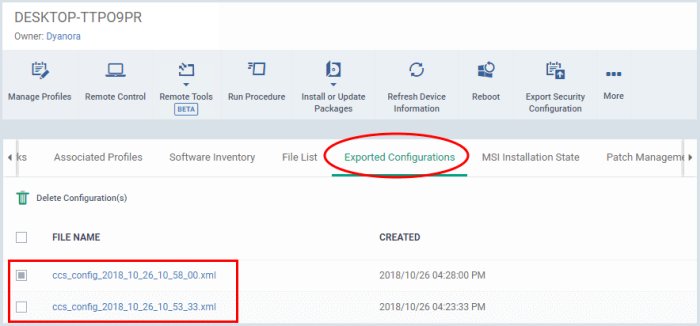
- Click the name of the file that you want to import as a profile and save it in a safe location.
- Then move on to Step 2 - Import the .xml file as a profile for application to required endpoints or endpoint group(s).
Manually export the CCS configuration from a selected device
- If you haven't done so already, configure the security settings of CCS at an endpoint to your requirements. See 'Advanced Settings' in the CCS guide if you need help with this - https://help.itarian.com/topic-399-1-904-11732-CCS-Advanced-Settings.html
- To export the current configuration as an xml file, run the command on the endpoint as given below:
C:/[installation folder of COCS]/>cfpconfg.exe --xcfgExport="C:
/.xml" --filter=""
For example, C:/Program Files/COMODO/COMODO Internet Security>cfpconfg.exe --xcfgExport="C:/winconfigprofile.xml" --filter=""
- Copy the .xml file from the endpoint to the computer from which the ITSM console is accessed.
- Then move on to Step 2 - Import the .xml file as a profile for application to required endpoints or endpoint group(s).
Step 2 - Import the .xml file as a profile for application to required endpoints or endpoint group(s)
- Click 'Configuration Templates' > 'Profiles'
- Click 'Import' > 'Import from 'Comodo Client Security Config file'
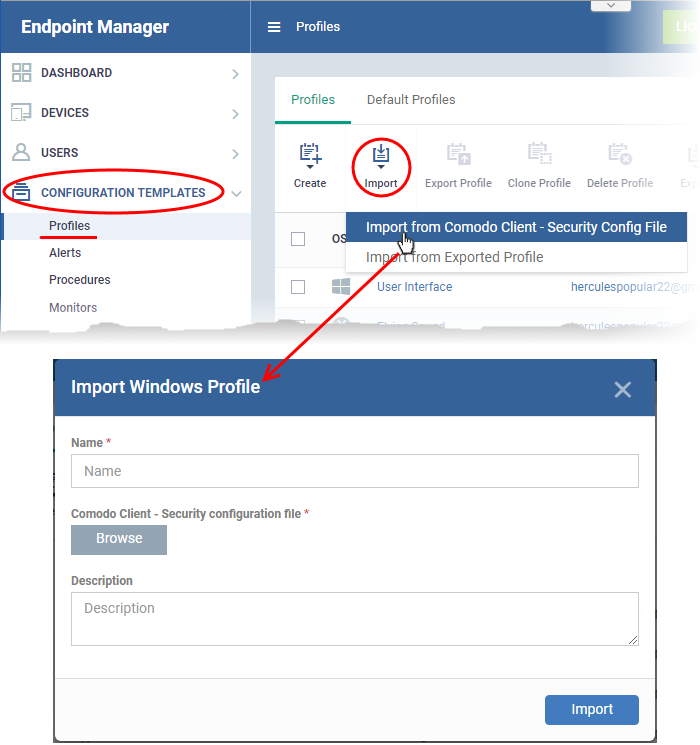
The 'Import Windows Profile' dialog opens.
- Enter a name and description for the profile.
- Click 'Browse', navigate to the location in your computer where the .xml file is saved, select the file and click 'Open'.
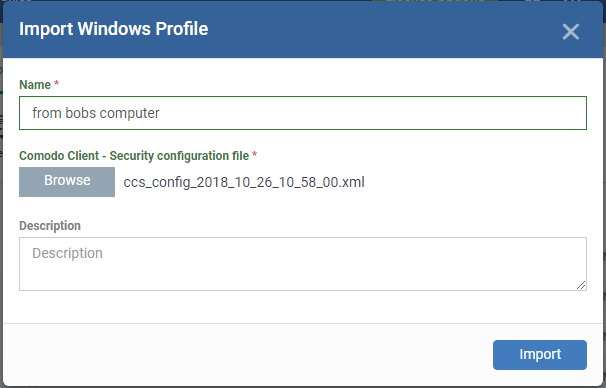
- Click the 'Import' button.
The Windows Profile interface will open with the security components pre-configured as per the settings in the configuration file.
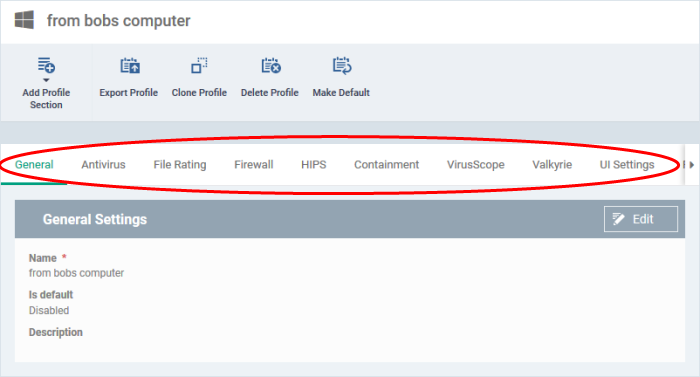
- The imported profile will not be set as 'Default Profile' by default.
- To change the name of the profile and/or to enable it as a default profile, click on the 'Edit' button
 at the top right of the 'General' settings screen, edit the settings and click the 'Save' button.
- You can now deploy this profile to endpoints and endpoint groups. You can add new profile components by clicking 'Add Profile Section' and can edit the settings for any security component by clicking the relevant tab. For more details on the options available under each
component, see explanation
of the component settings in Create
Windows Profiles.


