Account Security Settings
Click 'Settings' > 'Portal Set-up' then the 'Account Security' tab
-
This interface lets you configure security settings for EM admins that were created in Endpoint Manager itself ('Users' > 'User List' > 'Create User').
-
You can configure to compel users to change their password periodically and use two-factor authentication.
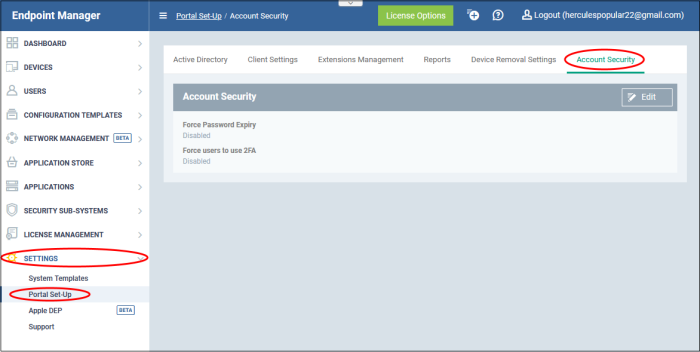
Click the following links for more information about each setting:
Configure Password Expiry Setting
Click 'Settings' > 'Portal Set-up' > 'Account Security' tab then the ‘Edit’ button at top-right
- This area lets you enable password expiration policy for admins that were created in Endpoint Manager itself ('Users' > 'User List' > 'Create User').
- This area does not implement password expiration policy for ITarian logins. If you created your admins in the ITarian portal, then please enable password expiration policy in ITarian instead ('Click user icon at top-right > ‘Settings’ > ‘Password and Account Policies’).
- You can create roles which allow users to login to Endpoint Manager if required. You can view and edit the privileges in each role at 'Users' > 'Role Management'. Click here if you want help with roles.
- The password expiration policy applies to EM and Remote Control tool. See Remote Management of Windows and Mac OS Devices for details using RC tool.
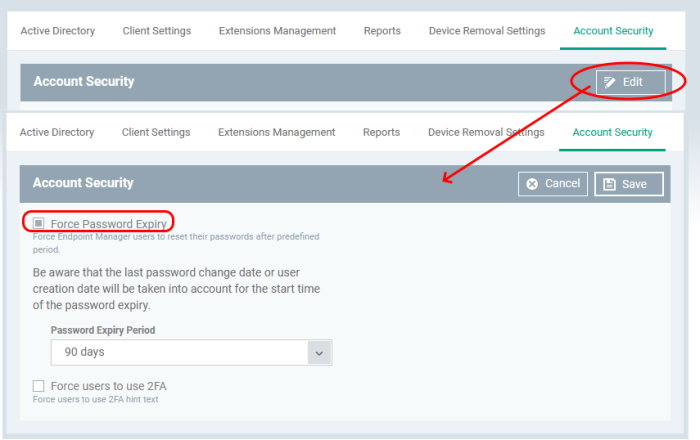
- Force Password Expiry – Select this to enable password expiration policy
- Password Expiry Period – Select the number of days after which the user is compelled to change his login EM login password. The maximum expiry period is 90 days for Comodo partners and up to 3 years for non-partners.
Click ‘Save’ to apply your changes. Users will receive alerts during every login to EM and Remote Tool to change password from seven days before the expiry date.
Configure
Two-factor Authentication Setting
Click 'Settings' > 'Portal Set-up' > 'Account Security' tab then the ‘Edit’ button at top-right
- Two-factor authentication adds additional security by requiring admins to present two forms of authentication before they can login to endpoint manager. They will need to enter their regular UN/PW + a unique code generated on their mobile device.
- This area lets you enable two-factor authentication (2FA) for admins that were created in Endpoint Manager itself ('Users' > 'User List' > 'Create User').
- This area does not implement 2FA for ITarian logins. If you created your admins in the ITarian portal, then please enable 2FA in ITarian instead ('Management' > 'Account' > 'Account Security Details').
- You can create roles which allow users to login to Endpoint Manager if required. You can view and edit the privileges in each role at 'Users' > 'Role Management'. Click here if you want help with roles.
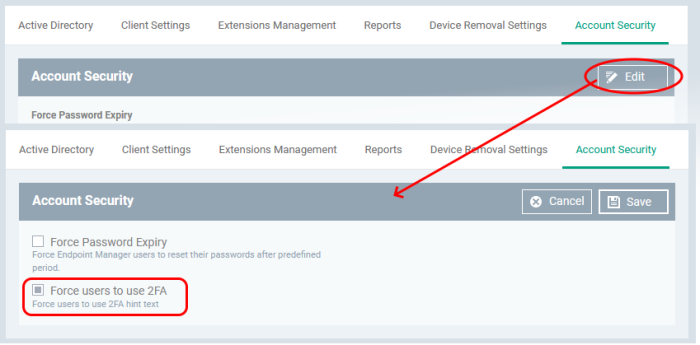
- Force user to use 2FA - If enabled, admins will need to set-up 2FA on their next login to the EM console. Setup involves installing the Google Authenticator app on their device. This app generates the codes that form the 2nd layer of authentication.
- Click 'Save' to apply your changes
- Admin enters his UN/PW in the EM login screen and clicks ‘Login’:
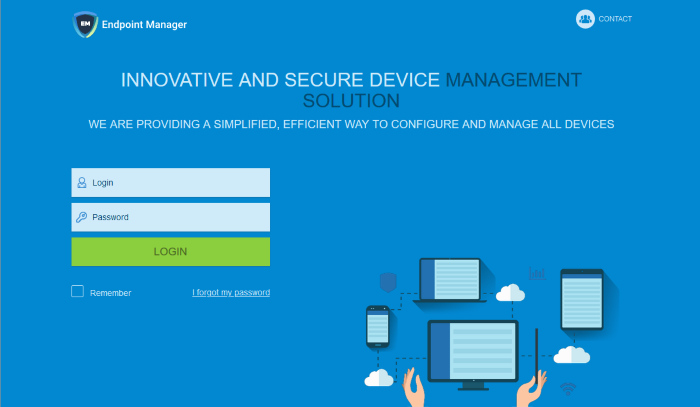
The two factor authentication activation screen is shown:
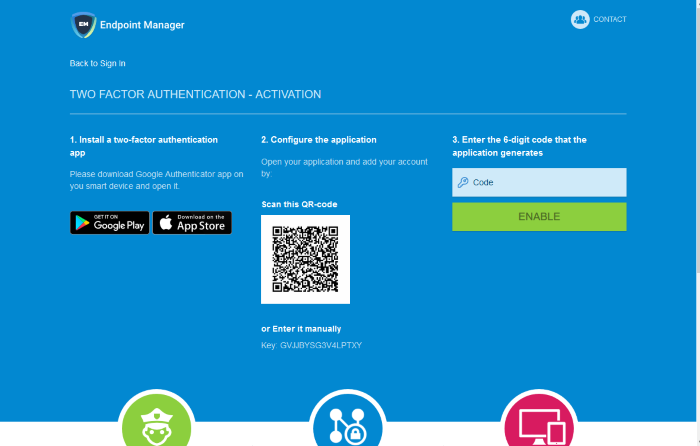
- Step 1 - Download the ‘Google Authenticator’ app and install it on your iOS or Android device
- Open the ‘Authenticator’ app and tap the ‘+’ icon
- Step 2 - Scan the QR code with the device camera. This will cause the Google app to generate the six digit code you need to complete pairing.
- Alternatively, enter the key shown below the QR code in the Google Authenticator app.
- Step 3 - After completing steps 1 and 2, a six digit authentication code is generated in the Google app. This code changes frequently and is unique to your account.
- Enter the verification code in the field provided
- Click ‘Enable’.
- A success message is shown along with 10 backup codes
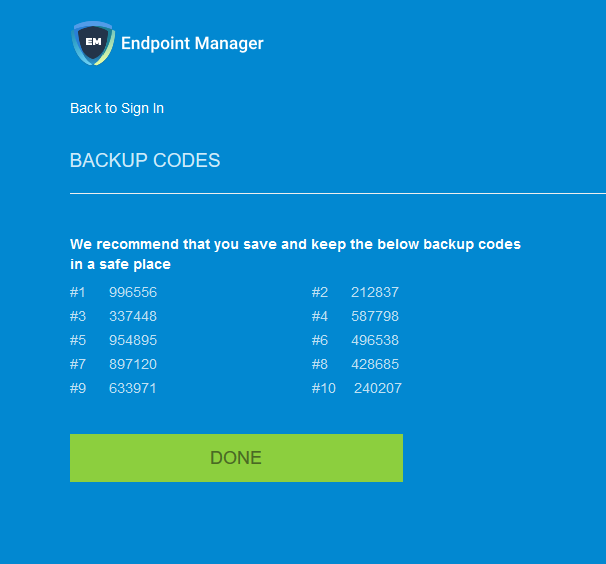
- You can use the backup codes to complete two-factor authentication if you do have the authentication device with you. Please make a copy of the codes. Each code can only be used once.
- Click ‘Done’. You will be logged in to your account.
Two-factor authentication is now configured.
- During next login to EM console, the two-factor authentication screen is shown after entering your username and password
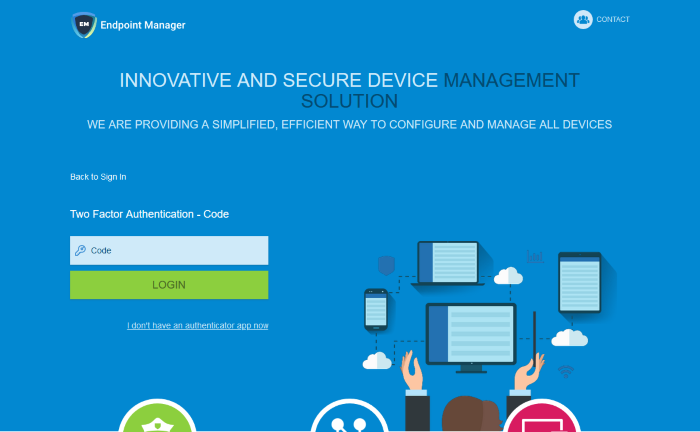
- Code – Open the Google Authenticator app on your paired device and enter the displayed code. Please note the code changes frequently.
- Click ‘Login’
Use Backup Codes
Endpoint Manager two-factor authentication allows you to use your backup codes in case you do not have your paired device with you during a login attempt.
- Click ‘I don’t have an authenticator app now’ link
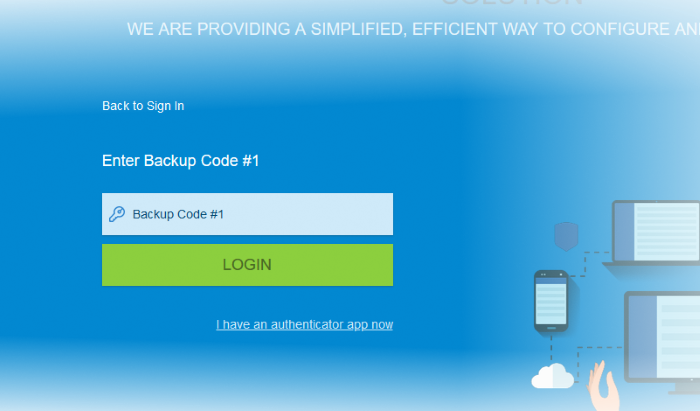
- Enter backup code 1 from the saved backup codes when you paired your device
- Click ‘Login’
Disable Two-Factor Authentication
- Individual admins cannot disable two-factor authentication on their own account as long as it is enabled by the account manager in EM.
- If 2FA is disabled by the account manager in EM, then you can deactivate it after logging in to your EM account.
- Login to your account by providing credentials and 2FA code.
- Click ‘Settings’ > ‘Portal Set-Up’ then ‘User Settings’ tab.
- Click ‘Security Settings’.
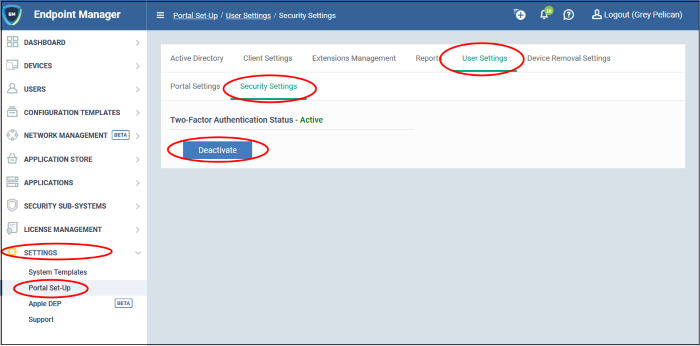
- Click ‘Deactivate’
A confirmation dialog is shown:
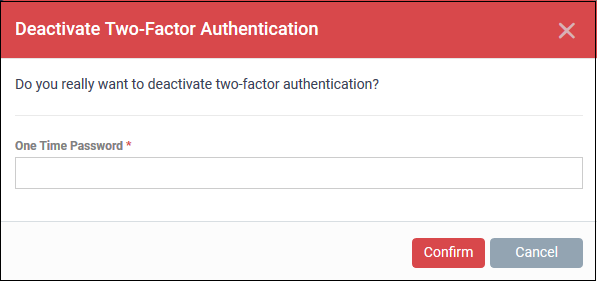
- One Time Password – Enter the code from your paired device
- Click ‘Confirm’
A success message is shown:

Two Factor Authentication
Activation by Admins
If 2FA is not enabled by your account manager in EM, you can enable it for yourself as follows:
- Login to your EM account
- Click ‘Settings’ > ‘Portal Set-Up’ then the ‘User Settings’ tab
- Click ‘Security Settings’
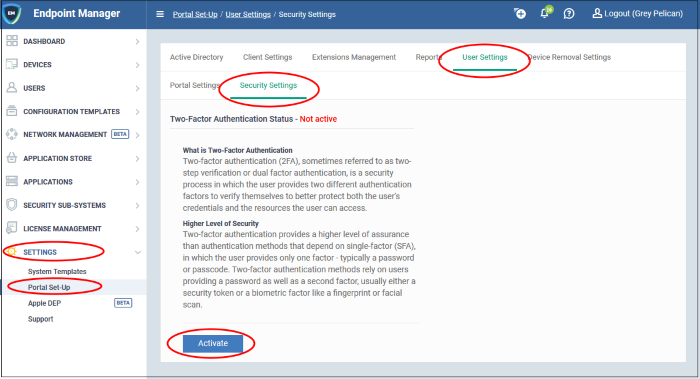
- Click ‘Activate’
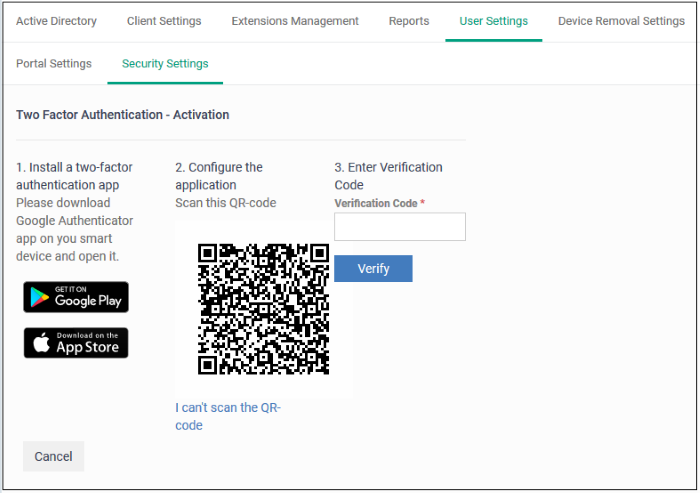
- The device pairing procedure is similar as explained in the section above.


