


Antivirus Settings for Linux Profile
The antivirus section lets you configure real-time monitoring, custom scans, scan schedules, exclusions and more.
Configure antivirus settings in a Linux profile
- Click 'Configuration Templates' > 'Profiles'
- Click on the name of a Linux profile
- Click 'Add Profile Section' then 'Antivirus' (if you haven't yet added the AV section)
OR
- Open the 'Antivirus' tab and click 'Edit' if it was already added
The antivirus settings screen will open:
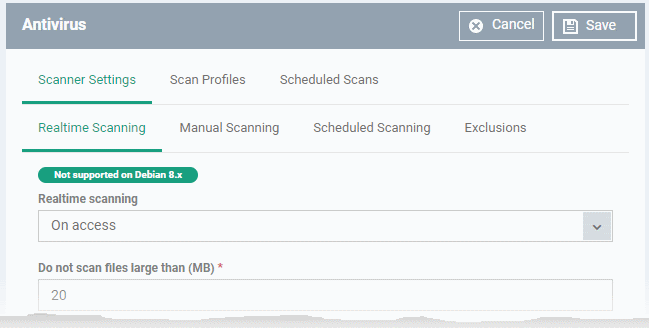
It contains three tabs:
- Scanner Settings - Configure real-time scans, manual scans, scheduled scans and exclusions.
- Scan Profiles - Create antivirus scan profiles that define specific folders, drives or areas to scan. Once saved, you can apply a scan profile to scheduled scans.
- Scheduled Scans - Timetable scans to be run on managed devices according to a selected scan profile.
Configure Scanner Settings for CCS for Linux
The 'Scanner Settings' area
contains four sub-tabs:
- Realtime Scanning – Set parameters for the 'always-on' virus monitor
- Manual Scanning - Set parameters for on-demand scans
- Scheduled Scanning - Set parameters for scheduled scans
- Exclusions - View and manage items which will be skipped by virus scans.
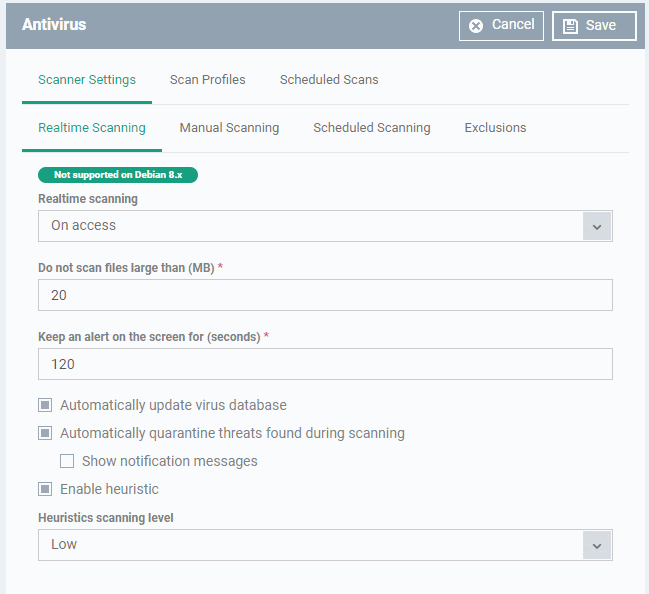
- Click the 'Realtime Scanning' sub-tab under 'Scanner Settings'
|
Please note: The real-time virus scanner is not supported on Debian. The settings in this screen do not apply to Debian devices. |
|
Real Time Scanning Settings - Table of Parameters |
||
|---|---|---|
|
Form Element |
Type |
Description |
|
Real time scanning |
Drop-down |
Enable or disable the background virus monitor.
|
|
Do not scan files larger than (MB) |
Text box |
Maximum file size that the antivirus should attempt to scan. Files larger than the size specified here are not scanned. (Default = 20 MB). |
|
Keep an alert on the screen for (seconds) |
Text box |
How long threat notifications should stay on-screen if not dismissed by the end-user. (Default = 120 seconds) |
|
Automatically update virus database |
Checkbox |
CCS will check for and download the latest virus database updates on system start-up, and subsequently at regular intervals.
(Default = Enabled). |
|
Automatically quarantine threats found during scanning |
Checkbox |
Threats will be encrypted and moved to a secure holding area where they can cause no harm. You can review quarantined items and delete, ignore or restore them.
(Default = Enabled) |
|
Show notification messages |
Checkbox |
Choose whether or not a notification is to be shown to the end-user, whenever CCS identifies a threat and moves it to quarantine. (Default = Disabled) |
|
Enable heuristic scanning |
Checkbox |
Enable or disable heuristics scanning and
define the scan level. The scan level determines how likely the scanner is to classify an unknown file as a threat.
(Default = Enabled with 'Low ' option) Background Note:
Background. Heuristics identify previously
unknown malware by checking whether it contains code typical of a
virus. If it is found to do so then the application deletes the
file or recommends it for quarantine. Heuristics is about detecting 'virus-like' attributes rather than looking for a virus signature which exactly matches a signature on the blacklist. This allows the engine to detect new viruses even if they are not in the current database. |
- Click the 'Manual Scanning' sub-tab under 'Scanner Settings'
- The options you set here will apply to manual scans on the endpoints on which the profile is active.
- A manual scan is one you run 'on-demand' on selected files, folder or drives. Manual scans can be launched from 'Security Sub-Systems' > 'Antivirus'.
- For more details on running on-demand scans on selected devices, see Run Antivirus and/or File Rating Scans on Devices.

|
Manual Scanning Settings - Table of Parameters |
||
|---|---|---|
|
Form Element |
Type |
Description |
|
Do not scan files large than (MB) |
Text box |
Maximum file size that the antivirus should attempt to scan. Files larger than the size specified here are not scanned. (Default = 20 MB). |
|
Scan archive files |
Checkbox |
CCS
scans archive files such as .ZIP and .RAR files.
(Default = Enabled). |
|
Automatically update virus database before scanning |
Checkbox |
CCS will check for and download the latest virus database before starting an on-demand scan.
(Default = Enabled). |
|
Enable cloud scanning |
Checkbox |
CCS detects the very latest viruses more accurately because the local scan is augmented with a real-time look-up of Comodo's online signature database. This makes it possible to detect zero-day malware even if your local virus database is outdated. (Default = Disabled). |
|
Enable heuristic scanning |
Checkbox |
Enable or disable heuristics scanning and
define the scan level. The scan level determines how likely the scanner is to classify an unknown file as a threat.
(Default = Enabled with 'Low ' option) Background Note:
Background. Heuristics identify previously
unknown malware by checking whether it contains code typical of a
virus. If it is found to do so then the application deletes the
file or recommends it for quarantine.
|
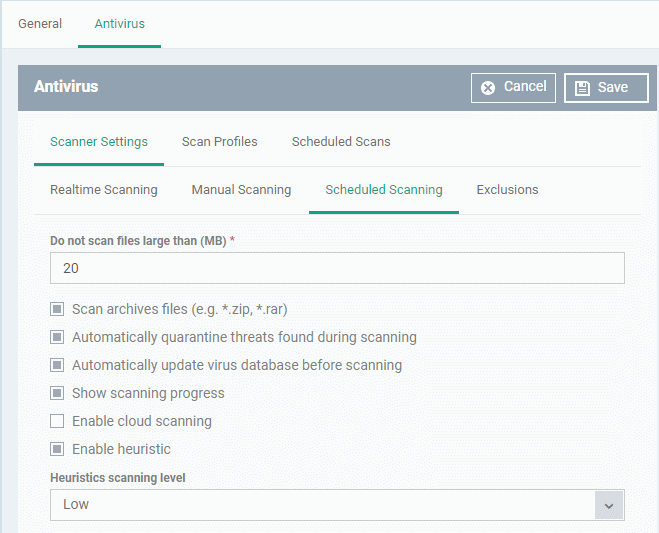
- Click the 'Scheduled Scanning' sub-tab under 'Scanner Settings'
- The options you set will apply to scheduled scans created for the profile. See Create and Manage Scheduled Scans for the Profile if you need help with this.
|
Scheduled Scanning Settings - Table of Parameters |
||
|---|---|---|
|
Form Element |
Type |
Description |
|
Do not scan files large than (MB) |
Text box |
Maximum file size that the antivirus should attempt to scan. Files larger than the size specified here are not scanned. (Default = 20 MB). |
|
Scan archives files |
Checkbox |
CCS scans archive files such as .ZIP and .RAR files.
(Default = Enabled). |
|
Automatically quarantine threats found during scanning |
Checkbox |
Threats identified by scheduled scans will be encrypted and moved to a secure holding area where they can cause no harm. You can review quarantined items and delete, ignore or restore them.
(Default = Enabled) |
|
Automatically update virus database before scanning |
Checkbox |
CCS will check for and download the latest virus database updates on system start-up, and subsequently at regular intervals.
(Default = Enabled). |
|
Show scanning progress |
Checkbox |
End-users will see a scan progress bar when the scan is running.
(Default = Enabled) |
|
Enable cloud scanning |
Checkbox |
CCS detects the very latest viruses more accurately because the local scan is augmented with a real-time look-up of Comodo's online signature database. This makes it possible to detect zero-day malware even if your local virus database is outdated. (Default = Disabled). |
|
Enable heuristic scanning |
Checkbox |
Enable or disable heuristics scanning and
define the scan level. The scan level determines how likely the scanner is to classify an unknown file as a threat.
(Default = Enabled with 'Low ' option) Background Note:
Background. Heuristics identify previously
unknown malware by checking whether it contains code typical of a
virus. If it is found to do so then the application deletes the
file or recommends it for quarantine. |
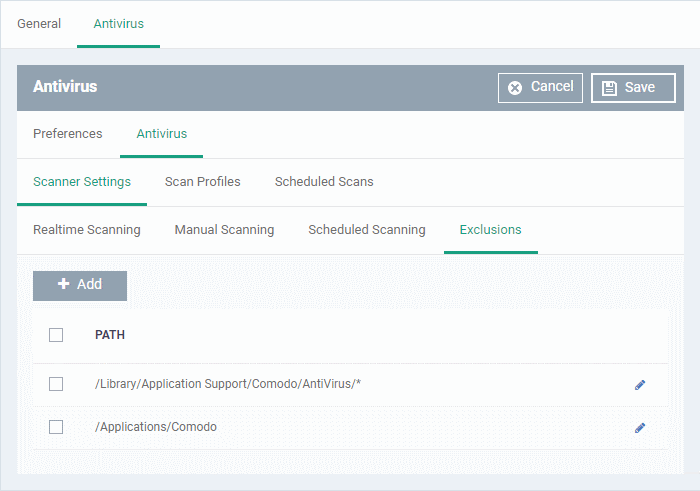
- Click the 'Exclusions' sub-tab under 'Scanner Settings'
- You can add files to be ignored by CCS during virus scans.
- Note. Any item you exclude will be skipped by ALL types of scan - real-time, on-demand and scheduled.
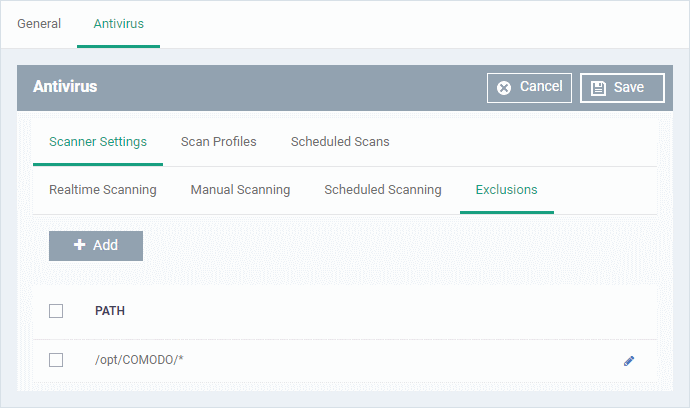
A list of excluded items will be displayed.
To add an item to the 'Exclusions' list
- Click 'Add'
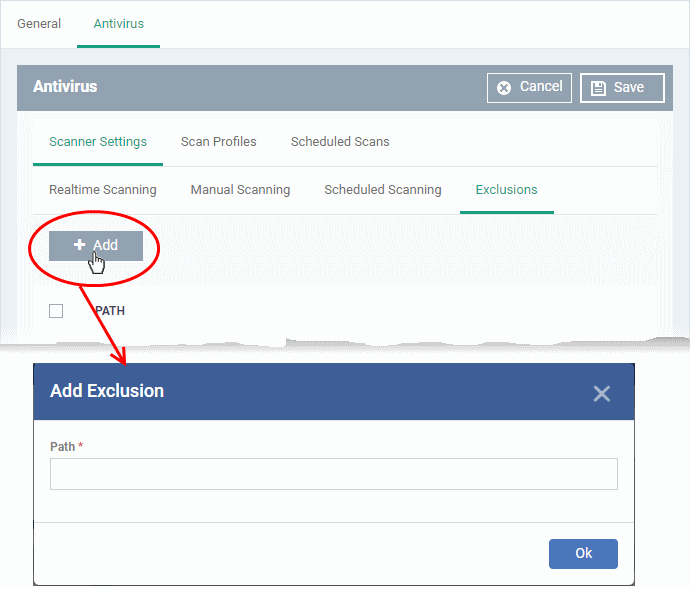
- Enter the location of the item to be excluded in the 'Path' field and click 'Ok'
- Repeat the process to add more items
- To
edit the path of an item, click the pencil icon
 beside it
Create and Manage Scan Profiles for the Profile
- Click the 'Scan Profiles' tab under 'Antivirus'
- Scan profiles instruct CCS to scan selected areas, folders or drives on a the device.
- The scan profiles you create here will be available when you configure a scheduled scan.
The list of pre-defined scan profiles will be displayed.
Add a new scan profile
- Click 'Add'
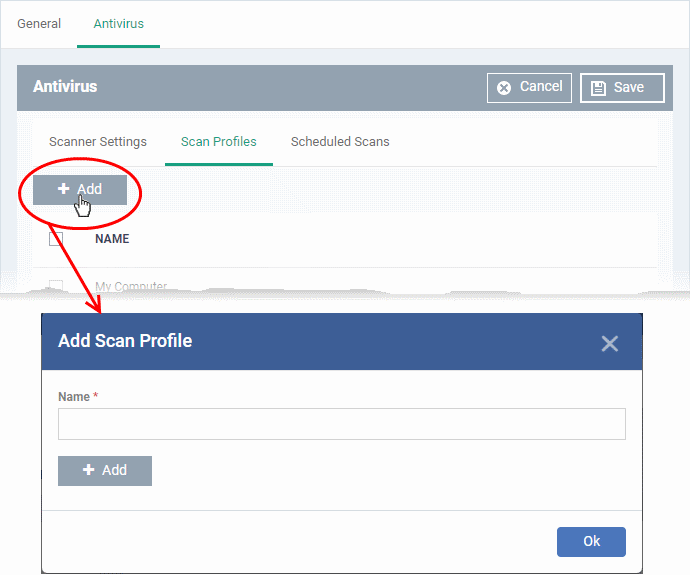
- Enter a name for the scan profile
- Click 'Add' to specify the locations to be scanned as per the custom profile
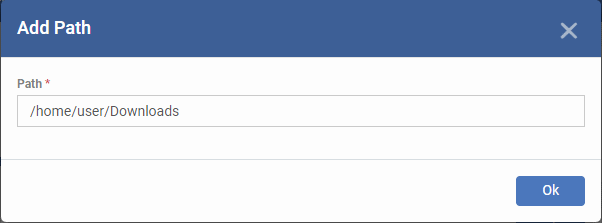
- Enter the path of the location to be scanned as per the custom profile and click 'Ok'
The path will be added to the profile.
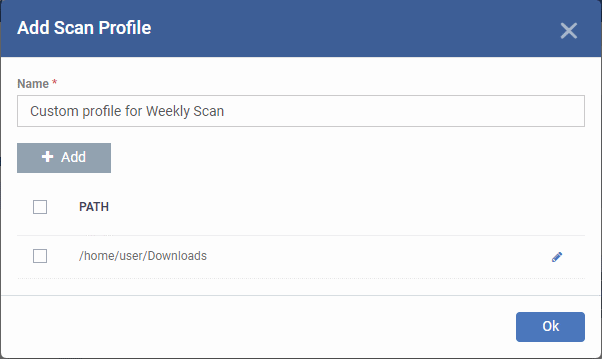
- To add more paths, click 'Add Path' and repeat the process
- To edit the path, click the pencil icon
- Click 'Ok' in the 'Add Scan Profile' dialog.
- The profile will be added to the list of 'Scan Profiles'.
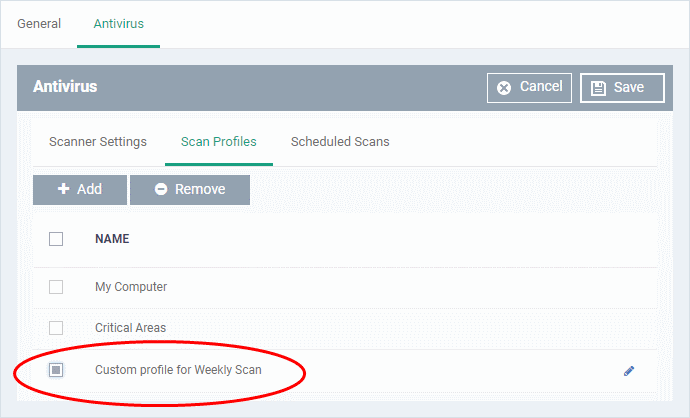
The custom profile will be added to the list.
- To add more custom scan profiles, click 'Add' and repeat the process
- To
edit a custom scan profile, click the pencil icon beside it
- To remove a custom scan profile, select it and click 'Remove'
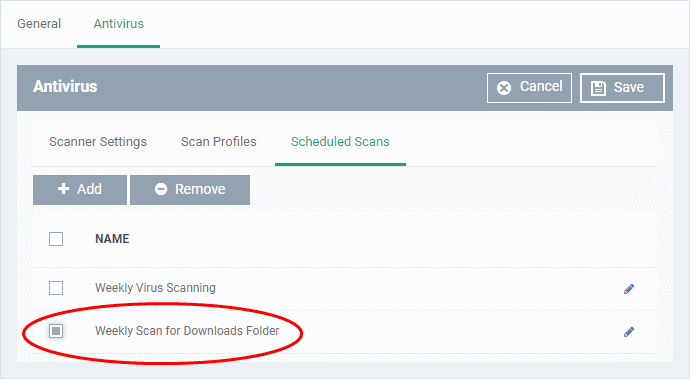
Create and Manage Scheduled Scans for the Profile
- Click the 'Scheduled Scans' tab under 'Antivirus'
- The highly customizable scan scheduler lets you timetable scans to be run on managed devices according to your preferences. CCS automatically starts scanning the entire system or the disks or folders contained in the scan profile selected for that scan.
- You can add any number of scheduled scans for a profile to run at a time that suits your preference. A scheduled scan may contain any scan profile of your choice.
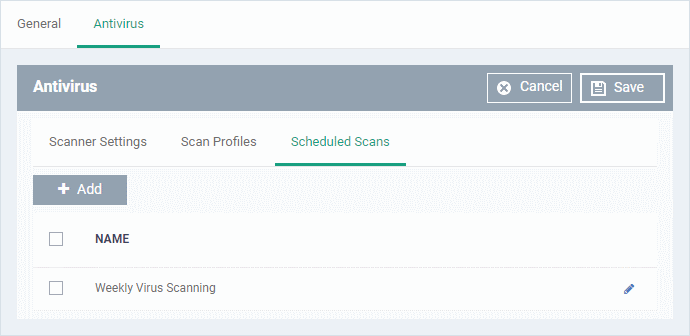
A list of pre-configured scheduled scans will be displayed.
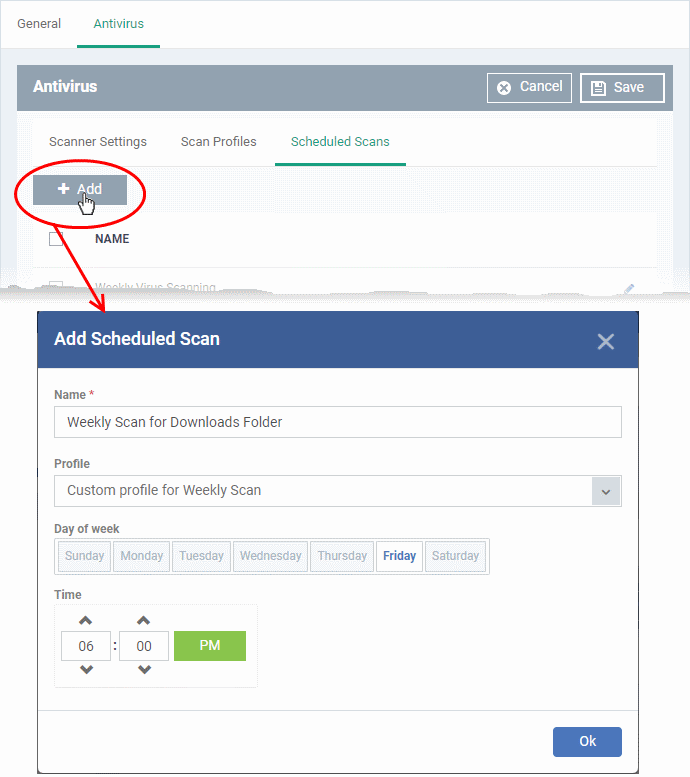
To add a new scheduled scan
- Click 'Add'
|
Add Scheduled Scan - Table of Parameters |
||
|---|---|---|
|
Form Element |
Type |
Description |
|
Name |
Text box |
Label for the scheduled scan. |
|
Profile |
Drop-down |
Choose the pre-defined or custom scan profile to be applied for the scheduled scan. The scan profiles included under the 'Scan Profiles' tab will be available in the drop-down. |
|
Day of the Week |
Buttons |
Select the day(s) of the week on which the scan has to run. |
|
Time |
HH:MM drop-down combo boxes |
Set the time at which the scans are to run on the selected days. |
- Click 'Ok'
The scheduled scan will be added to the list.
- To add more scheduled scans to the configuration profile, click 'Add' and repeat the process
- To edit the settings of a scheduled scan, click the pencil icon
- To remove a scheduled scan, select it and click 'Remove'
- Click 'Save' on the top right for your settings to take effect for the profile.
The settings will be saved and displayed under the 'Antivirus' tab. You can edit the settings or remove the section at anytime. See Edit Configuration Profiles for more details.