Run Antivirus and/or File Rating Scans on Devices
- Click 'Security Sub-Systems' > 'Antivirus' > 'Device List'
- The interface lets you run virus and file rating scans on Android, Mac OS, Windows and Linux devices.
|
Note: The scans interface lets you manage on-demand scans only. For automated scans, please create a scan schedule in a configuration profile then push it to selected devices/groups. See Create Configuration Profiles for more details. |
Launch an on-demand scan
- Click 'Security Sub-Systems' on the left then select 'Antivirus'.
- Choose the 'Device List' tab.
- Select on a company name or a group to view their devices
Or
- Select 'Show All' to view all devices enrolled to EM
- Select the devices you wish to scan
- Choose a scan type from the 'Scan' drop-down
- The scan command will sent to the target devices and the scan will commence immediately.
|
Tip: You can access filters by clicking the funnel icon at the top right. For example, you may want to display only devices with Last Scan States of 'Unknown', 'Scan Failed' and 'Scan Canceled'. |
The scan types available depend on the OS of the selected device(s). The scan type defines the areas to be scanned on the selected device(s). The following sections explain the scan process for:
- Android Devices (Quick Scan, Full Scan, SD Card Scan)
- Windows Devices (Quick Scan, Full Scan, Quick Rating Scan)
- Mac OS Devices (Quick Scan, Full Scan)
- Linux Devices (Quick Scan, Full Scan)
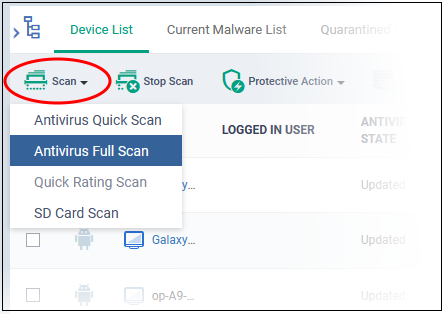
- Click 'Scan' and choose the scan type from the drop-down to select the area to be scanned on the device.

The available scan profiles are:
- Antivirus Quick Scan - Scans critical areas of the device which are highly prone to attack from viruses, rootkits and other malware. Areas scanned include RAM, hidden services and other significant areas like system files. These areas are of great importance to the health of the device so it is essential to keep them free of infection.
- Antivirus Full Scan - Scans all folders/files in both the system internal memory and the SD card.
- SD Card Scan - Scans all folders/files in the Secure Digital (SD) memory card mounted on the device.
The scan command will be sent to the selected device(s) and the scan status will be displayed in the 'Last Scan State' column for each device.
- If you want to terminate the scan, choose the devices and click 'Stop Scan' from the options at the top.
- If malware is found after the scan then the 'Last Scan State' will say 'Infected'. Infections identified after the scan will be treated according to settings in 'Settings' > 'Portal Set-Up' >Android Client Configuration' > 'Antivirus'. See Configure Android Client Antivirus Settings for more details.
- If 'Manual control' is chosen, then you have the option to uninstall or ignore from the 'Current Malware List'. See View and Manage Identified Malware for more details.
- You can also choose to uninstall or ignore the identified malware by clicking the respective buttons at the top. See Handle malware on scanned devices section for more details.
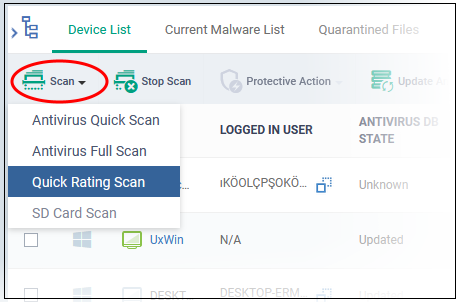
- Click 'Scan' and choose the scan type from the drop-down to select the area to be scanned on the device.

The available scan types/profiles are:
The scan command will be sent to the selected device(s) and the scan status will be displayed in the 'Scan State' column for each device.
- Antivirus Quick Scan - Scans critical areas of the device which are highly prone to attack from viruses, rootkits and other malware. Areas scanned include. Areas scanned include include system memory, auto-run entries, hidden services, boot sectors and other significant areas like important registry keys and system files. These areas are of great importance to the health of each computer so it is essential to keep them free of infection.
- Antivirus Full Scan - Scans every local drive, folder and file on each computer. Any external devices like USB drives, digital camera and so on are also scanned.
Files are rated as:
- Quick Rating Scan - Runs a cloud-based assessment of files on the device to determine the trust rating of each file. The 'Quick' rating scan checks commonly infected areas and memory.
- Trusted - the file is safe
- Unknown - the trustworthiness of the file could not be assessed
- Bad - the file is unsafe and may contain malicious code
- If you want to terminate the scanning on selected devices, choose the devices and click 'Stop Scan' from the options at the top.
- If malware is found on completion of scan the Scan State will indicate 'Viruses Found'. You can choose to uninstall, ignore, delete the identified malware or to move them to quarantine at the endpoint for later analysis. See Handle Malware Identified from Scanned Devices for more details.
-
Items moved to quarantine are encrypted and saved in the endpoint itself, so that they are isolated from the rest of the system.
- You view the quarantined items from the 'Quarantine' interface. The Quarantine interface allows you to:
- Delete an item, if it is identified as malicious
- Restore the file to its original location on the endpoint if the item is a false-positive. You can also rate a file as 'Trusted' to restore it to the endpoint. Doing so will effectively white-list the file by giving it a 'Trusted' rating in the local CCS database.
- See View and Manage Quarantined Items for more details.
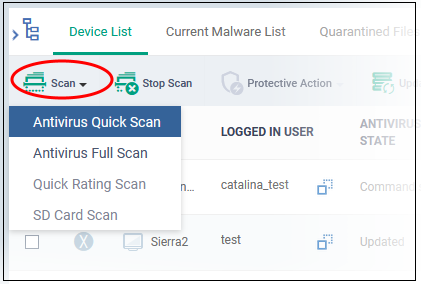
- Click 'Scan' and choose the scan type from the drop-down to select the area to be scanned on the device.

The available scan profiles are:
- Antivirus Quick Scan - Scans important operating system files and folders including system memory, auto-run entries, hidden services.
- Antivirus Full Scan - Scans every local drive, folder and file on your system including external devices, storage drives, digital cameras.
The scan command will be sent to the selected device(s) and the scan status will be displayed in the 'Last Scan State' column for each device.
- If you want to terminate the scan on certain devices, choose the devices and click 'Stop Scan' from the options at the top.
- If malware is found on completion of scan the Last Scan State will indicate 'Viruses Found'. You can choose to uninstall, ignore, delete the identified malware or to move them to quarantine at the endpoint for later analysis. See Handle Malware Identified from Scanned Devices for more details.
- Items moved to quarantine are encrypted and saved in the device itself, so that they are isolated from the rest of the system.
- You view the quarantined items from the 'Quarantine' interface. The Quarantine interface allows you to:
- Delete an item, if it is identified as malicious
- Restore the file to its original location at the endpoint if the item is a false-positive.
- See View
and Manage Quarantined Items for more details.
-
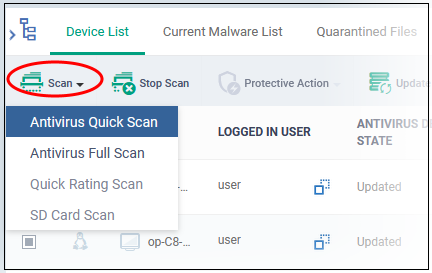
Click 'Scan' and choose the scan type from the drop-down menu:

The status of current, or previous, scans is shown in the 'Last Scan State' column.
- Antivirus Quick Scan - Scans important areas which are frequently targeted by malware. Areas scanned include system memory, important registry keys, auto-run entries, operating system folders and hidden services.
- Antivirus Full Scan - Scans every local drive, folder and file on your system. Connected devices like USB sticks and external drives are also scanned.
- Terminate a scan - Select target devices then click 'Stop Scan' from the options at the top.
- 'Viruses Found'- You can uninstall, ignore, quarantine or delete the identified malware. See Handle Malware Identified from Scanned Devices for more details.


