Add iOS Apps and Install them on Devices
- You can add apps to Endpoint Manager directly from the Apple store or by uploading a custom app.
- Apps can be installed on all or selected iOS devices
See the following sections for more details:
Add iOS Apps from the App Store
- Click 'Application Store' > 'iOS Store'
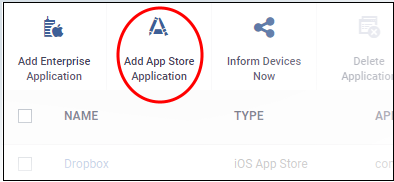
- Click the 'Add App Store Application' button:
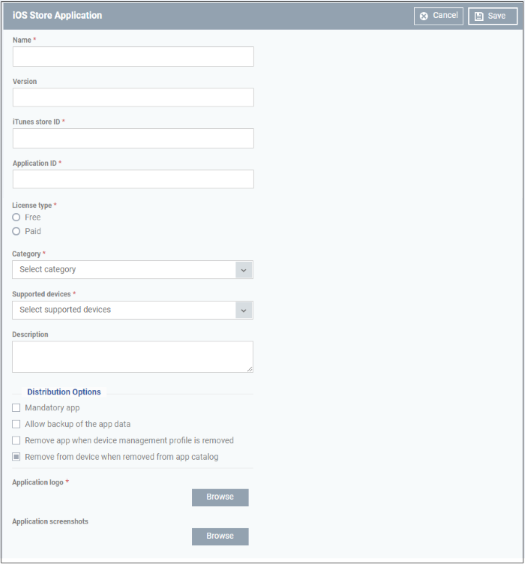
- Type the first few letters of the app in the 'Name' field on the form. Endpoint Manager will search for matching apps from the store.
- Select the correct app from the list of suggestions. The rest of the form will be auto-populated by the app details.
- Click 'Save' after confirming the details.
- The app will be added to the repository and listed in the 'iOS Store' interface. It will be synced to devices during the next cycle.
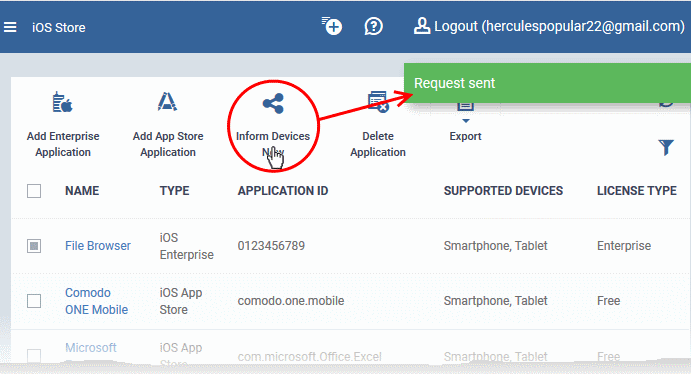
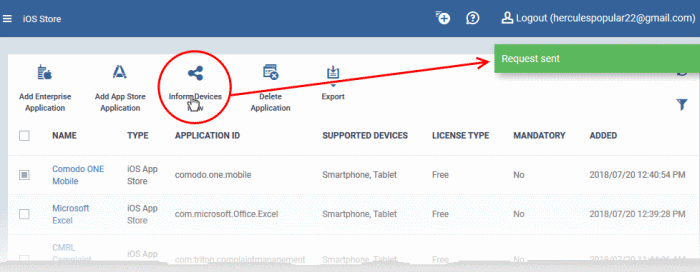
- Click 'Inform Devices Now' if you want to immediately notify devices to install the app:
|
Apple Store Application - Table of Parameters |
||
|---|---|---|
|
Form Element |
Type |
Description |
|
Name |
Text Field |
The label of the application.
|
|
Version |
Text Field |
The version number of the application. This field is auto-populated after entering the app name. |
|
iTunes Store ID |
Text Field |
The Apple identification number of the app. This field is auto-populated after entering the app name. Usually, this number will appear after ID in the download URL of the app. For example, in the URL https://itunes.apple.com/us/app/ITSM/id807480077, the numbers after ID is the iTunes Store ID for this app. |
|
Application ID |
Text Field |
The bundle ID of the
app. This field is auto-populated after entering the app name. For example, the bundle ID for EM client is com.comodo.ITSM.client |
|
License Type |
Radio Button |
Specify whether the app is free or a paid version. This option is pre-populated by the app chosen in the 'Name' field. |
|
Category |
Drop-down |
The classification of the application. The category field will be auto-populated depending on the app chosen in the 'Name' field. The drop-down also enables you to choose the category to which the app belongs. |
|
Supported devices |
Drop-down |
The category of devices on which the app can run. The device type will be auto-selected depending on the app chosen in the 'Name' field. The drop-down also enables you to choose the device types to which the app is compatible. |
|
Description |
Text Field |
The 'Description' filed will be auto-populated with the description of the selected app, from the App Store page. The text field also enables you to enter your description or edit the existing description. |
|
Mandatory app |
Checkbox |
Specify whether or not it is compulsory that devices install this app. If enabled, all enrolled devices will get alerts automatically to install the app. See Install Apps on Android/iOS Devices for more details. |
|
Allow backup of the app data |
Checkbox |
Allows user to backup the application along with its user data to iTunes. |
|
Remove app when device management profile is removed |
Checkbox |
The app will be deleted from devices if the profile applied to the device is removed. |
|
Remove from device when removed from app catalog |
Checkbox |
The app will be deleted from devices if it is removed from 'iOS Store'. |
|
Application logo |
'Browse' Button |
The application logo will be automatically fetched from the App Store for the app chosen in the name field. If you want to change the logo, upload a new logo from the local computer by clicking 'Browse'. |
|
Application screenshots |
'Browse' Button |
The application screenshots will be automatically fetched from the App Store for the app chosen in the name field. If you want to add new screenshots from the local computer, upload them by clicking 'Browse'. |
Add Custom/Enterprise iOS Apps
- Custom applications can be added to the repository by simply uploading the app .ipa file
- Most app details, such as name, version and ID, will be automatically fetched by parsing the file. You just need to manually enter some remaining details
- Click 'Application Store' > 'iOS Store' to open the interface
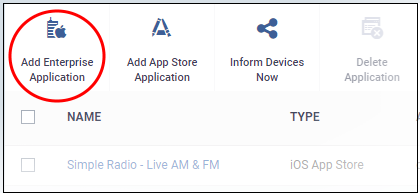
- Click 'Add Enterprise Application' from the options at the top.
- Click 'Browse' beside 'Source File', select the .ipa file you want to upload and click 'Open'
- The file will be uploaded. Many form field details are auto-populated from the file itself:
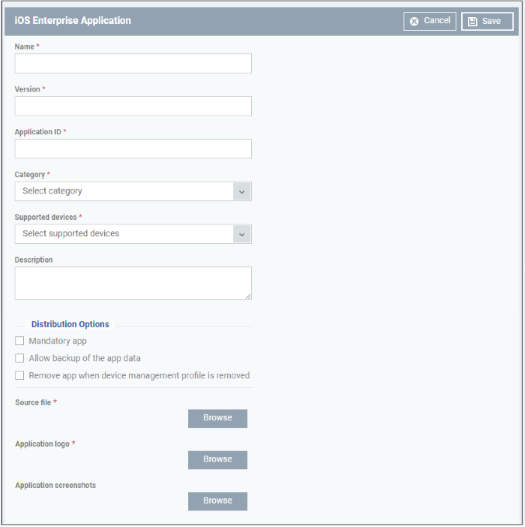
|
Add iOS Enterprise Application - Table of Parameters |
||
|---|---|---|
|
Form Element |
Type |
Description |
|
Name |
Text Field |
Application label. Auto-populated from the .ipa file
|
|
Version |
Text Field |
The version of the application as obtained from the .ipa file.
|
|
Application ID |
Text Field |
The app's unique identifier as obtained from the .ipa file. Usually, this number will
appear after ID in the download URL of the app. For example, in the URL https://itunes.apple.com/us/app/ITSM/id807480077, the numbers after ID is the iTunes Store ID for this app. |
|
Category |
Drop-down |
Select the app classification. |
|
Supported devices |
Drop-down |
Select the category of the devices to which the app is compatible. |
|
Description |
Text Field |
Enter a description for the app. |
|
Mandatory app |
Checkbox |
Specify whether the app should compulsorily be installed on devices. If enabled, all enrolled devices will be alerted to install the app. See Install Apps on Android/iOS Devices for more details. |
|
Allow backup of the app data |
Checkbox |
Allows to backup the application along with its user data to iTunes. |
|
Remove app when device management profile Is removed |
Checkbox |
The app will be automatically uninstalled if the EM profile applied to the device is removed. |
|
Source file |
Browse button |
Navigate to the storage location of the .ipa file to be uploaded and select the file. |
|
Application logo |
Browse button |
Upload the logo image for the app. |
|
Application screenshots |
Browse button |
Upload screenshots of the app, if required. |
- Click
'Save' after confirming all details.
- The app will be added to the repository and listed in the 'iOS Store' interface. It will be pushed to devices on the next sync-cycle.
- Click 'Inform Devices Now' if you want to push the app to devices immediately.
