View Exported Configurations and Import Profiles
- You can create a new Windows profile out of the CCS configuration on an endpoint
- This is useful if you want to copy the configuration of an endpoint to multiple other endpoints
Export a CCS configuration
- Click the 'Devices' tab on the left and choose 'Device List'
- Click the 'Device Management' tab at the top of the main configuration pane
- Select a Company or a group to view only their devices
Or
- Select 'Show all' on the left to view every device enrolled to EM
- Click on the Windows device whose configuration you wish to export to open its 'Device Details' interface
- Click the 'Export Security Configuration' button at the top.

The CCS configuration will
be exported as an .xml file with date/time stamp suffix in the file
name. The profile will be saved on the EM server and can be viewed
by clicking the 'Exported Configurations' tab of the device
details interface of the same device.
View and manage exported
profiles
- Click the 'Devices' tab on the left and choose 'Device List'
- Click the 'Device Management' tab at the top of the main configuration pane
- Select a company or a group to view their devices
Or
- Select 'Show all' on the left to view every device enrolled to EM
- Click the name of a Windows device then select the 'Exported Configurations' tab:

|
The 'Exported Security Configuration' List - Table of Column Descriptions |
|
|---|---|
|
Column Heading |
Description |
|
File Name |
The label of the exported file. |
|
Created |
Date and time at which the CCS configuration was exported. |
- Click
any column header to sort items in alphabetic or
ascending/descending order
Import and save the security configuration
- Click
on the file name that you want to import as a profile

The file will be imported as an .xml file.
To
import the saved configuration file as a Windows profile, see 'Step 2 - Import
the .xml file as a profile for application
to required endpoints or endpoint group(s) in 'Import
Windows Profiles'.
-
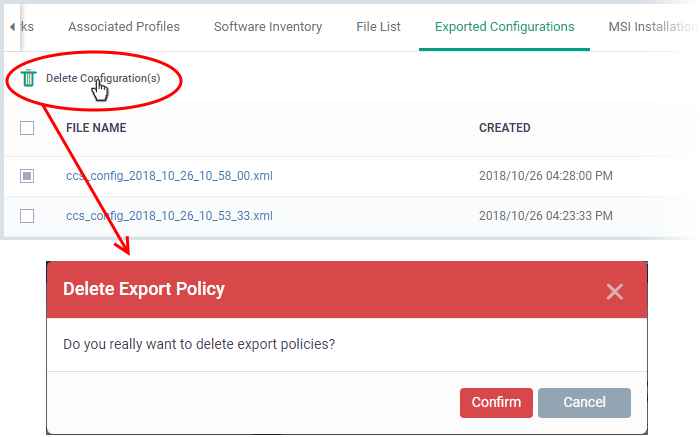
To remove a file from the list, select it and click 'Delete'
-
Click 'Confirm' to remove the file from the list


