Maintenance Window Settings
- A maintenance window is a scheduled time-slot when your Endpoint Manager procedures will run. You can create them by adding a ‘Maintenance Window’ section to a Windows profile.
- Once created, you can assign the maintenance window to a procedure in the procedure settings. You can assign multiple procedures to the same maintenance window.
- You can also add multiple maintenance windows to a profile. This lets you assign different procedures to different time-slots.
- You have the option to pause all running monitors while the maintenance window runs, and to randomize task start times to avoid system congestion.
- You can block certain tasks from running outside of a maintenance window. Example tasks include remote control sessions, patch installation and more.
- Alternatively, you can show a warning to the admin which asks if they want to move the task to the maintenance window instead.
- You can define times when maintenance windows should not run. For example, holidays, weekends or other occasions.
Create a maintenance window
- Click 'Section' > 'Device'
- Click 'Edit' > Select 'Maintenance Window' if it is not added yet.
The maintenance window setting screen opens:
Click the following links for more info on each tab:
- Maintenance Window (MW) - Configure the time-slot and settings you want to use.
- General Settings - Choose whether to randomize tasks and/or define no-maintenance times.
- Click
'Add Window' (or 'Edit' then 'Add Window')

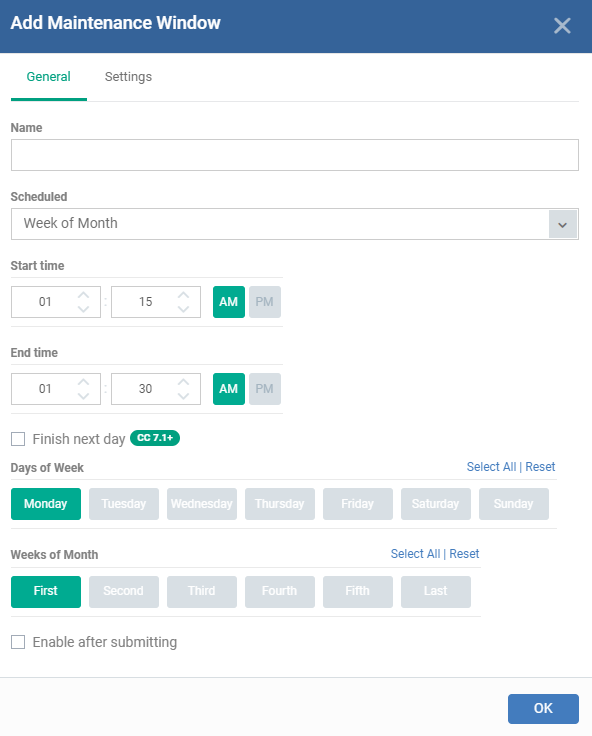
- General – Configure when the maintenance window should run.
- Name – Create a label for the window. For example, 'Maintenance Window – 11 PM to 1 AM'
- Scheduled – Choose how often you want to run the maintenance:
- Daily – Select the start and end time of the window. The window runs every day at the time you set.
- Weekly - Select the start and end times, and the days of the week that the window should run.
- Monthly - Select the start and end times, and the days of the month that the window should run.
- Week of Month – Select the start and end times, the week number, and the days that the window should run. Use this, for example, if you want to run the window once every monday of a first week
- Enable after submitting - Make the window available for use after clicking 'OK'. Only enabled windows are available for selection with procedures.
- MW Settings – Configure additional settings for the MW. Click the 'Settings' tab
- Stop monitors during maintenance window – Pause all monitors on a device for the duration of the maintenance window.
- Skip procedures for offline device during maintenance windows:
- Run procedure as soon as device became online – The procedure is executed when the device is next connects to Endpoint Manager.
- Run procedure during the nearest maintenance window – The procedure is executed in the next available window after the device comes online.
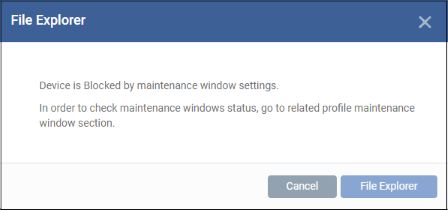
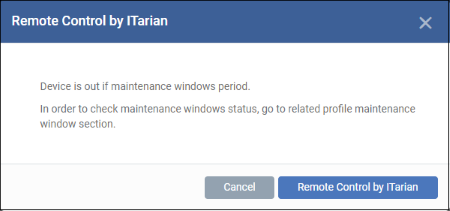
- On-demand maintenance tasks out of Maintenance Window – Endpoint Manager can block or show a warning if someone tries to run tasks outside of a maintenance window. You can warn/block the following tasks:
Example block/warn messages are shown below:
- Remote control
- Remote tools
- On-demand patch installation
- Other MSI package installation
- On-demand running script procedures
- On-demand running patch procedures
- Reboot system
Alert


Blocked


- Click 'OK'.
Repeat the procedure to add more maintenance windows.
Edit a MW
- Select a MW and click 'Edit' at the top. The procedure is similar to adding explained above.
Enable / Disable
- Select a MW and click 'Enable / Disable' at the top. Note – Only active MWs are available for selection
- Select a MW and click 'Delete' at the top. Note – You cannot delete MWs that are in use
These
settings apply to all maintenance windows in the profile.
- Click the 'General Settings' tab
Randomize task starting times for each device within the maintenance window to minimize the load on the network and systems - Staggers task start-times to prevent several procedures running at the same time on each device. This can ease congestion and lead to a smoother roll-out of your procedures.
- Define no-maintenance window for stopping all maintenance tasks - Configure periods during which maintenance windows should not run. For example, during holidays.
- Click
'Add No-Maintenance Window'
- Name - Provide an appropriate label for the no-MW. For example, 'New year holiday'.
- Start and Finish dates - Select from the calendar or enter the start and end period.
- Click 'Ok'.
Repeat the
process to add more no-maintenance windows.
- Select an item, click 'Edit' and update as explained above
Delete a
no-MW
- Select an item and click 'Delete'
- Click 'Save' to apply your changes.


